
Loading...
Loading...
Loading...
Loading...
Loading...
Loading...
Loading...
Loading...
Loading...
Loading...
Loading...
Loading...
Loading...
Loading...
Loading...
Loading...
Loading...
Loading...
Loading...
Loading...
Loading...
Loading...
Loading...
Loading...
Loading...
Loading...
Loading...
Loading...
Loading...
Loading...
Loading...
Loading...
Loading...
Loading...
Loading...
Loading...
Loading...
Loading...
Loading...
Loading...
Loading...
Loading...
Loading...
Loading...
Loading...
Loading...
Loading...
Loading...
Loading...
Loading...
Loading...
Loading...
Loading...
Loading...
Loading...
Loading...
Loading...
Loading...
Loading...
Loading...
Loading...
Loading...
Loading...
Loading...
Loading...
Loading...
Loading...
Loading...
Loading...
Loading...
Loading...
Loading...
Loading...
Loading...
Loading...
Loading...
Loading...
Loading...
Loading...
Loading...
Loading...
Loading...
Loading...
Loading...
Loading...
Loading...
Loading...
Loading...
Loading...
Loading...
Loading...
Loading...
Loading...
Loading...
Loading...
Loading...
Loading...
Loading...
We support all the major image formats, and a large number of more confidential ones.
We are obviously expanding our support to include any new significant formats being created. As of today, we have full support for the following origin formats and the ability to apply transformations for them:
Adobe Photoshop Document (PSD)
AVIF - AV1 image format
Bitmap (BMP)
Encapsulated PostScript (EPS)
Graphics Interchange Format (GIF)
High Efficiency Image File Format (HEIC)
Cloudimage helps you store, optimize, transform, and deliver your media at scale.
Leverage Cloudimage to automatically compress and accelerate images, videos, PDFs, CSS, and JS over CDN, ensuring faster websites, smoother apps, and better user experiences.
Optimize and deliver any media: images, videos, PDFs, CSS, and JS with on-the-fly compression and CDN acceleration.
Create and preview image transformations directly in the Cloudimage UI - no code needed
The Asset Variation Builder (AVB) lets you create and preview image transformations directly in the Cloudimage UI — no coding needed. Non-Developers using Cloudimage can easily gain control with instant previews of future image transformations before creating a .
While building your URL transformations, you can easily spot the active parameters in the different categories thanks to a blue dot: Format, Adjust
Once satisfied, save the transformation as a preset to apply consistent templates across all your images. Every adjustment is shown live in the Asset Library in "Asset Details" / "Variations", so you see the exact output before saving.
Preview image transformations Stop guessing URL parameters: visually build your transformation, preview results in real time, and save as reusable presets. These presets ensure consistency, speed up content workflows, and empower non-technical teams to manage image variants independently.
Supported features in the AVB:
Icon (ICO)
JPEG-compressed images
JPEG2000-compressed images
Portable Document Format (PDF)
Portable Network Graphics (PNG)
Scalable Vector Graphics (SVG)
Tag Image File Format (TIFF)
WebP image format
Image compression & format
Automatic best format or force WEBP, JPEG, PNG, GIF
Quality settings (lossless, adjustable compression)
Image operations
Resize by width & height (with enlargement prevention)
Cropping options: automatic gravity, positionable, focal point, face crop, aspect ratio crop, face hide
Fit, Cropfit, Background color, Bound, Boundmin, Cover
Flip, Rotate, Rounded corners, Trim
AI operations
Background removal
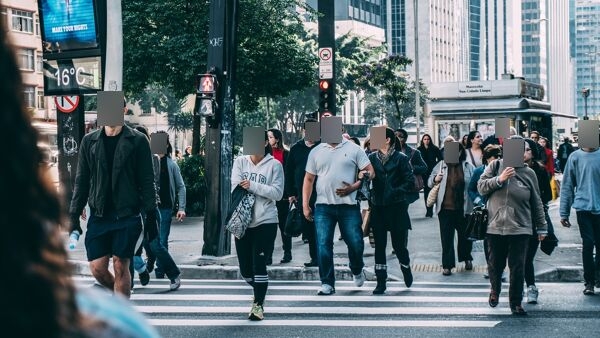
Face blurring
Image filters
Adjustments: brightness, contrast, saturation, blur, sharpen
Colorize: overlay, grayscale, sepia, pixelate, duotone, invert
Watermarking
Static watermark
Dynamic watermark
Color effects and filters
Modify brightness, contrast and saturation
Making URL more semantic and SEO-friendly
Configure your Cloudimage image acceleration and optimization engine
Integrate pixel-perfect images and videos on your website thanks to powerful Responsive Libraries.
Create reusable image Presets: use the Asset Variation Builder to visually build transformations (crop, resize, background removal, face blurring, etc.) and save them for consistent formatting.
Centralize your assets: upload, preview, edit, and enrich files directly in the Asset Library.
Boost SEO, GEO, and accessibility: generate smart alt text and auto-tags automatically with Visual AI.
No more slow-loading websites caused by heavy visuals.
No need for complex scripts or hours of manual Photoshop edits.
Easy tools for marketers or e-commerce managers, and developers alike.
Future-proof workflows: from SEO-ready alt text to adaptive video streaming.
Cloudimage URL Format:
//token.cloudimg.io/original_image_url?operations&filters&watermarks
token
Your Cloudimage customer token. Subscribe to get one. You can also for a customized token.
original_image_url
That's an easy one :)
Image manipulation operations like width, height, crop, fit, rotate, trim. For a full list, see .
Use filters like contrast, pixellate, blur, greyscale and sharpen to apply different effects on your image. For a full list, see .
Cloudimage can place a watermark in your images if you want to protect them from copying, or tag them with a custom text. More details in the section.
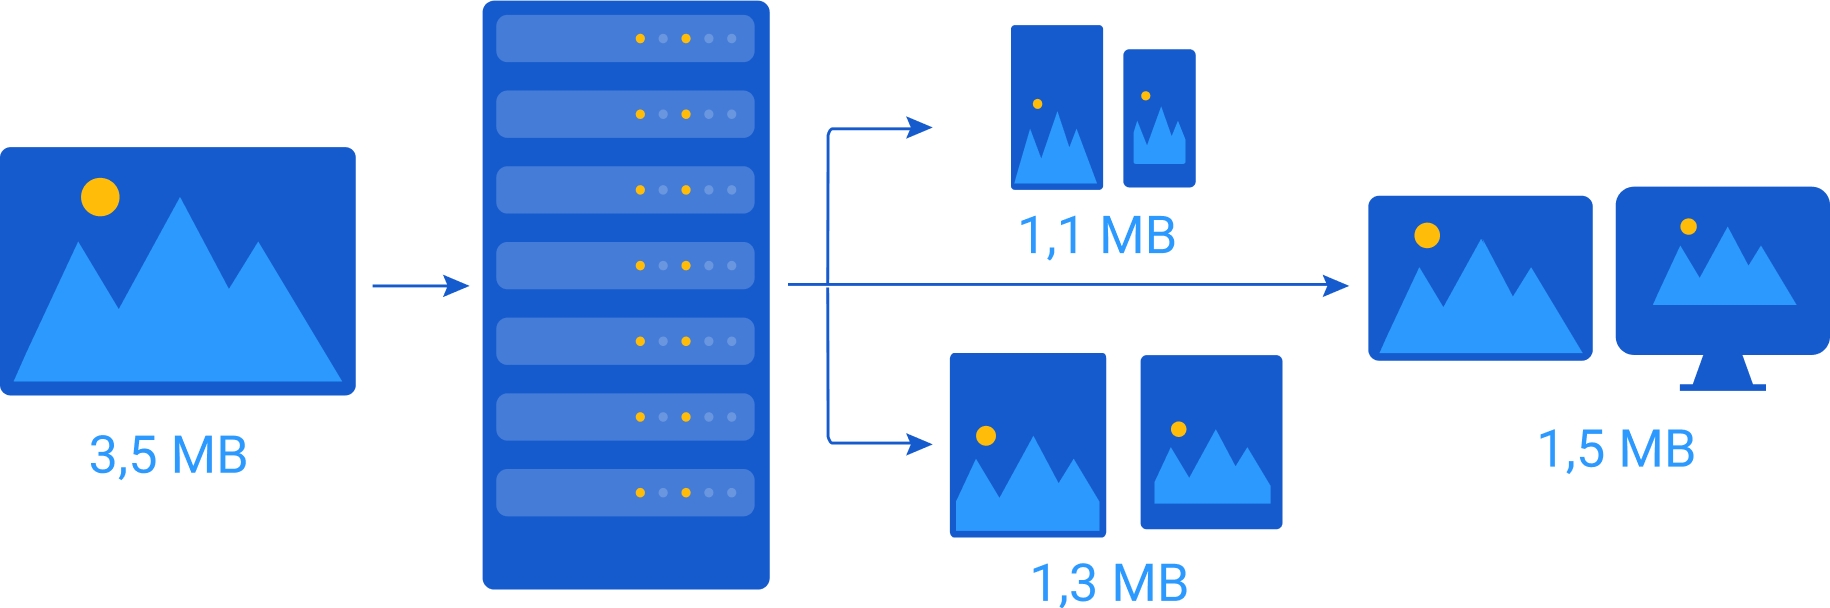
Cloudimage supports chaining multiple transformations in a single URL, such as crop, resize, format conversion, filters, or watermarking. Here is the step-by-step flow for your asset transformations:
Cloudimage downloads your original asset (image, video, PDF, CSS, JS).
On-the-fly, it applies a selection of 50+ transformations and filters.
Optimized files are served worldwide via a rocket-fast CDN.
If you host your images on a Web Server, Image Repository, or Storage Bucket sitting behind a Firewall or protected by authentication, make sure your images are accessible over HTTP(S) and that you have whitelisted our infrastructure and are in possession of the required credentials. Otherwise, Cloudimage servers will not be able to download the originals.
Examples:
Preview transformations instantly in the UI, save them as presets, and deliver them globally through our premium CDN infrastructure.
We have documented the most common resizing functions here. Cloudimage supports many more and we can even build them for your specific use-case, please contact us if you don't find your luck!
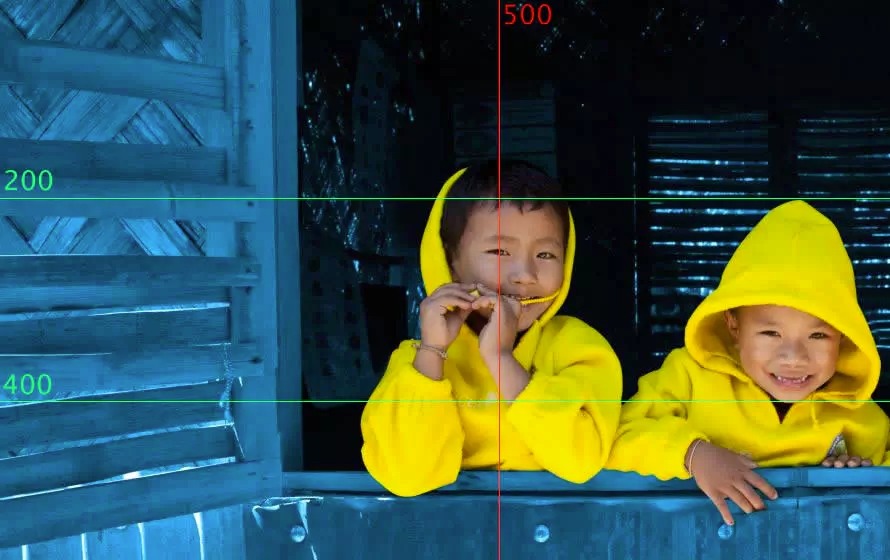
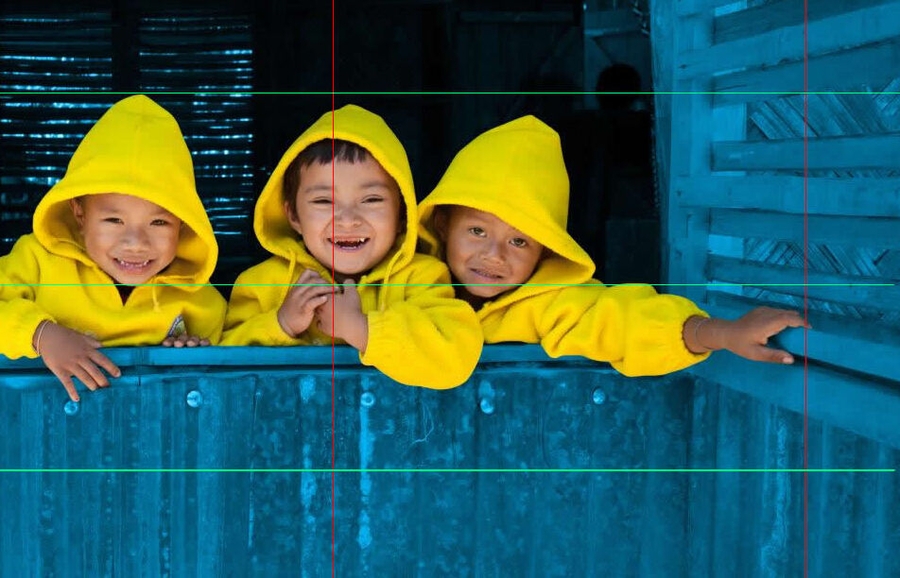
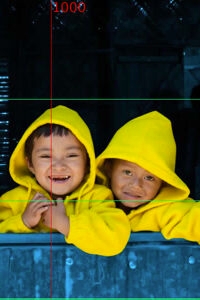
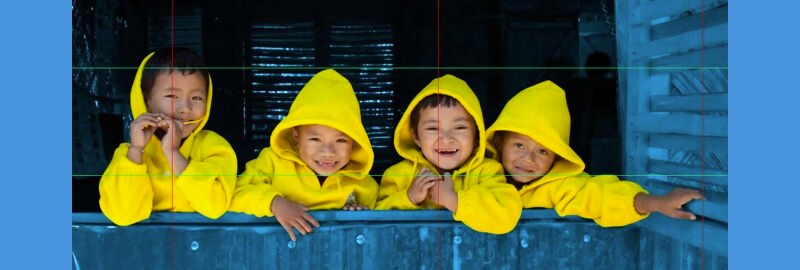
Sets the crop focal point coordinates
Allows to crop an image by defining the coordinates of the crop focal point. It is useful when you want to crop images where the coordinates of the point of interest are already known.
To set the coordinates of the focal point, use the gravity=X,Y operation where X and Y are the coordinates of the focal point (in pixels). Alternatively, you can set the coordinates as a percentage of the original image - gravity=Xp,Yp or gravity=xc,yc, where X,Y=0..100 and x,y=0..1.
gravity=X,Y
gravity=Xp,Yp|xc,yc
Delivers the optimal size based on device pixel-ratio
Allows you to deliver the proper image dimensions according to a defined device pixel ratio. This operation can help with conversion between device-independent pixels and CSS (reference) pixels. Useful in responsive image solutions using the srcset HTML attribute. Allows positive values limited to 5.
dpr=X
ICC profiles and sRGB compression
By default, if the origin image has an embedded ICC profile, the image is converted to the sRGB color space, and the ICC profile is removed from the compressed image.
If you prefer to retain the original ICC profile instead of converting the image to sRGB, you can activate the Keep origin image ICC profile option in the admin panel (Image Settings -> Compression).
When using this option, to avoid embedding very large ICC profiles, you can set the maximum permitted ICC profile size (in kilobytes) along with setting the Convert ICC profile to sRGB if too large option.
https//token.cloudimg.io/{origin_image_url}?func=cropfit&w=500&h=350&bg_colorize=navy&contrast=10&q=90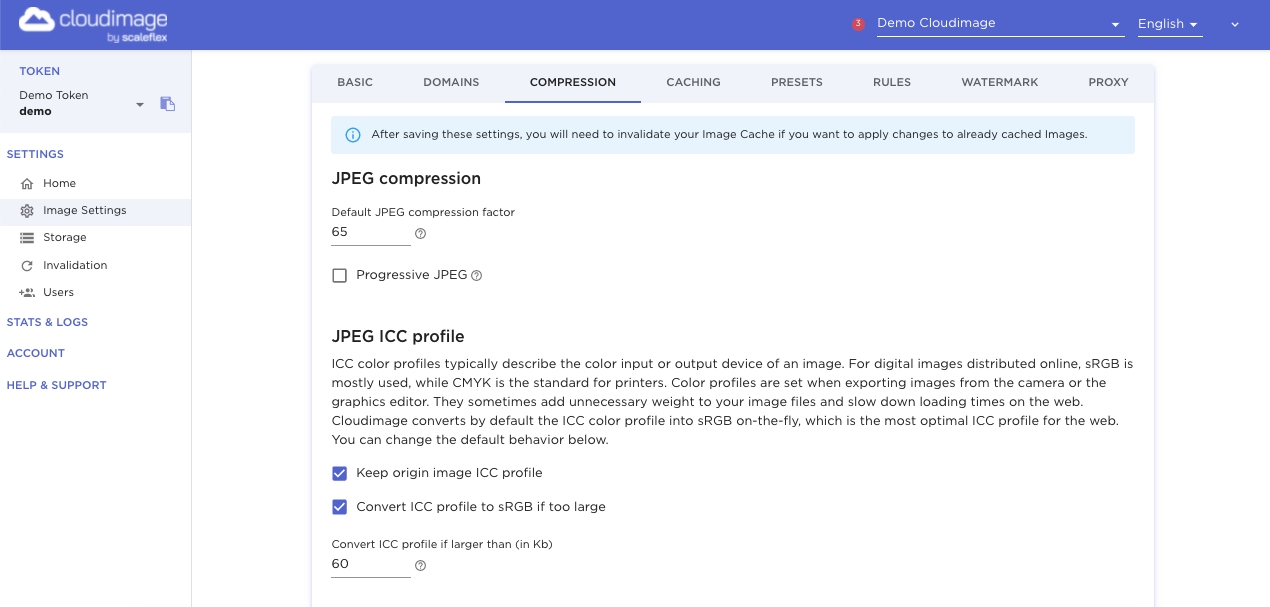


Minification of JS and CSS files
process=minify-css process=minify-js
Cloudimage supports on-the-fly optimization of CSS and JS content to further facilitate faster loading of your website or web application.
/samples.scaleflex.com/bootstrap.css?func=proxy&process=minify-css (152 kB minified vs. 192 kB original)
/samples.scaleflex.com/jquery.js?func=proxy&process=minify-js (111 kB minified vs. 219 kB original)
Securing your token, account and origin server
Configure your website or web application to use Cloudimage
Plugin implementation for content management systems
Step-by-step instructions how to set up Cloudimage with Shopify
Original image: /docs/castle.jpg?w=1000
No dpr parameter (assumed dpr=1):
Device pixel ratio 1.75:
Crop operation which removes faces from the top of the image
Crops out the topmost part of an image if it contains a face.
To control the margin when cropping the face out, you can use the face_margin=Y operation where Y is a percentage of the face height. Its default value is 20. You can also use negative numbers if you would like to keep part of the face.
func=facehide
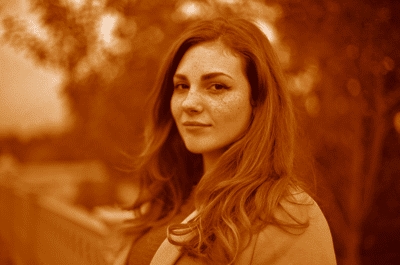
Sepia tone
To apply a sepia effect to your images, you can use the sepia=1 parameter.
sepia=1
Original image:
Sepia tone:
Original image:
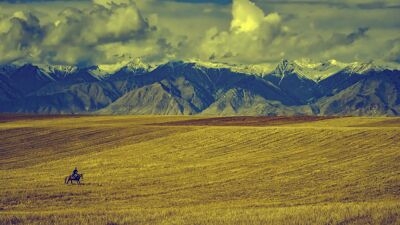
Duotone transform
Create a duotone effect by using duotone=C1,C2[,Y], where C1 and C2 are the colors for the duotone (hex value or color name) and Y is the opacity (Y=0..1, default1).
duotone=C1,C2[,Y]
Original image:
Color inversion
To invert the colors of an image, use the invert=1 parameter.
invert=1
Original image:
Static file acceleration
func=proxy
Cloudimage offers you the option to deliver any file, including non-processable files - static content like JS or CSS files, via our Content Delivery Network.
By default, all URLs are regarded as images. To deliver a non-image file, you have to use the func=proxy option:
/samples.scaleflex.com/bootstrap.css?func=proxy
Cloudimage can automatically use the proxy function for all files that don't have an image file extension. This however will require all your images to have proper file extensions. If you prefer this behavior, you can switch it on in your Admin Console (Image Settings / Compression / Enable static Content acceleration):
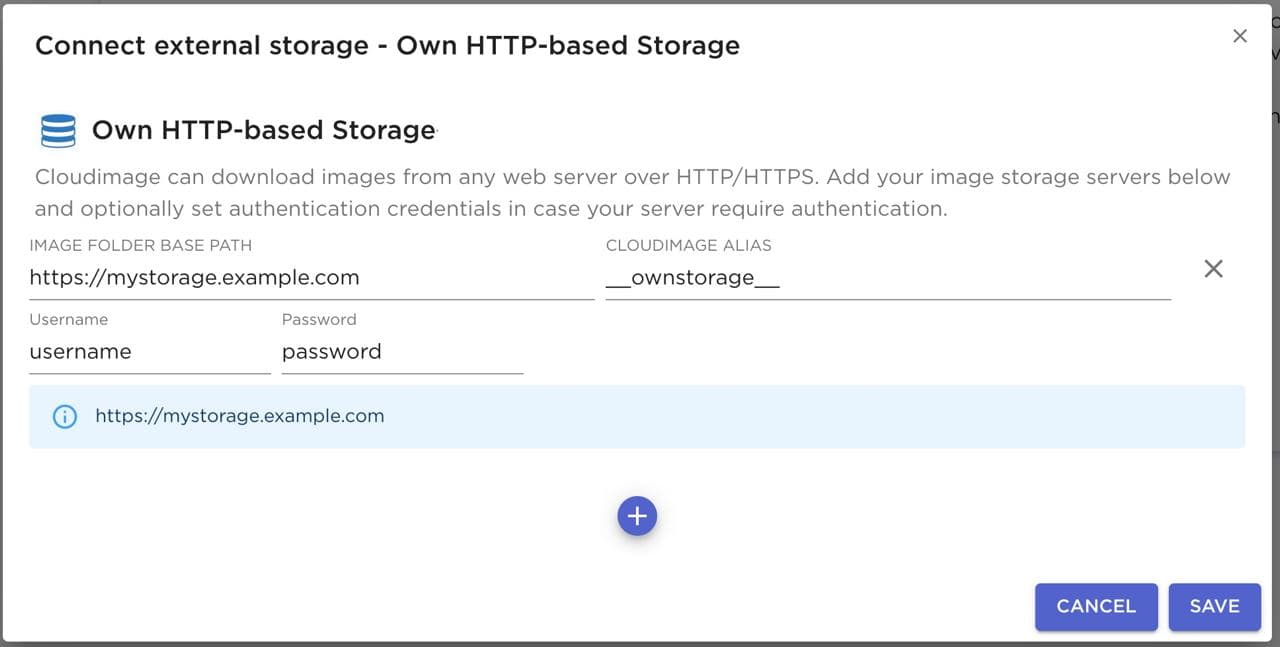
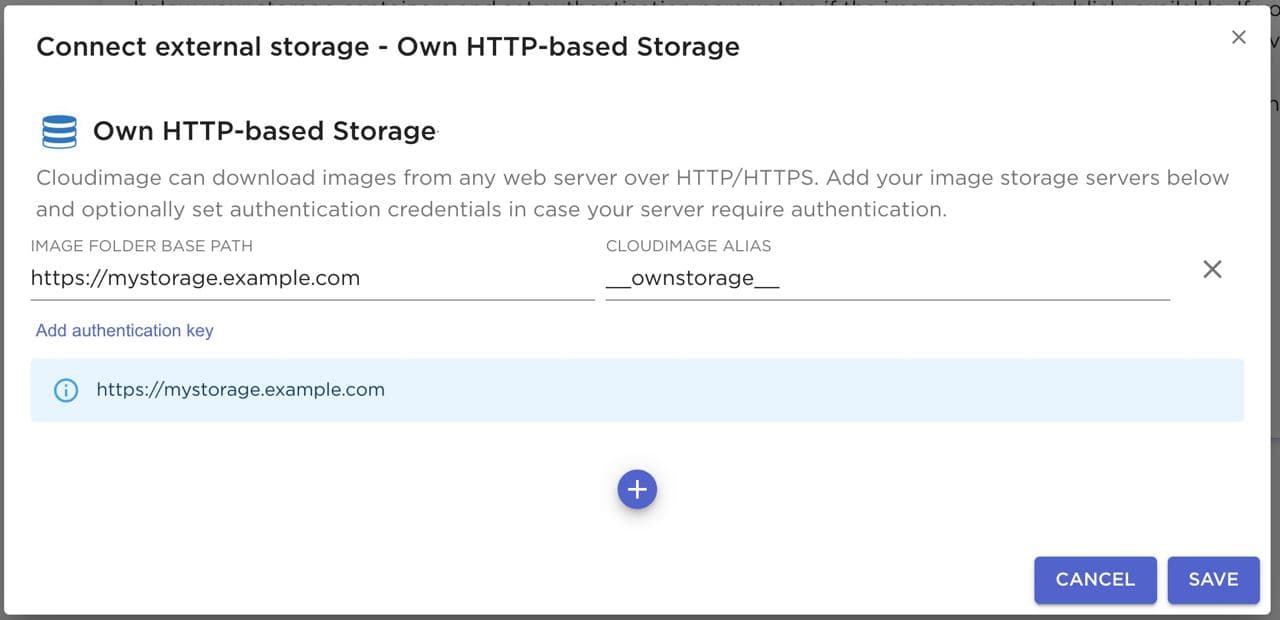
Public or authenticated generic HTTP storage
If your images are stored at URL https://mystorage.example.com and you can access image.jpg at the following URL:
//mystorage.example.com/image.jpg
You should enter the data as follows:
All aliases have to be prefixed and suffixed by underscores. Please note that all aliases have to be unique for your account - aliases set in the storage sections cannot be used in the alias section.
Your storage is now accessible by using the alias entered in the Cloudimage Alias field:
//your-token.cloudimg.io/__ownstorage__/image.jpg
If your storage requires authentication, you can enter your username and password:
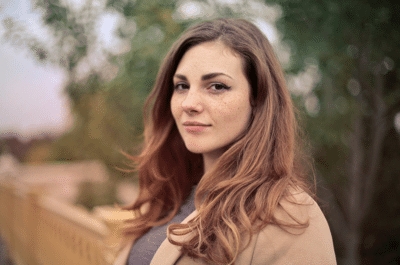
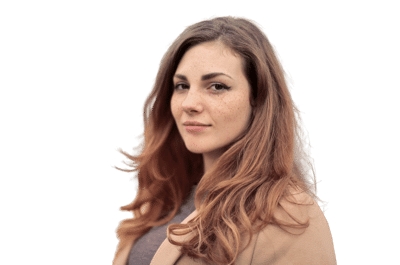
Isolate the main object in the image and remove the background
bg_remove=1
Background removal automatically detects the foreground object and isolates it by removing the background of an image using advanced AI technology. It can help you create a solid or transparent background for your pictures. This can give your application or website an overall polished look. Moreover, product images with a clear-defined foreground can be indexed better in search engines which rely on AI classification.
Feel free to try the background removal algorithm with your own images on our .
Colorize the image with an overlay
To create a color overlay by using colorize=X[,Y], where X is the color of the overlay (hex value or color name) and Y is the opacity (Y=0..1, default 0.5).
colorize=X[,Y] | colourise=X[,Y]
Proportionally resize an image to the desired width or height
Resize ignoring proportions
Resizes the image to a specified width and height without keeping the original proportions and delivers the resulting image via CDN.
func=cover
Apply rounded corners with specified radius
Rounds the corners of images with a radius of X pixels. If you wish to fill the cut corner(s) with a specific color, you can use the bg_color parameter.
radius=X (all corners are rounded with radius X pixels)
radius=R1,R2,R3,R4 (values for each corner, with max being the min px of the 2 sides around corner)
If four values are provided, these values correspond to the four corners: R1 = top-left corner, R2 = bottom-left corner, R3 = bottom-right corner, R4 =top-right corner. For example, to round only one of the corners with the maximum possible radius, you need to use radius=max,0,0,0.
You can change the compression (output format and quality) of your image by using compression filters. You can use the compression filters alongside and .
You can of course force a specific output format(s). More details can be found in the image formats section.
Most of the on-the-fly image transformations can be configured using the , an in-line URL builder to preview each image transformation instantly.
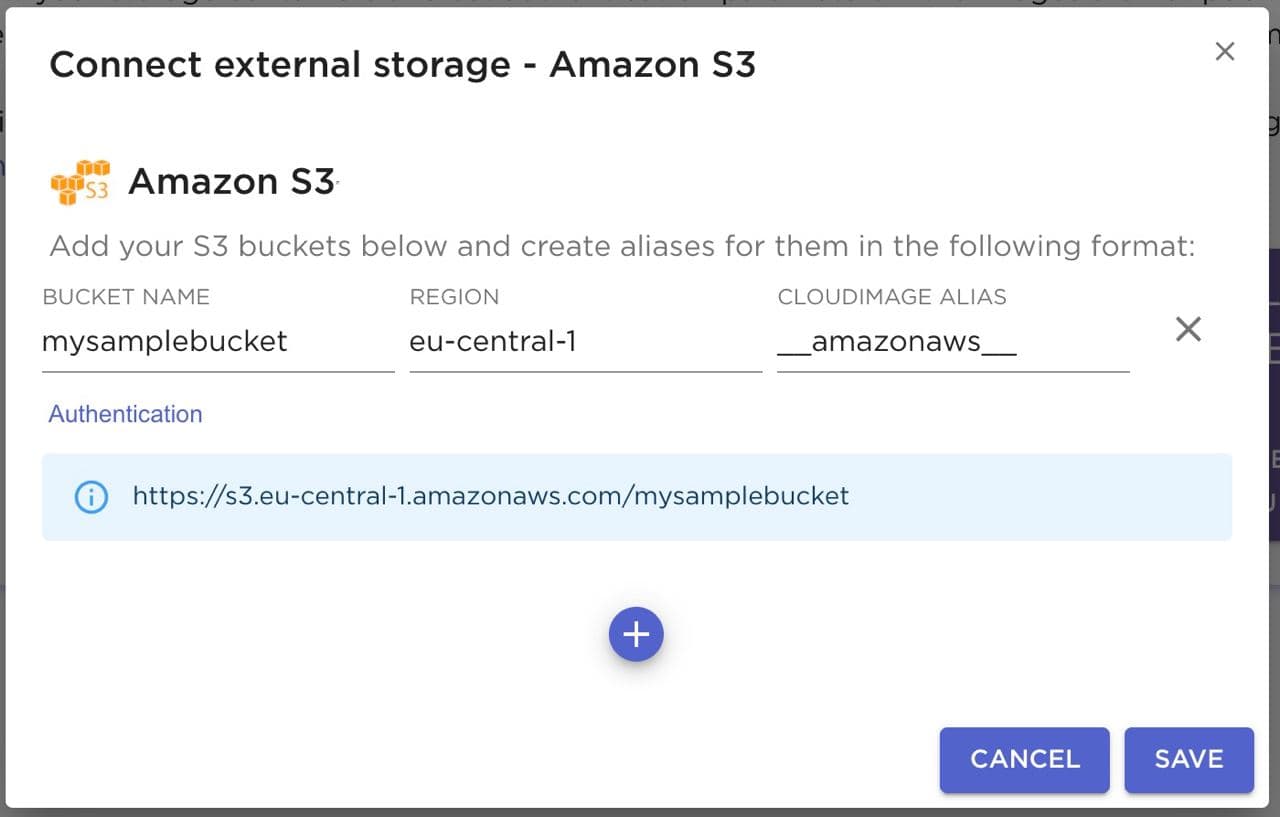
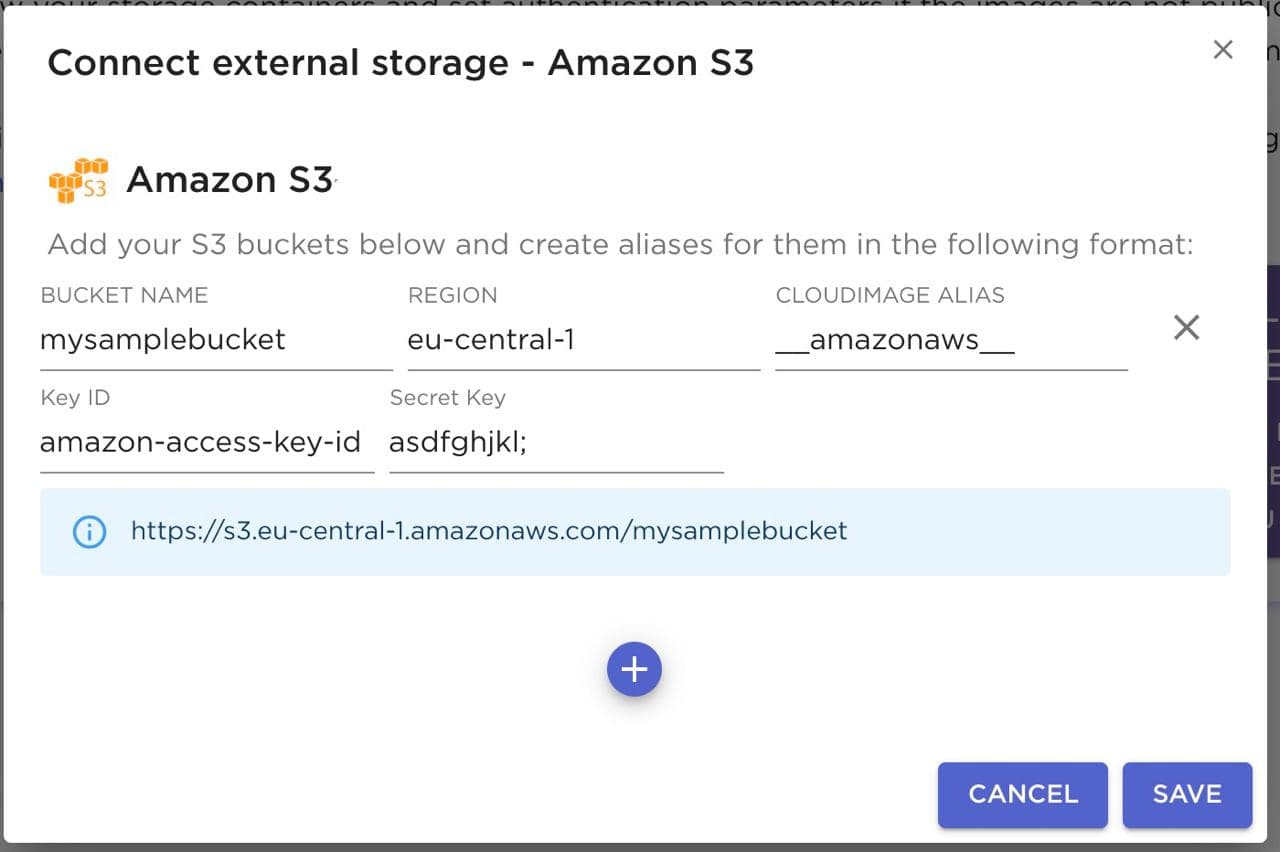
Public or authenticated Amazon S3 bucket
If your images are stored at a bucket named mysamplebucket at the eu-central-1 region and you can access image.jpg at the following URL:
//s3.eu-central-1.amazonaws.com/mysamplebucket/image.jpg
You should enter the data as follows:
All aliases have to be prefixed and suffixed by underscores. Please note that all aliases have to be unique for your account - aliases set in the storage sections cannot be used in the section.
Your storage container is now accessible by using the alias entered in the Cloudimage Alias field:
//your-token.cloudimg.io/
Allow fetching images only from a pre-defined list of origins
As a reminder, a Cloudimage URL looks like this:
//token.cloudimg.io/original_image_url?operations&filters
By default, images from any origin domains can be resized by Cloudimage. The storage and traffic used by these images will count toward your plan’s allowance. In the Cloudimage admin console, you can restrict the list of origin server URLs your token can transform images from.
If you are using and you have Domain whitelisting enabled, you have to include all aliases in the whitelisted domain list.
Using a single origin server for your files
To make your Cloudimage URLs shorter and improve SEO, you can configure an origin prefix. For example, if your images are stored at the URL https://hello.s3.aws.com/, you can set up prefix URL:
When you use:
//token.cloudimg.io/photos/paris.jpg?width=800
Cloudimage will search the origin image at the URL:
//hello.s3.aws.com/photos/paris.jpg
By using the origin prefix, you can avoid exposing the URL of your media to users.
Magento plugin
Cloudimage can be implemented to accelerate Magento shops in 2 modes:
Optimize filesize of SVG images
Cloudimage offers automatic optimization of Scalable Vector Graphics (SVG) files which can reduce the file size by up to 80% without visual appearance deterioration. This is possible since most SVG editors include unnecessary information which can be omitted. Moreover, most shapes in SVG files can be simplified.
Protect your origin with custom request headers
Cloudimage allows you to set up one or many global headers which are sent to the origin on every request.
You need to enter the name and value of the header(s) to send. All these headers will be automatically sent for each request made with your token which allows you to set up your origin to accept only requests containing these headers.
Using third-party origin file storage
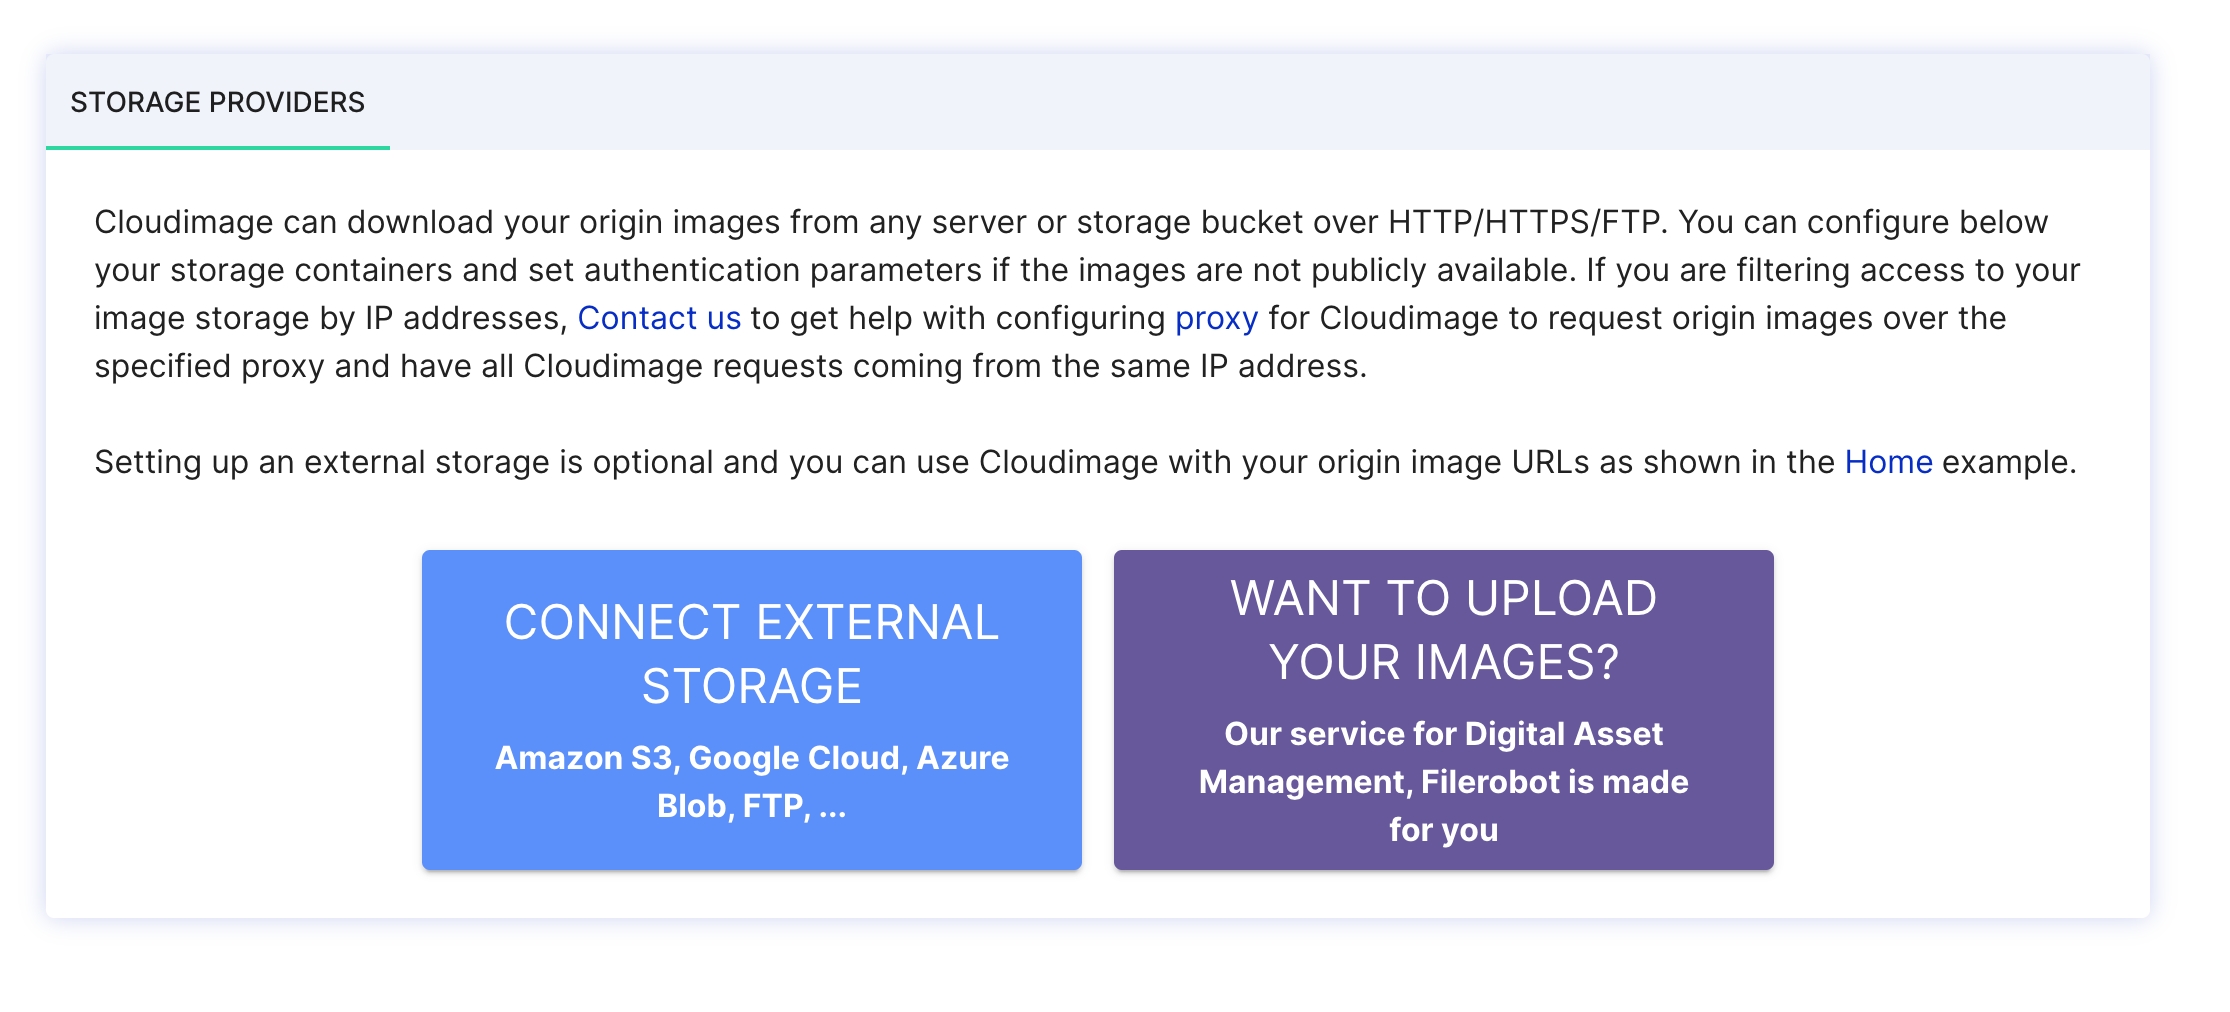
Cloudimage can download your origin images/files from any server or storage bucket over HTTP/HTTPS/FTP. Setting up an external storage is optional and you can use Cloudimage with your origin image URLs as shown in the introduction - .
If the images are not publicly available, you have to configure your storage containers and set authentication parameters. If you are filtering access to your image storage by IP addresses, to get help with configuring for Cloudimage to request origin images over the specified proxy and have all Cloudimage requests coming from the same IP address.
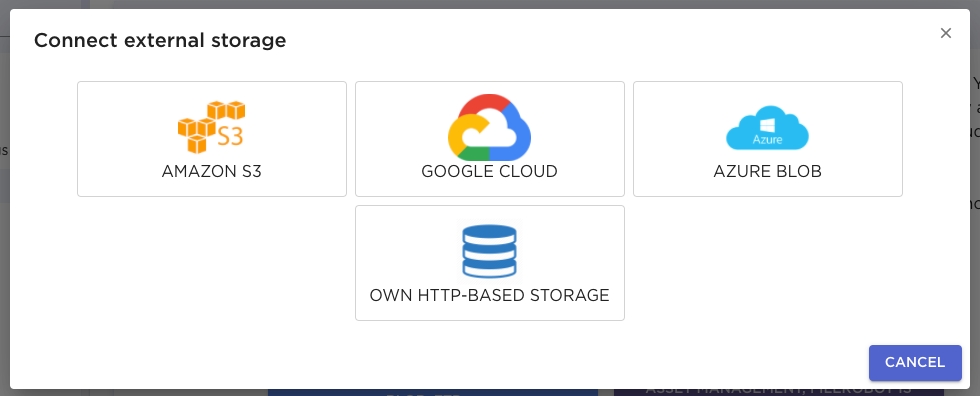
You can set up external storage in the Storage section in the admin panel by using the Connect External Storage button.
You can set up an , , or any generic HTTP-based storage (see .
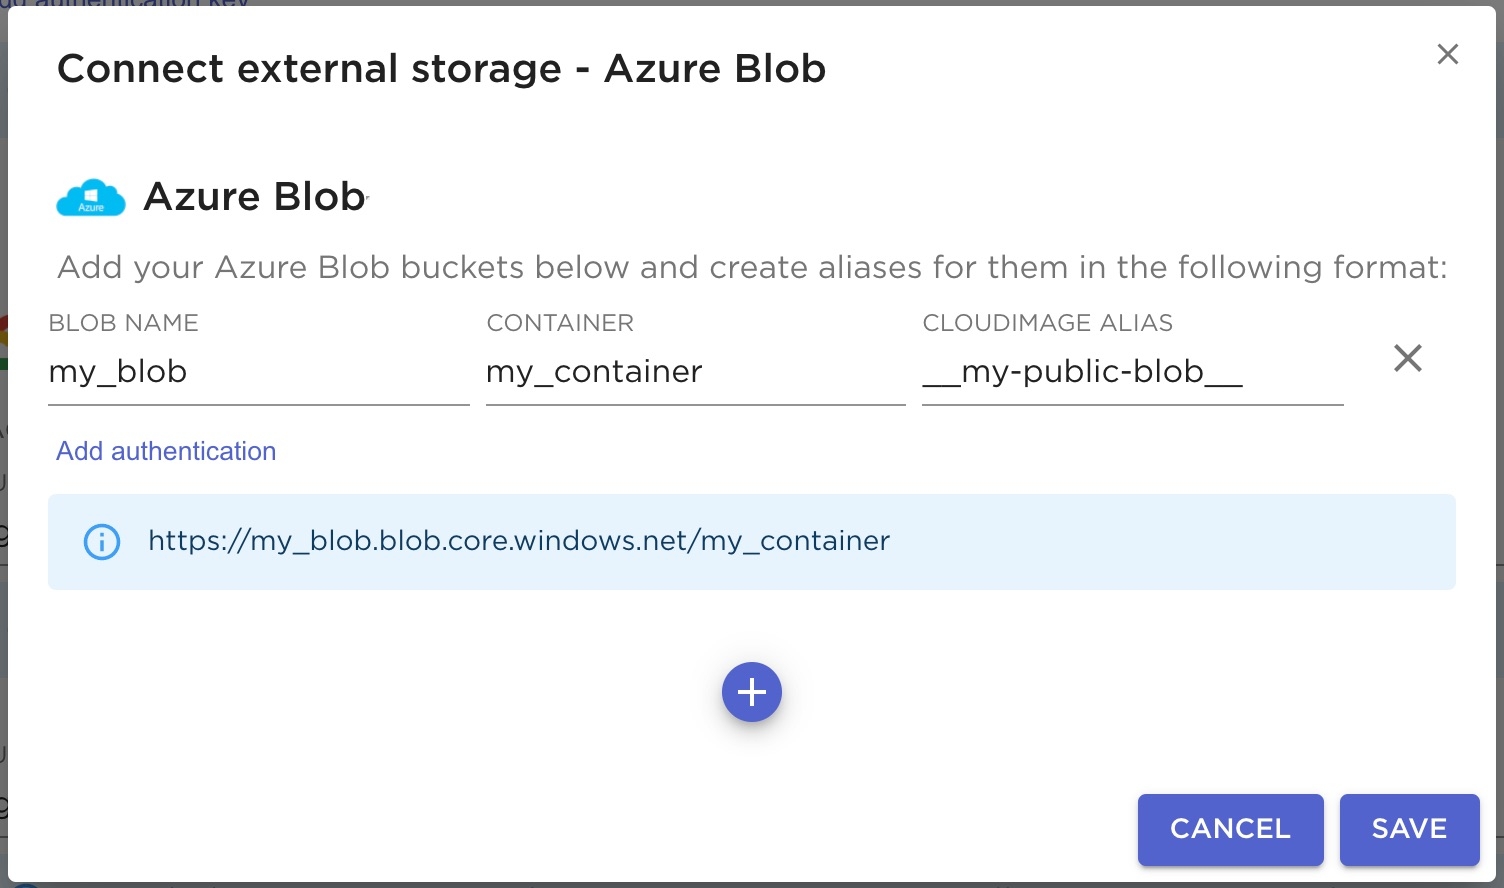
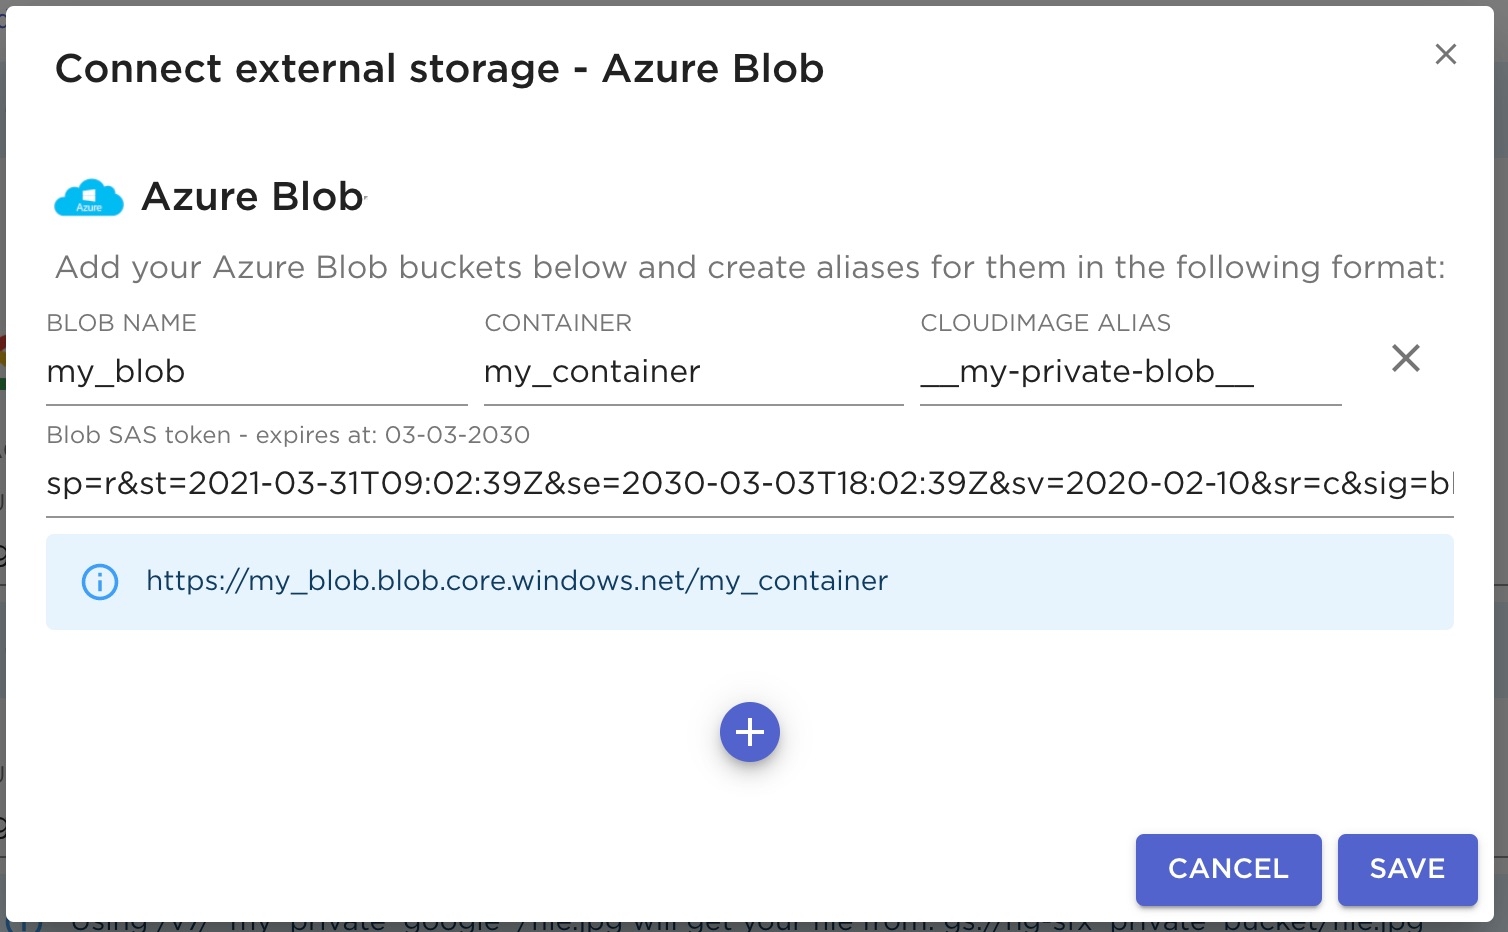
Public or authenticated Microsoft Azure Blob
If your images are stored at a blob with account my_blob in a container named my_container and you can access image.jpg at the following URL:
//my_blob.blob.core.windows.net/my_container/image.jpg
You should enter the data as follows:
All aliases have to be prefixed and suffixed by underscores. Please note that all aliases have to be unique for your account - aliases set in the storage sections cannot be used in the section.
Your storage container is now accessible by using the alias enter in the Cloudimage Alias field:
Protect your Cloudimage token from abuse
Protect your Cloudimage URLs from tampering
To prevent URL tampering and protect your token, every Cloudimage URL can be secured with an SHA-1 HMAC signature.
Please be aware that when the URL signature is activated for your token, all Cloudimage URLs which are not signed properly will cease to work.
The signature is calculated as follows:
The syntax to process an image is:
//token.cloudimg.io/original_image_url?operations&filters&ci_sign=Signature
Because the Salt is a shared secret between you and Cloudimage, only you will be able to calculate the signature of your images.
Specify which domains your Cloudimage token can download original images from. You can limit the list to a few domains that you own to make sure no one uses your token on his or her URLs.
Sign your Cloudimage URLs with an SHA hash to prevent someone else from using your Cloudimage token.
With this feature, you can sign only part of the url which will allow you to add more parameters to the URL while protecting the sealed ones.
The Origin URL prefix will apply to all Cloudimage transformations for your token. Make sure that all your origin images are served from the Origin URL prefix domain. Should you have multiple source domains, then please use aliases instead.


Transparent corners (default, if the formats supports transparency):
Solid color corners:
Maximum radius on two corners only:
Original image:
Increased contrast:
Decreased contrast:
Original image:
Increased saturation:
Using saturate=-100 will remove all color information and convert the image to grayscale.
Desaturation:
Grayscale:
Original image:
Grayscale image:
Only resize:
Resize and sharpen:
Original image:
Pixelate effect:
A modern format suitable for most images. Supports trasnparency and offers both lossy and lossless compression.
The most popular and widely-supported format. Used by digital cameras. Suitable for photographic images. Lossy compression only.
Image format with transperency support suitable for raster logos, charts, infographs, etc. Lossless compresison only.
If your S3 bucket requires authentication, you can enter your access key ID and secret access key:
Log in to your Cloudimage admin console and navigate to Image settings / tab Domains. Scroll down to Whitelisted domains. Then configure your original image domains / S3 buckets.
Please note that when you whitelist eg. sample.li, this will also whitelist all its subdomains sub1.sample.li, www.sample.li, along with any recursive (sub...)sub.domain from the listed one.
When adding a domain to the whitelist, do not include http:// or https://.
By default, Cloudimage does not enforce the domain whitelist when deliveringStatic content. If you would like to restrict delivering static content to whitelisted domains only, you can enable the Honor whitelist when delivering static content option in the Admin console.
This Cloudimage URL works (the sample.li domain is whitelisted):
If the domain is not in your whitelisted domains list, the request will fail. In this example, pbs.twimg.com is not whitelisted, so the request is blocked.
Simple configuration change in Magento settings
JPEG optimization WebP delivery CDN acceleration
Requires the installation and configuration of the Cloudimage Content Transformation & Acceleration Magento plugin or Github.
Basic + Responsive images
In the value field, you could use the following variables:
{{header.host}} will allow you to forward the HOST header to your origin;
{{req.ip}} will allow you to forward the client's IP address.
If you have been a Cloudimage customer before 01/01/2023, please contact us to enable this feature.
Original image:
Increased brightness:
Decreased brightness:
If your Azure Blob container requires authentication, you have to enter your SAS token (found in your Azure panel) in the respective field:
Please keep in mind that the SAS token has an expiration date and you have to generate a new one and update it before it expires. Otherwise, our servers will not be able to fetch your media from the storage.
Before activating the URL signature, please make sure that all Cloudimage URLs contain the proper signature.
To activate this feature, you need to navigate to Image Settings / Security and activate URL security toggle.
In the Add Security modal, you need to choose URL Signature and place a string you will be using as salt when generating the URL signature.
Signature = sha1('Salt' + 'URI')
where URI = original_image_url?operations&filtersFlip horizontally: /samples.scaleflex.com/flat_hd.jpg?w=400&flip=h
Flip both horizontally and vertically: /samples.scaleflex.com/flat_hd.jpg?w=400&flip=hv
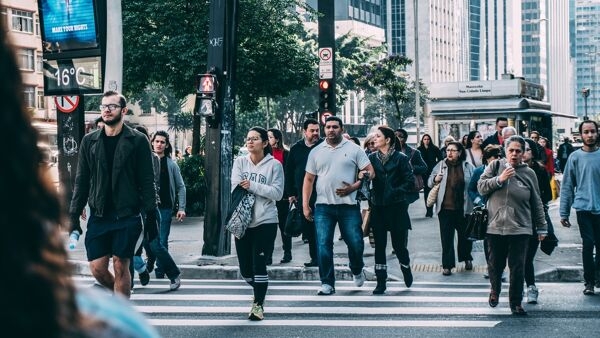
Original image:
Faces blurred:
You can combine any color adjustments and filters to achieve the desired artistic effects:
/samples.scaleflex.com/face.png?w=400&sepia=1&contrast=24&bright=-10&gray=1


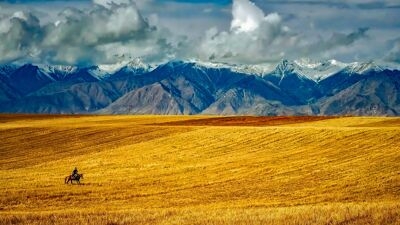
By default, the image is desaturated first:
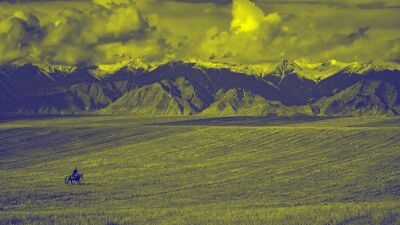
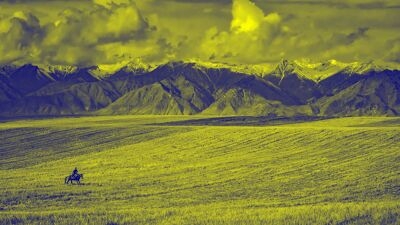
/samples.scaleflex.com/mountains.jpg?w=400&duotone=000080,ffff00
If you prefer, you can convert to grayscale instead:
/samples.scaleflex.com/mountains.jpg?w=400&duotone=000080,ffff00&gray=1
60% opacity (0.6) of the filter:
/samples.scaleflex.com/mountains.jpg?w=400&duotone=000080,ffff00,0.6
Original image: /samples.scaleflex.com/ny_doc.jpg
Blur applied: /samples.scaleflex.com/ny_doc.jpg?blur=6
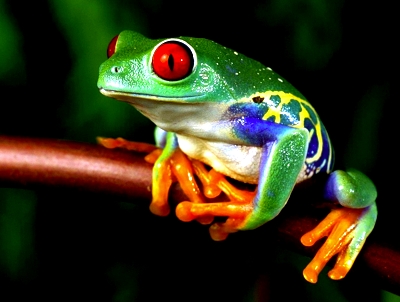
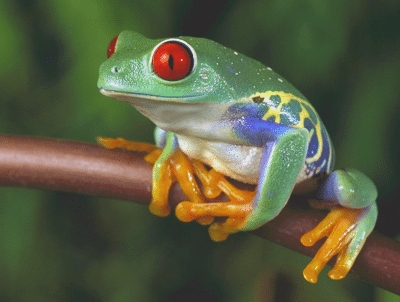
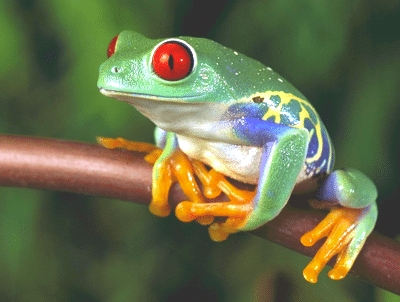
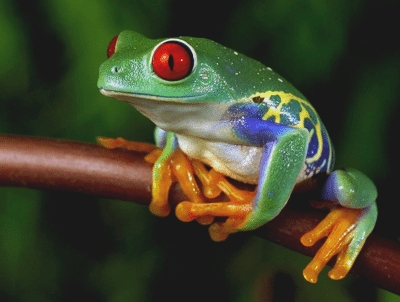
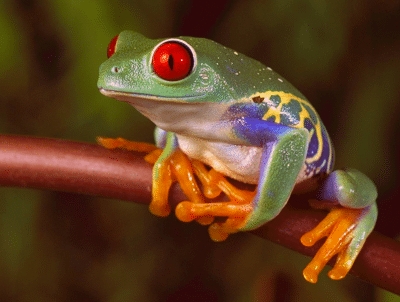
Original image: /samples.scaleflex.com/frog.png?w=400
Color overlay: /samples.scaleflex.com/frog.png?w=400&colorize=red,0.85
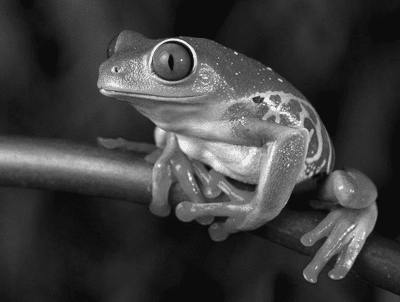
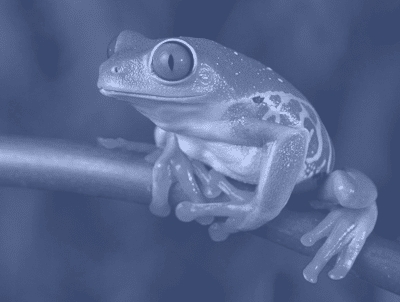
Desaturate and color overlay: /samples.scaleflex.com/frog.png?w=400&saturate=-100&colorize=7af,0.6
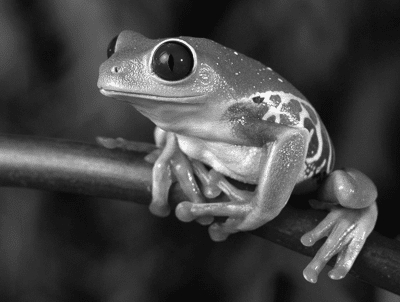
Grayscale and color overlay: /samples.scaleflex.com/frog.png?w=400&gray=1&colorize=7af,0.6

Original (1543 bytes):
Compressed SVG (221 bytes): https://samples.scaleflex.com/5603.svg?force_format=svg

Image trimming
Removes any single-color padding around the image if present.
The parameter does not specify the amount of border or frame to trim but rather how aggressive the trim algorithm should be. A bigger value of the parameter (e.g. 25) might trim part of the image. Typical values are between 0 and 10.
This allows you to use the same parameter values for all your images.
trim=X
When gravity=trim is set alongside trim=X (for the , or operations), the focal point is defined depending on the trim result:
When the image is trimmed on all sides, gravity is set to center;
When no trim has been performed, gravity is set to smart;
If the image has been trimmed on some edges only, the gravity is set to:
fit operation - gravity is set to the edges opposite of the trimmed ones so that the canvas is extended only on the trimmed sides;
Crop operation focusing only on one face
Finds the most prominent face in the image and crops it to the specified with the width and height parameters dimensions. If you however provide only one dimension, the other dimension will be chosen automatically to keep the aspect ratio of the face.
func=face
Sets margins around the face. You can set equal margins with face_margin=X or separate horizontal and vertical margins (face_margin=W,H).
face_margin=X|W,H
Do not upscale an image if target size is larger than the origin image
Disallows image upscaling when resizing with the width or height operations. When resizing, the image can be either scaled down or up depending on the original and target dimensions. If you want to ensure that the image is never upscaled - so the output will not be larger than the original, you can use the org_if_sml parameter.
org_if_sml=1
Machine learning based image compression
Different images compressed with the same compression parameters may result in different perceptive quality. Moreover, the same image in different sizes may require different compression strategies to achieve maximum size gain without visible quality loss.
To overcome this, you can use our Optipress JPEG compression algorithm.
Optipress finds out the best JPG compression approach by analyzing specific image features and current compression parameters.
A Machine Learning model determines the best compression strategy for this image.
Quality is then evaluated based on a simulation model of the Human Visual System to achieve optimum compression without perceptive quality deterioration.
By using Optipress, you can get the most out of the JPEG compression format.
Cloudimage Content Transformation & Acceleration in Magento
To use the plugin, you need to have a Cloudimage account. You can create one on the Cloudimage registration page.
To be able to install the module by Composer, you need to get a copy of the module on the Magento Marketplace, or directly from Github.
Enable and install module in Magento:
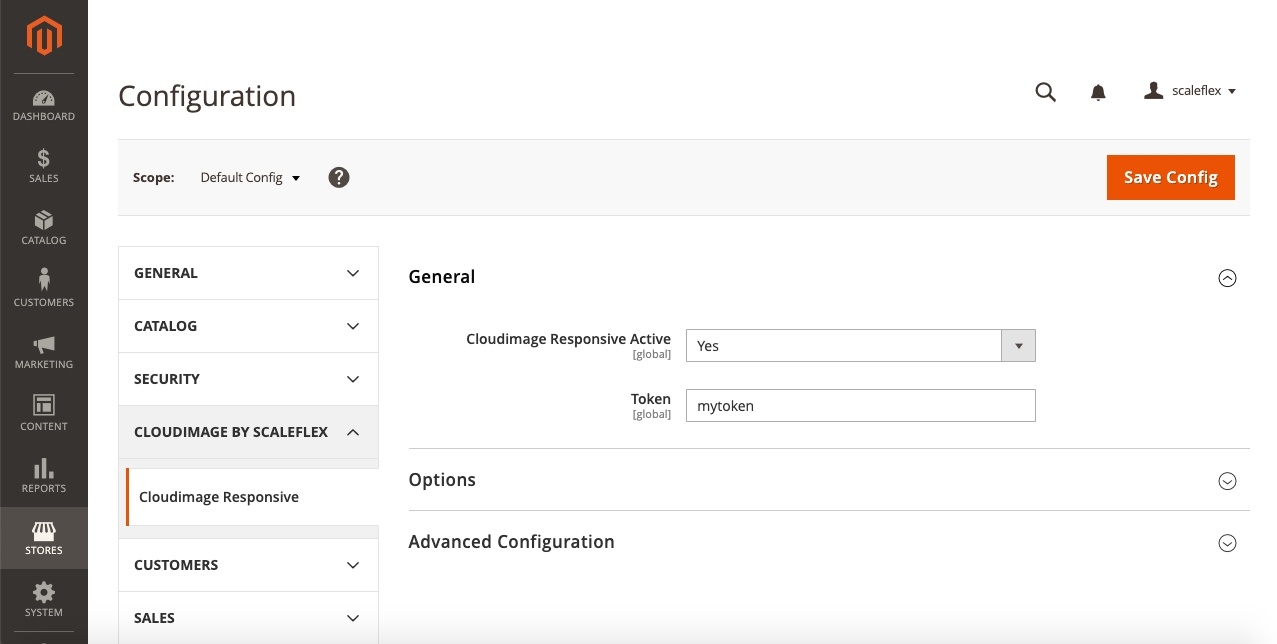
Activate the module and enter your Cloudimage token in the module configuration in Magento admin interface: Stores / Configuration / Cloudimage by Scaleflex / Cloudimage Responsive:
This setting is for advanced users only and allows to inject a custom JS function into the Magento templates in order to support some specific Magento templates. Feel free to in order to get the custom JS function to address issues with your specific template.
Once activated, the Cloudimage Responsive module will replace your template's classic image tag elements on-the-fly. This functionality is 100% compatible with the Magento Luma theme.
In the case of a personalized template, please consult the section in the Cloudimage plugin Github page.
Multi-factor authentication to the Cloudimage Console
The access to the Cloudimage administration Console supports SSO over SAMLv2. Cloudimage officially supports several Identity Providers (IDPs) and can integrate with any IDP that speaks SAML 2.0. You can integrate Cloudimage as a Service Provider (SP) with your IDP to allow your Cloudimage administrators to log in to the Console with a federated account and enjoy SSO.
Copy the ACS URL / Consumer URL and Entity ID / Audience ID or download the Service Provider XML from the link provided. These values are needed for configuring Cloudimage as a Service Provider or Relying Party Trust (ADFS) in your IDP.
Within your Identity Provider, add a Service Provider (generic term, Ping Federate), Application (OKTA), or Relying Party Trust (ADFS) using the information gathered in the previous step.
Make sure the IDP is returning the user's email address as NameID in the SAML assertion with the format emailAddress (see note below for ADFS).
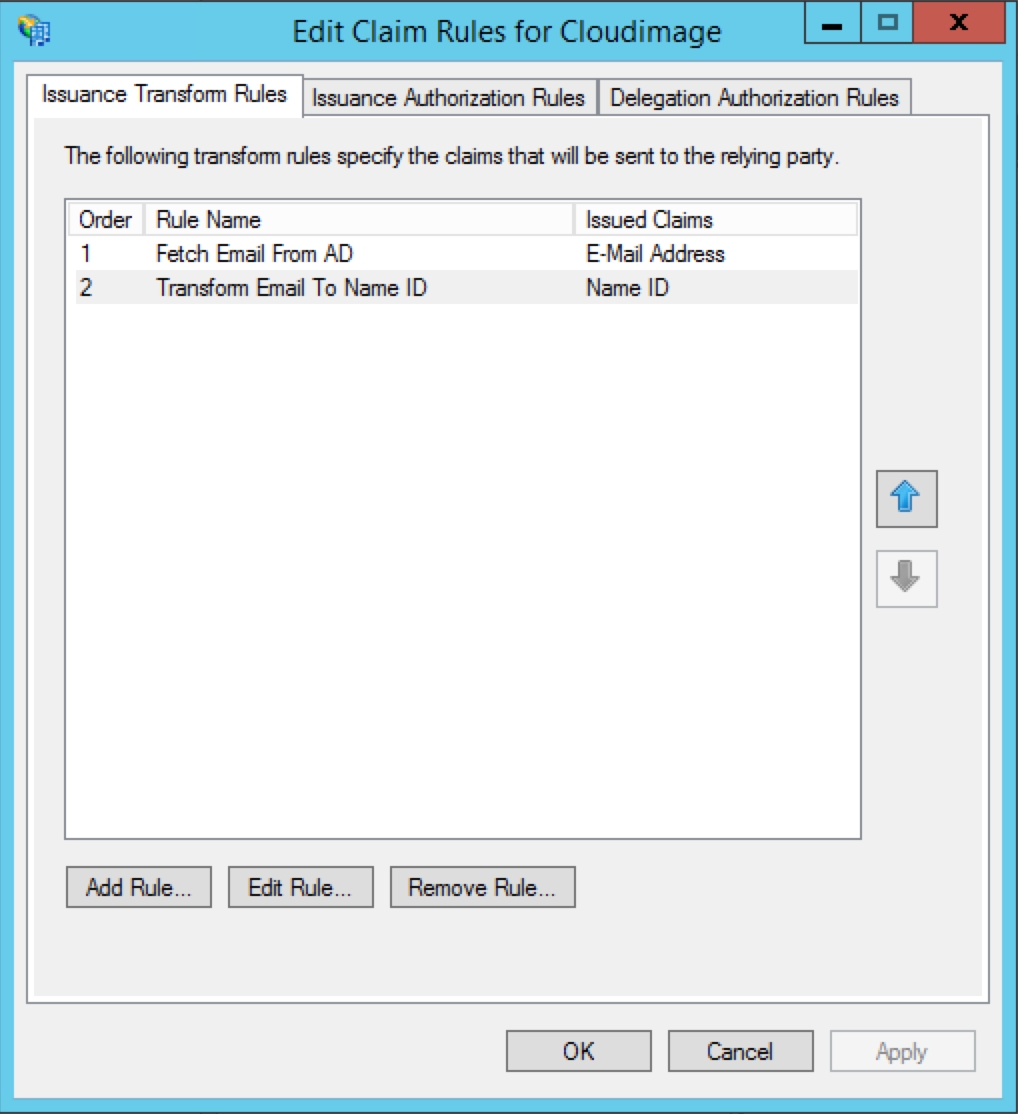
If you are using ADFS as IDP, you will need to configure the following two Issuance Transform Rules for the Relying Party Trust:
Fill in the Identity Provider section:
Entity ID: the entity ID from your IDP as per the IDP's metadata.xml.
SSO Target URL: IDP single sign-on URL.
SAML Single Logout Service URL: IDP single sign-out URL (usually the same as SSO Target URL).
Using your Cloudimage admin account's email from your company, try to .
Enjoy SSO and additional security!
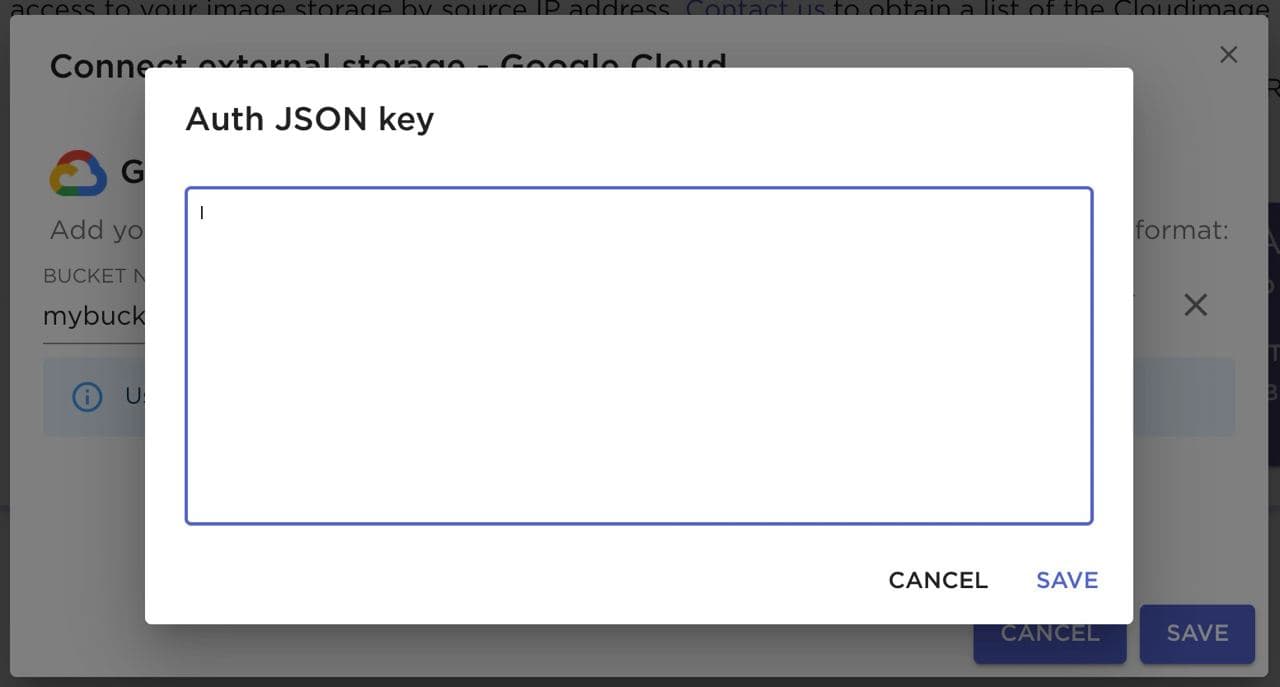
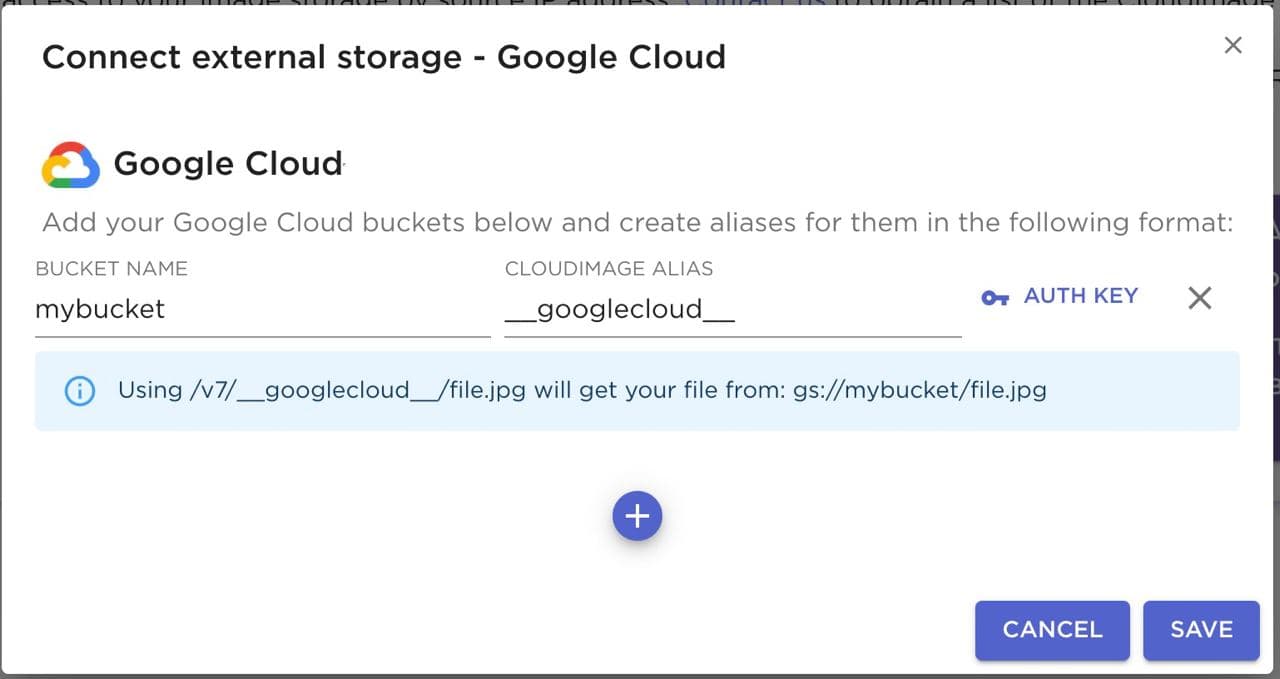
Public or authenticated GCP storage
If your images are stored in a bucket named mysamplebucket and you can access image.jpg at the following URL:
//www.googleapis.com/upload/storage/v1/b/mysamplebucket/o/image.jpg
You should enter the data as follows:
All aliases have to be prefixed and suffixed by underscores. Please note that all aliases have to be unique for your account - aliases set in the storage sections cannot be used in the alias section.
Your storage bucket is now accessible by using the alias entered in the Cloudimage Alias field:
//your-token.cloudimg.io/__googlecloud__/image.jpg
If your Google Cloud bucket requires authentication:
You need to generate an Authentication JSON file using the guide in the Google Cloud documentation -
You will be provided with a JSON file to be saved on your computer
Copy the contents of this file and paste it into the field that appears after pressing "AUTH KEY" in the storage settings
Cloudimage Contentful plugin
You need to have a Contentful account. Contentful is 100% Cloud Native, so you have to sign up for a hosted CMS at https://be.contentful.com
You’ll get :
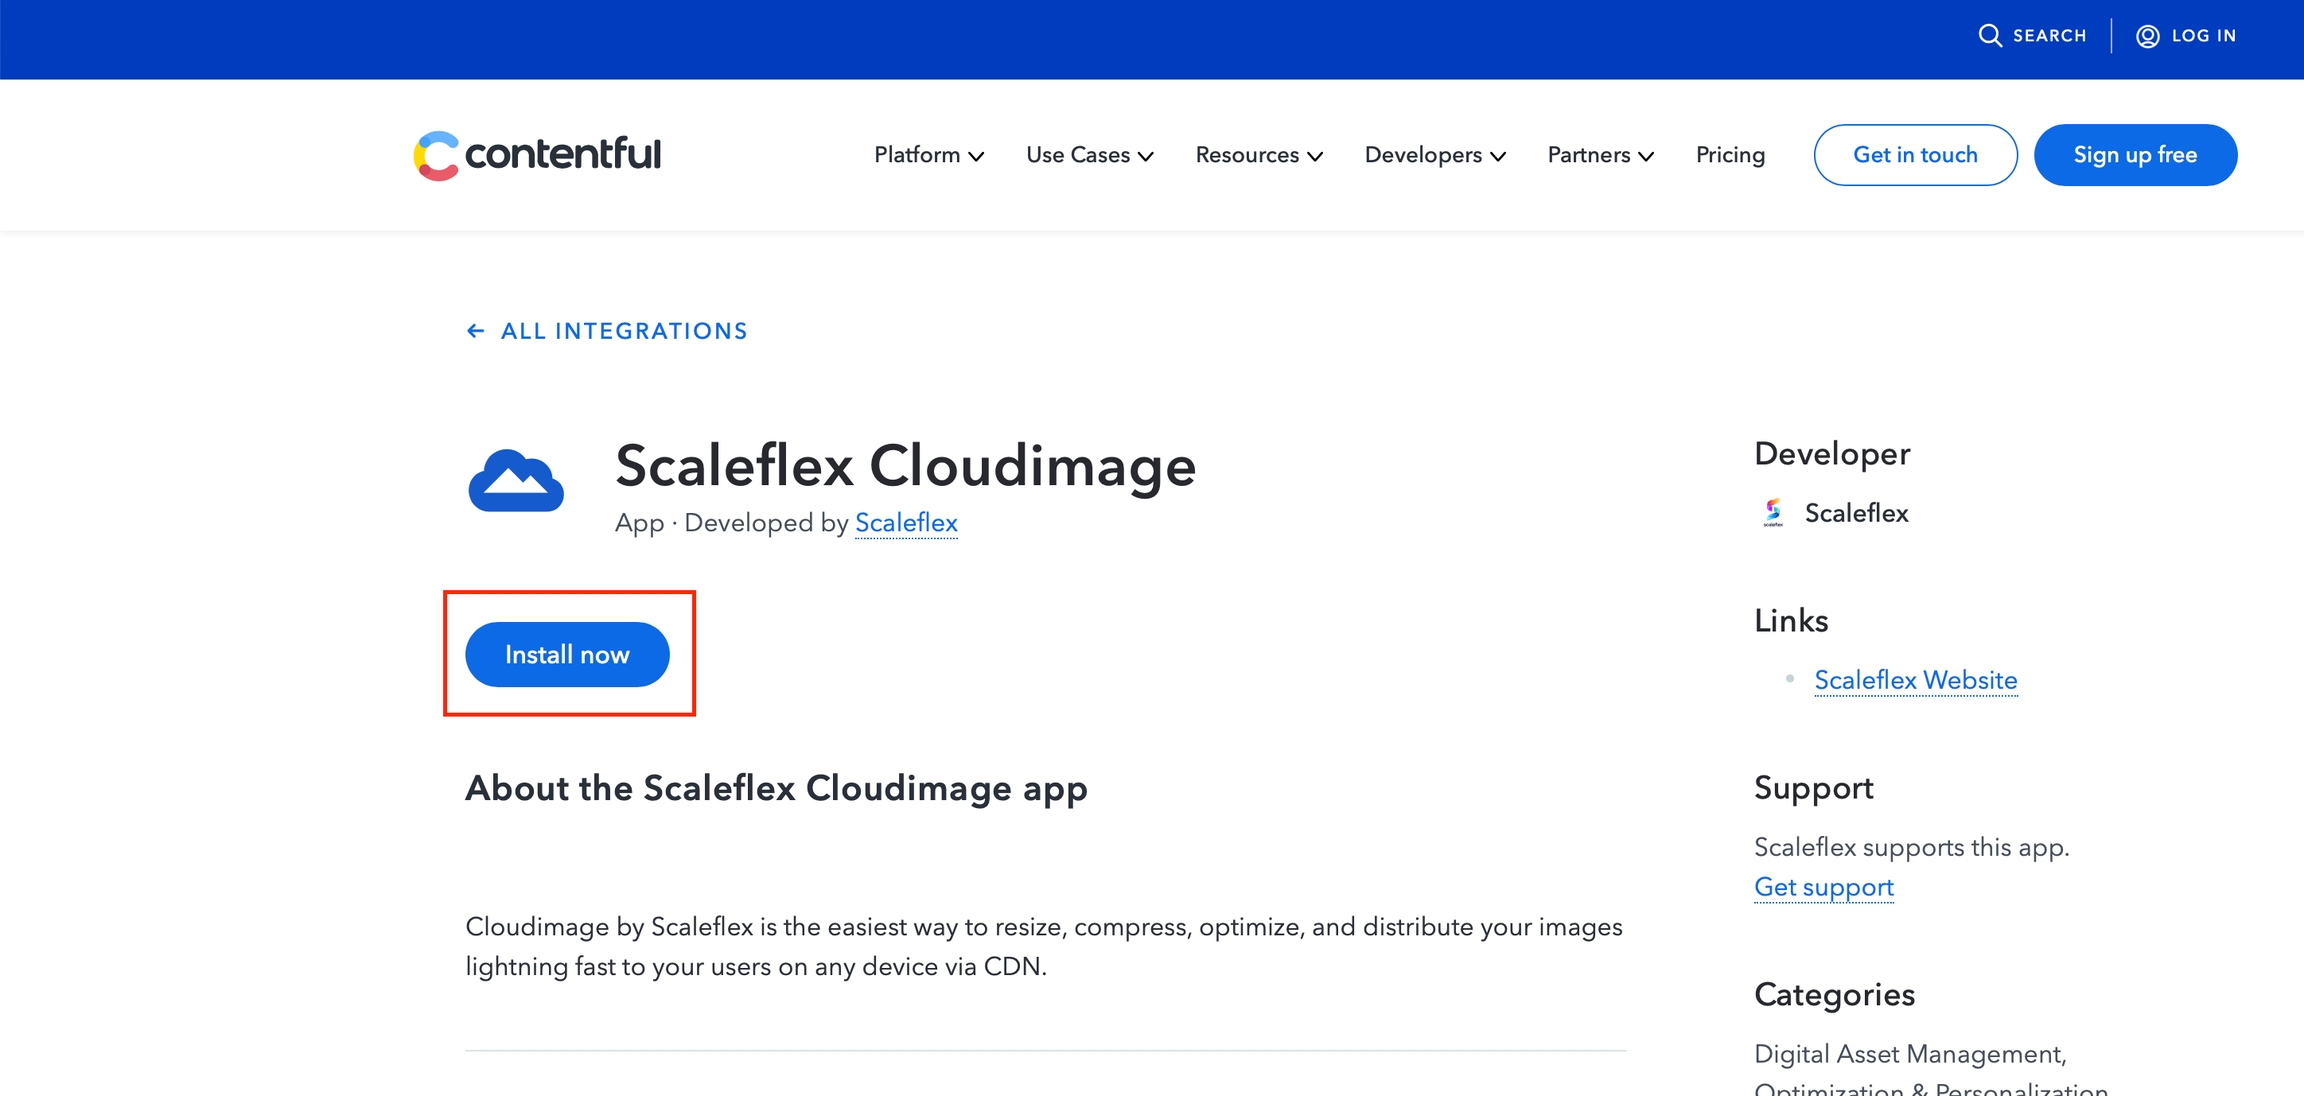
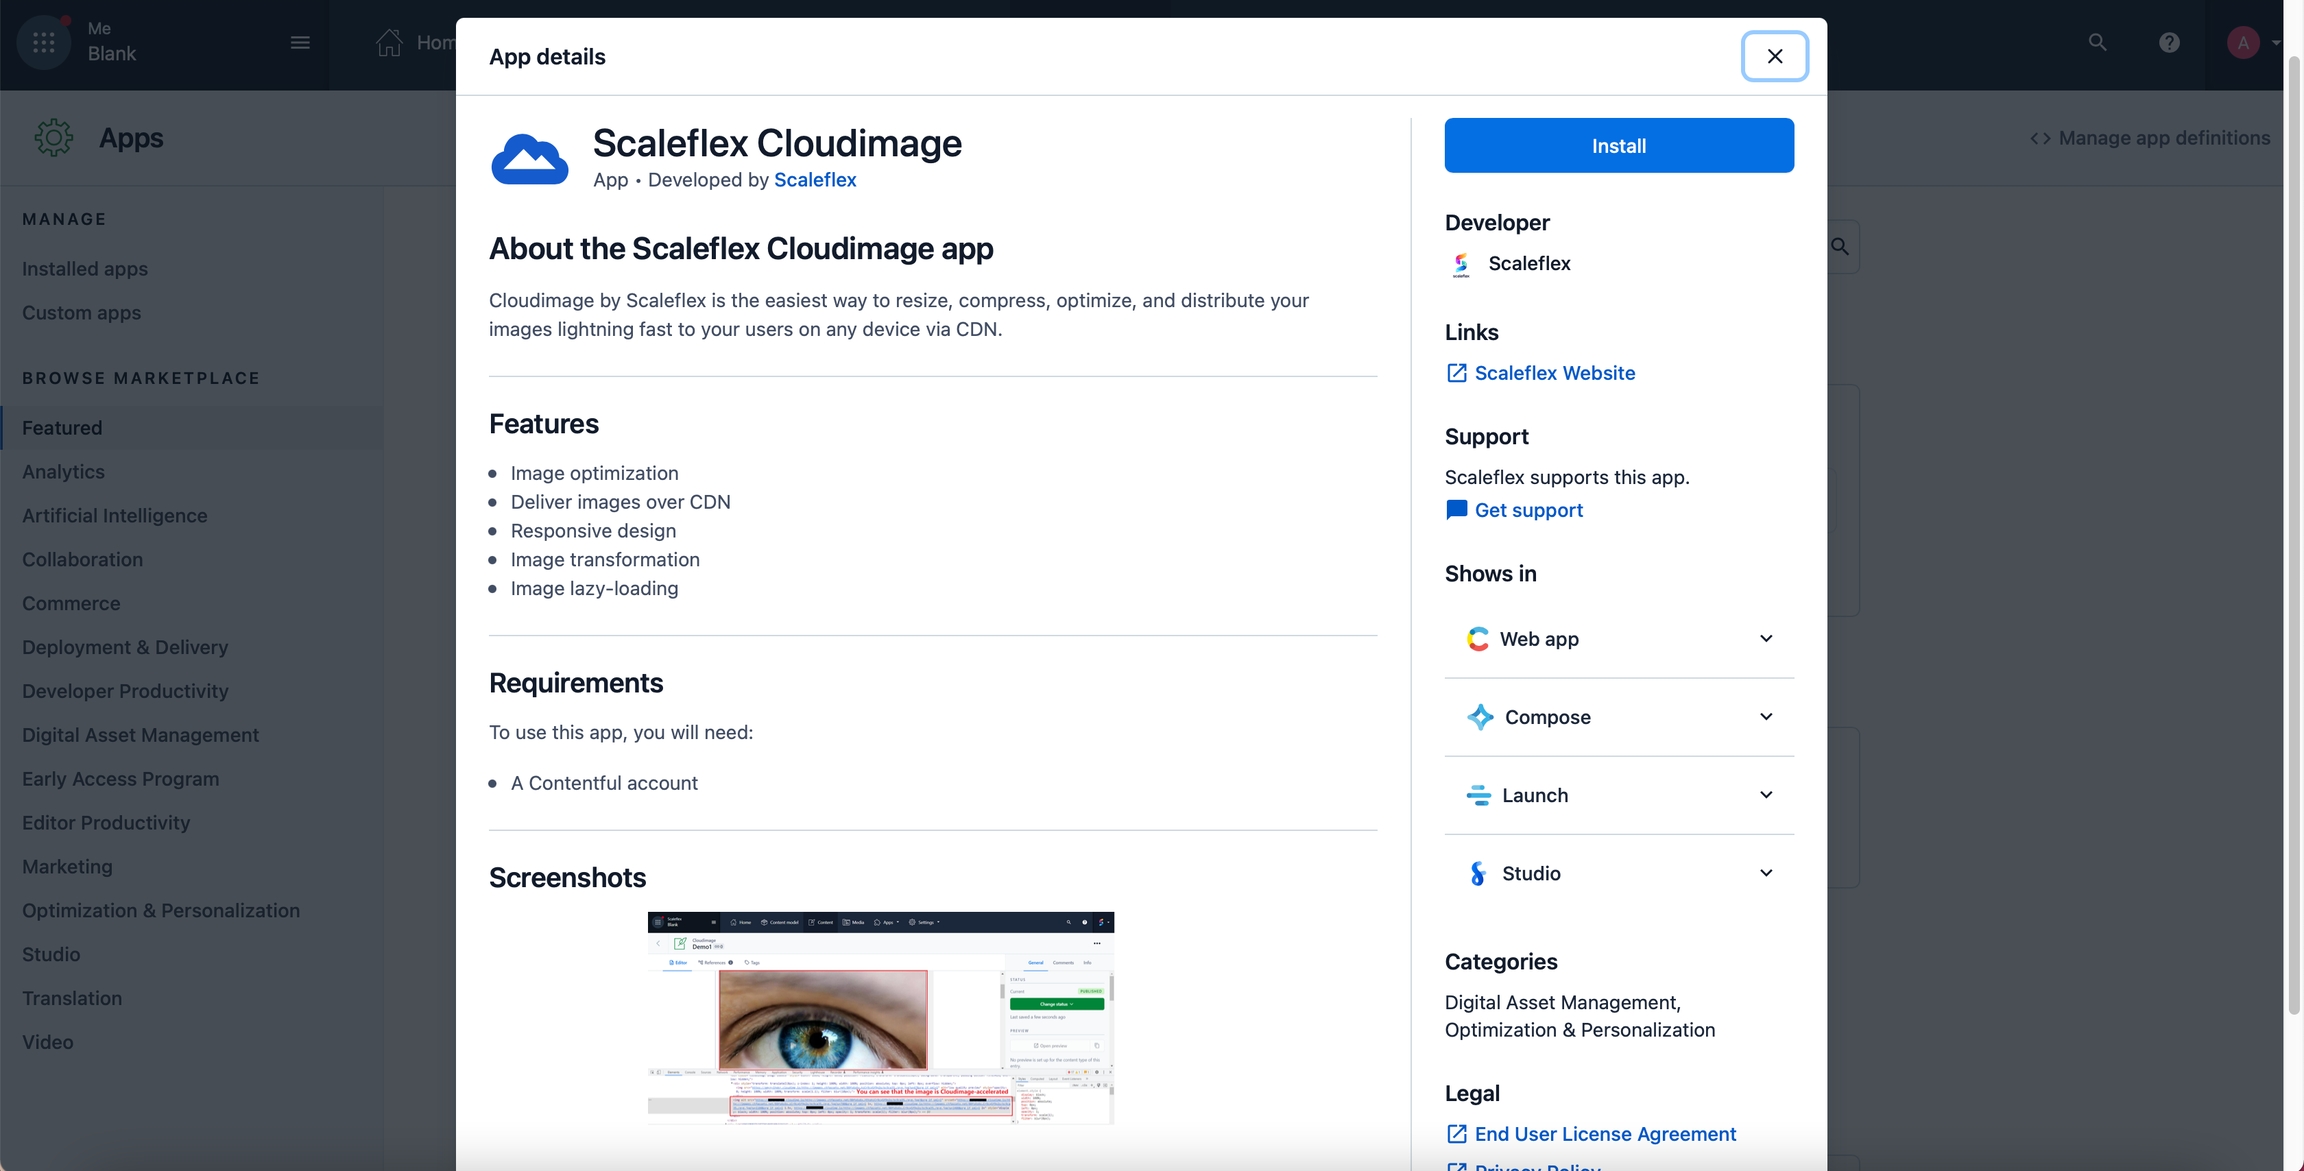
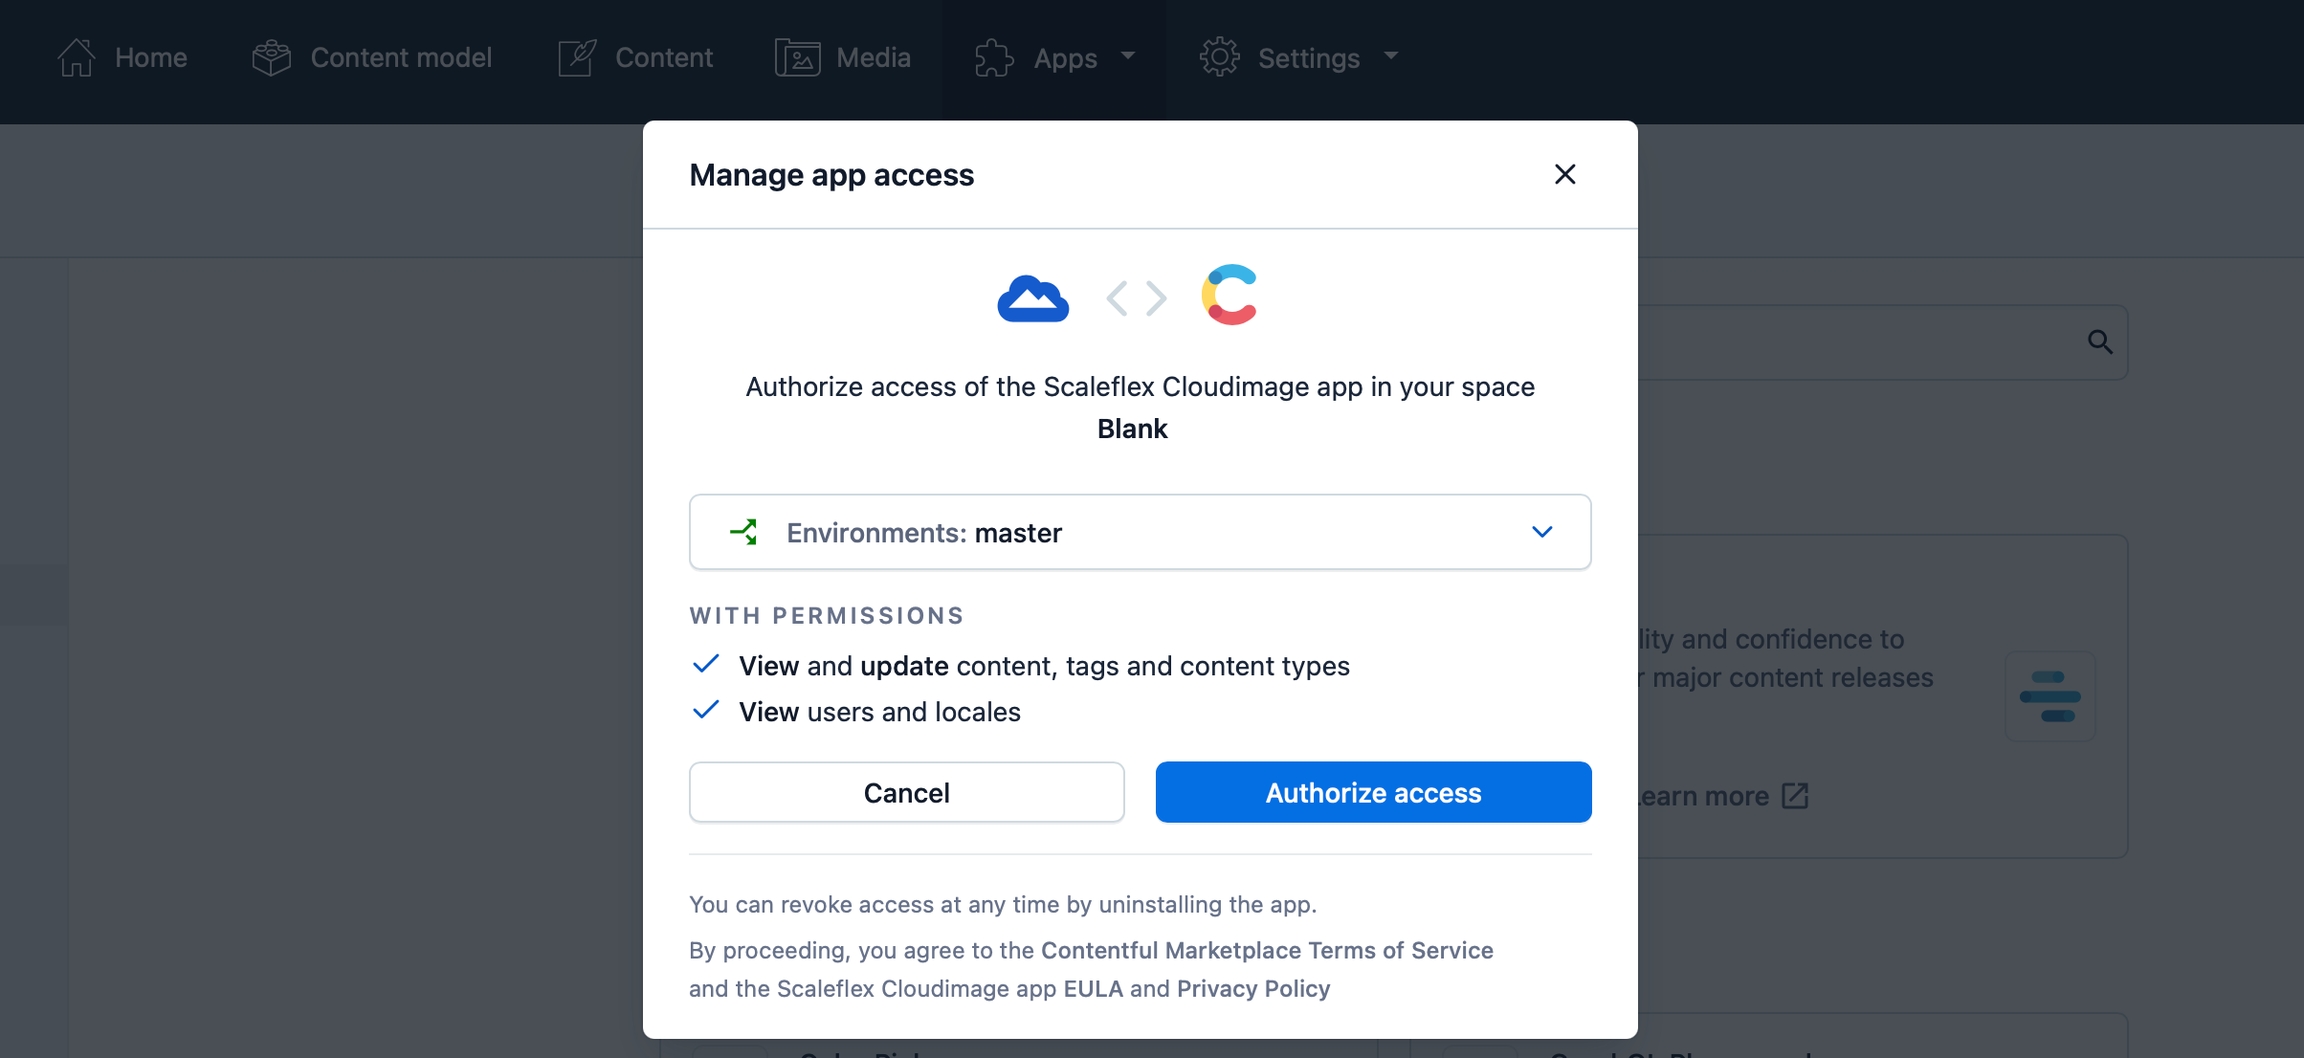
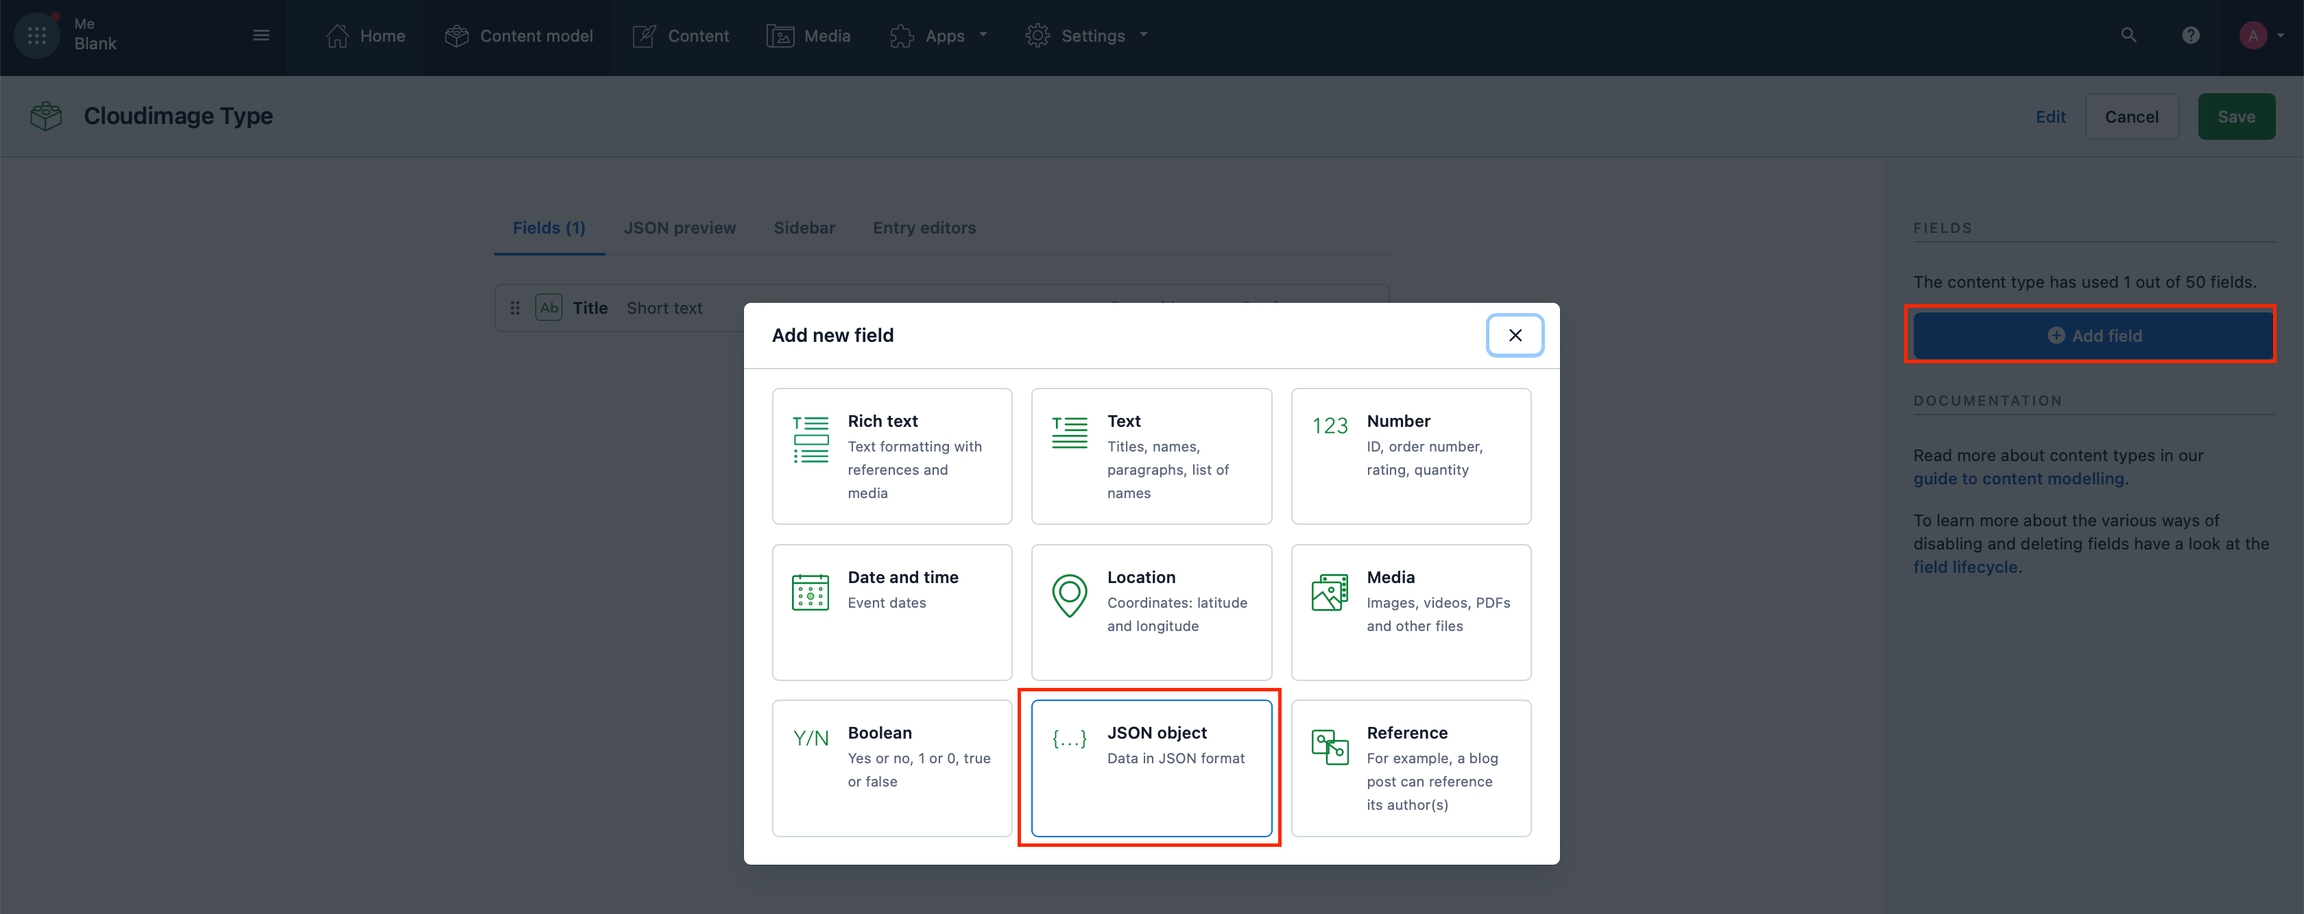
Find it here and install it.
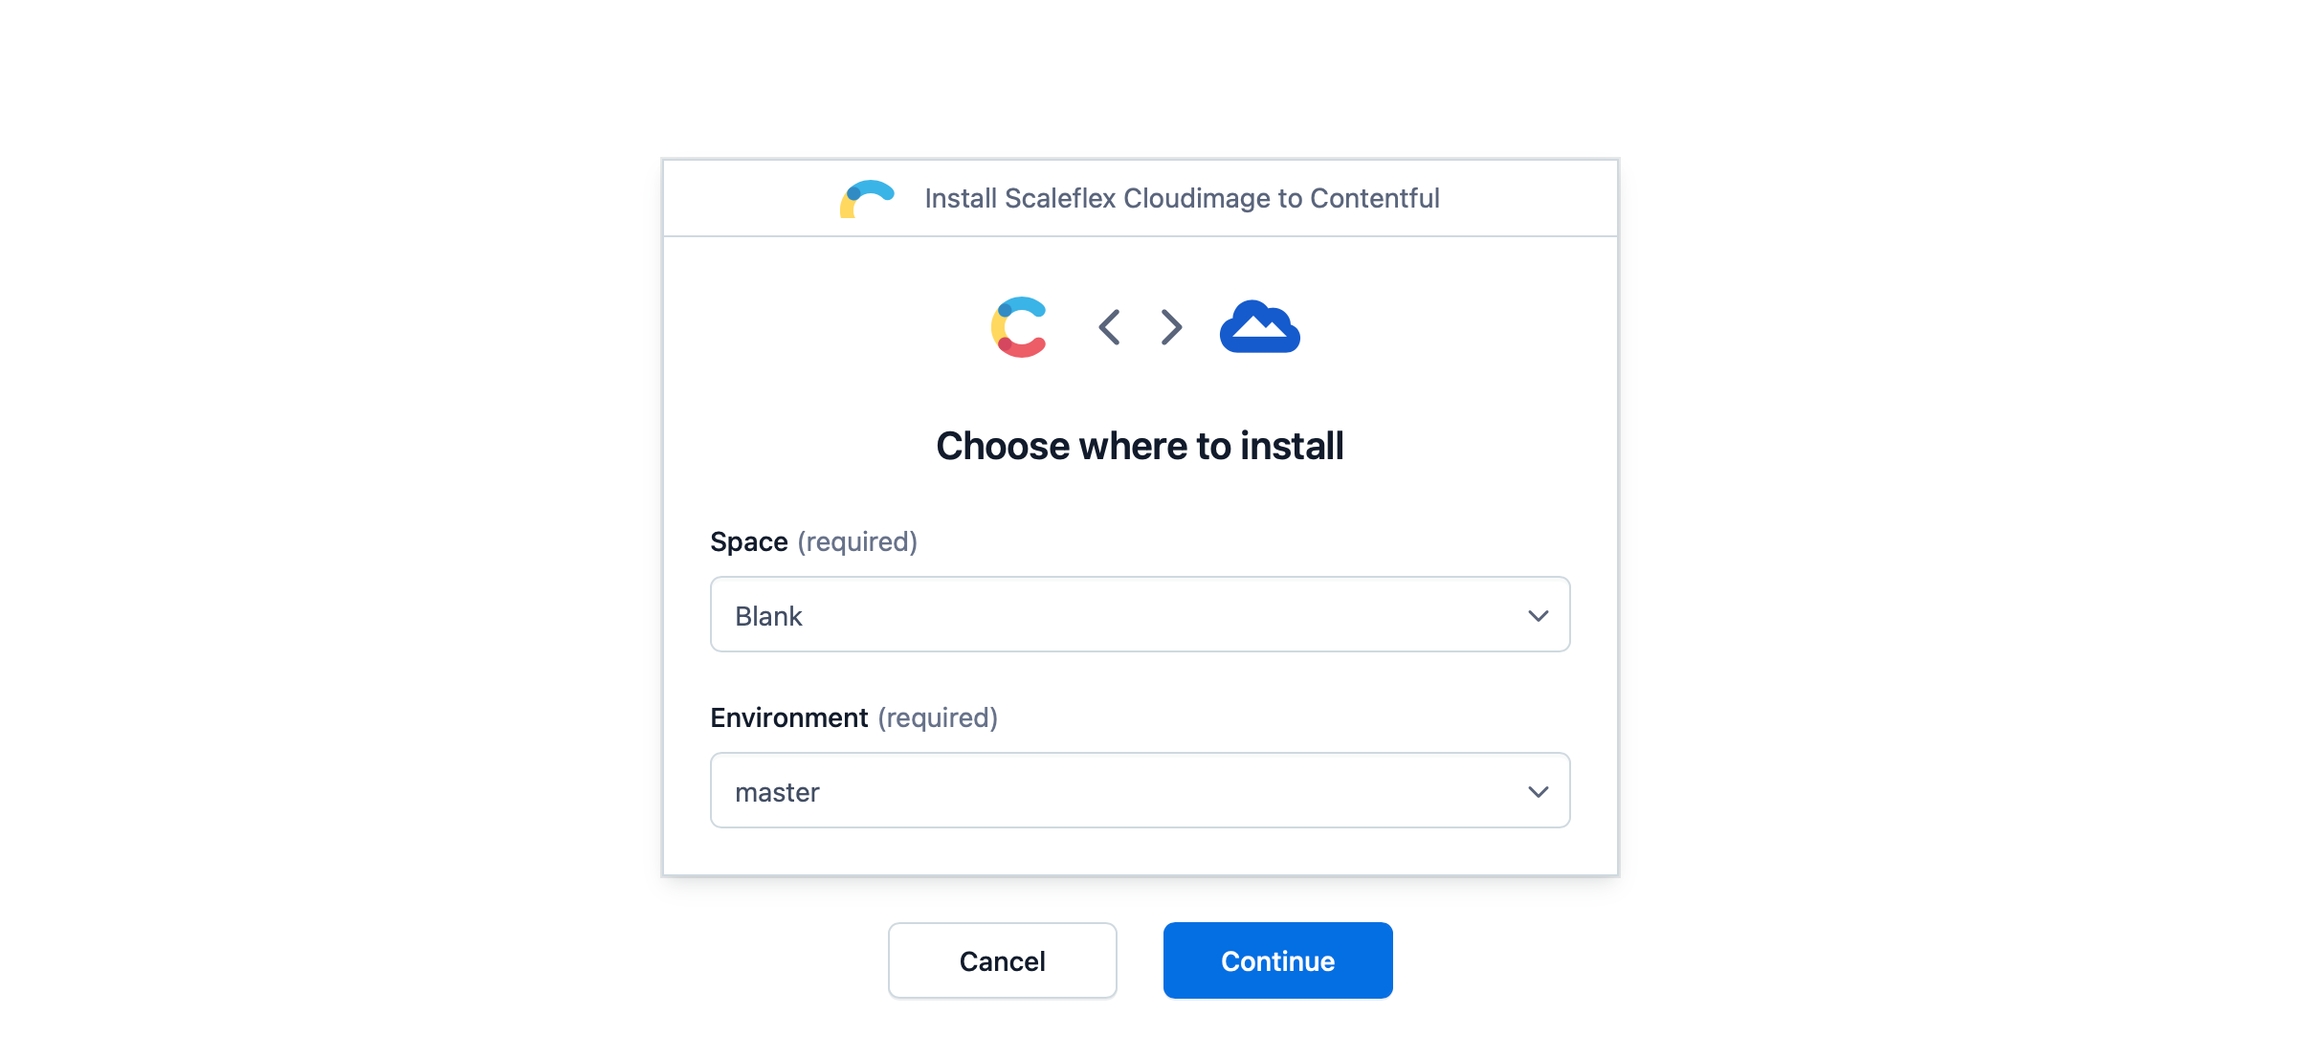
Or click "Install now" on
Then save and install.
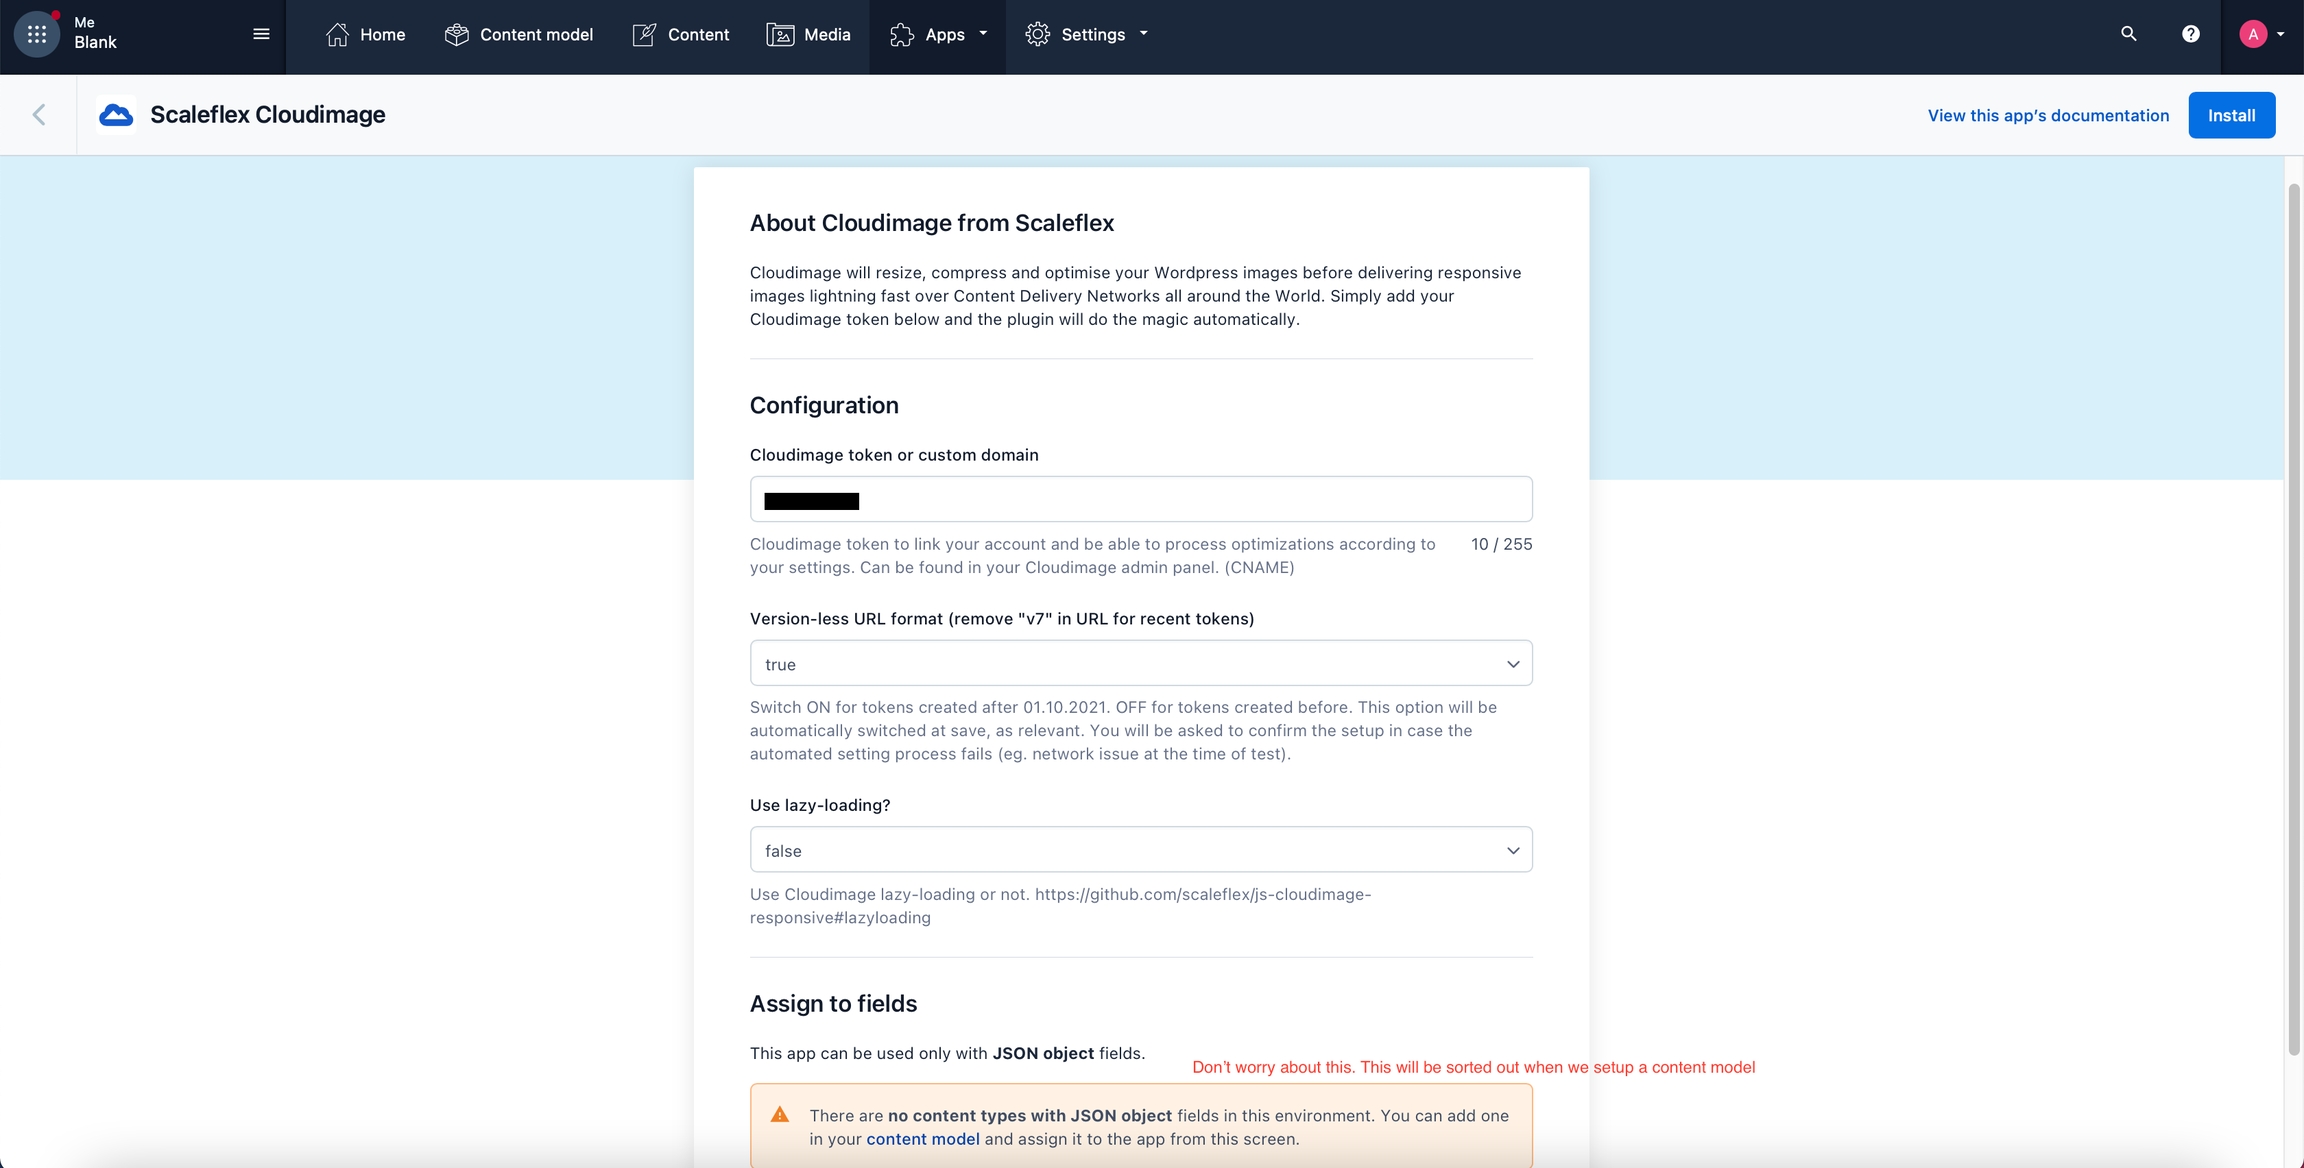
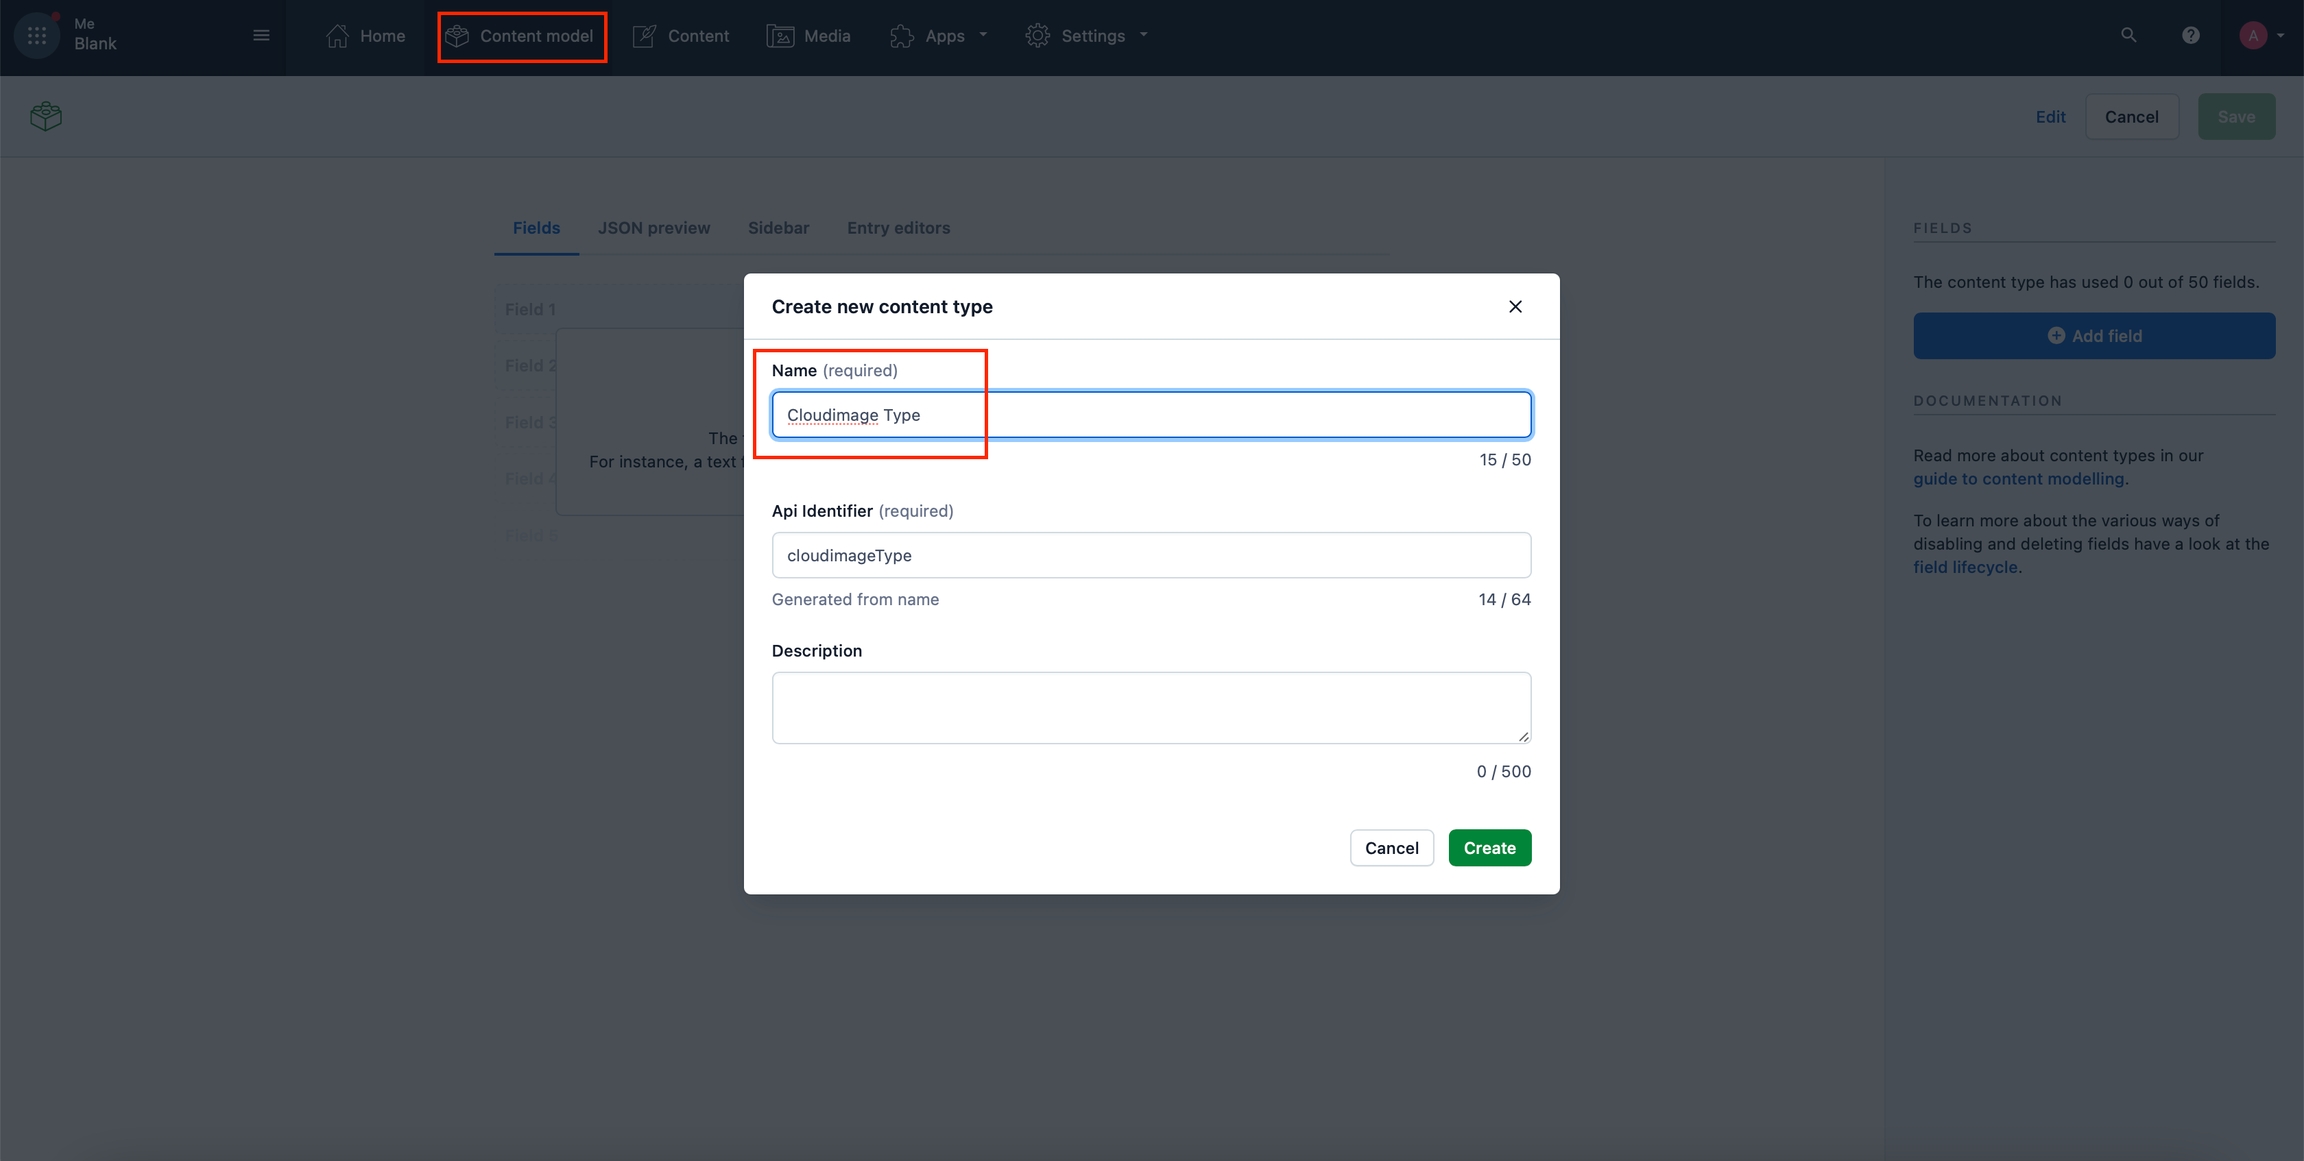
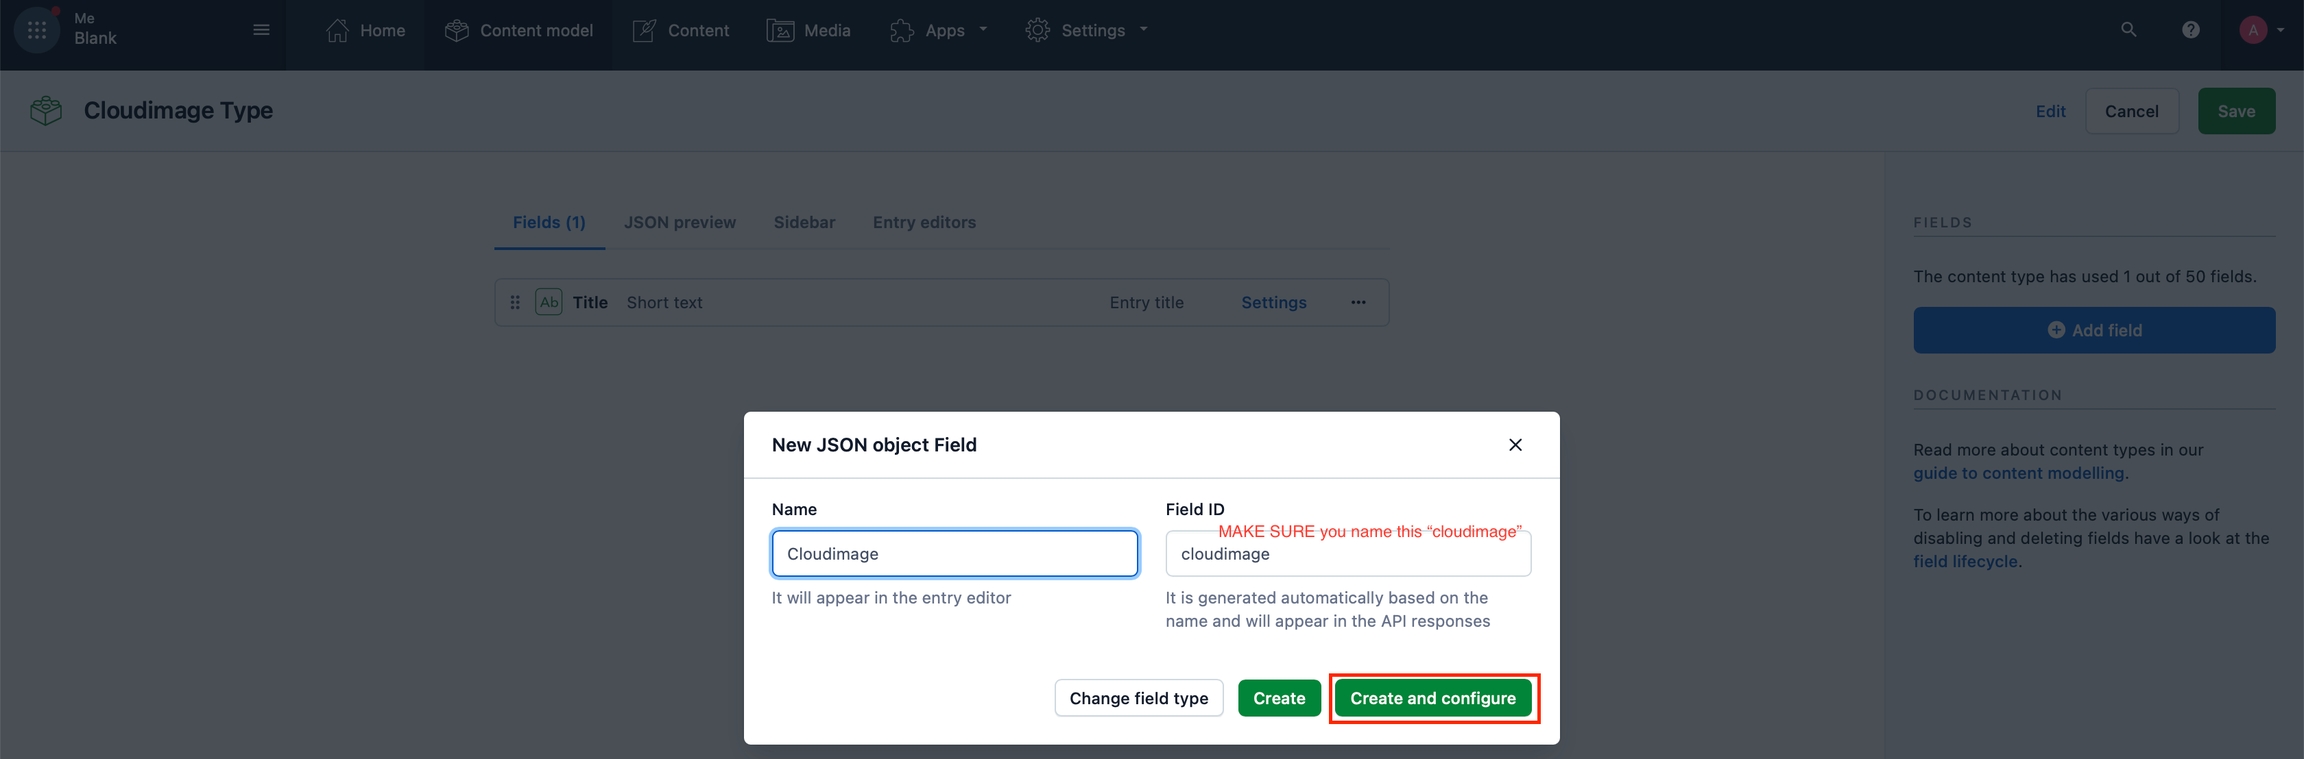
Absolutely important: The Field ID must be "cloudimage".
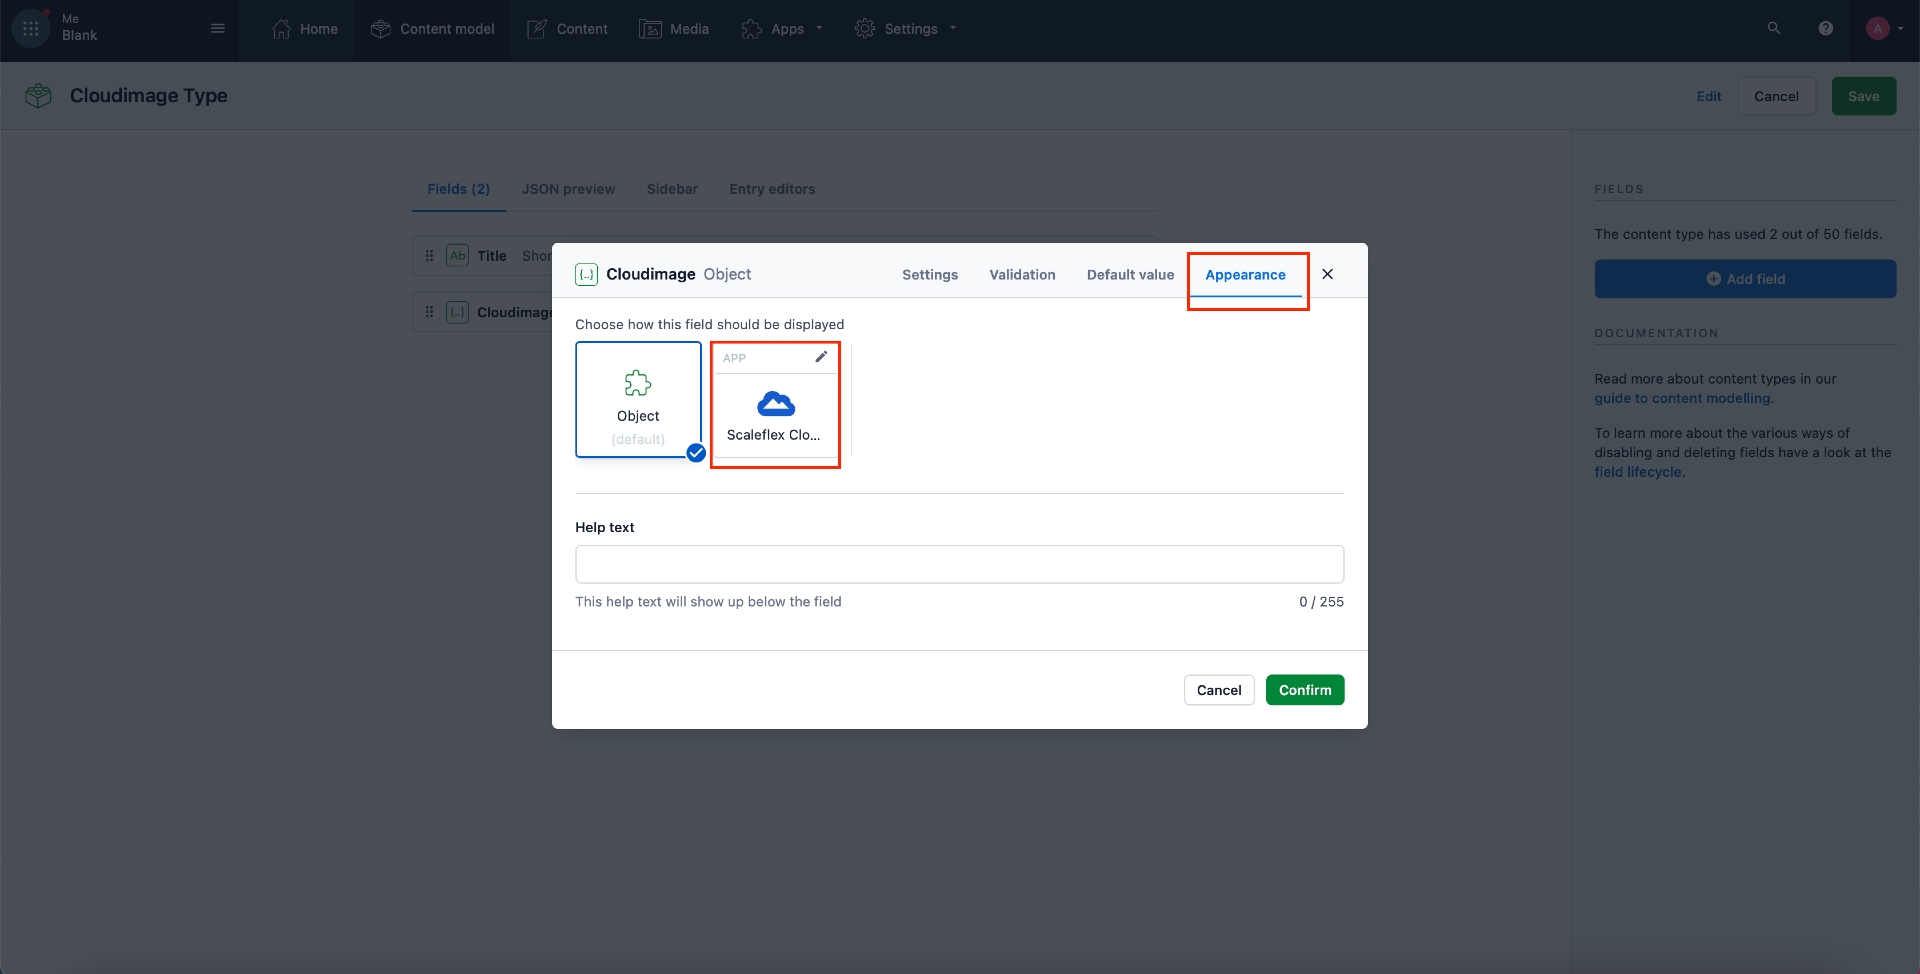
By doing the above, you will associate the Cloudimage field (the field that you named Cloudimage) to the Cloudimage App. Recall the warning message you saw during the app configuration stage "There are no content types with ..."? By doing the above, that will no longer be an issue.
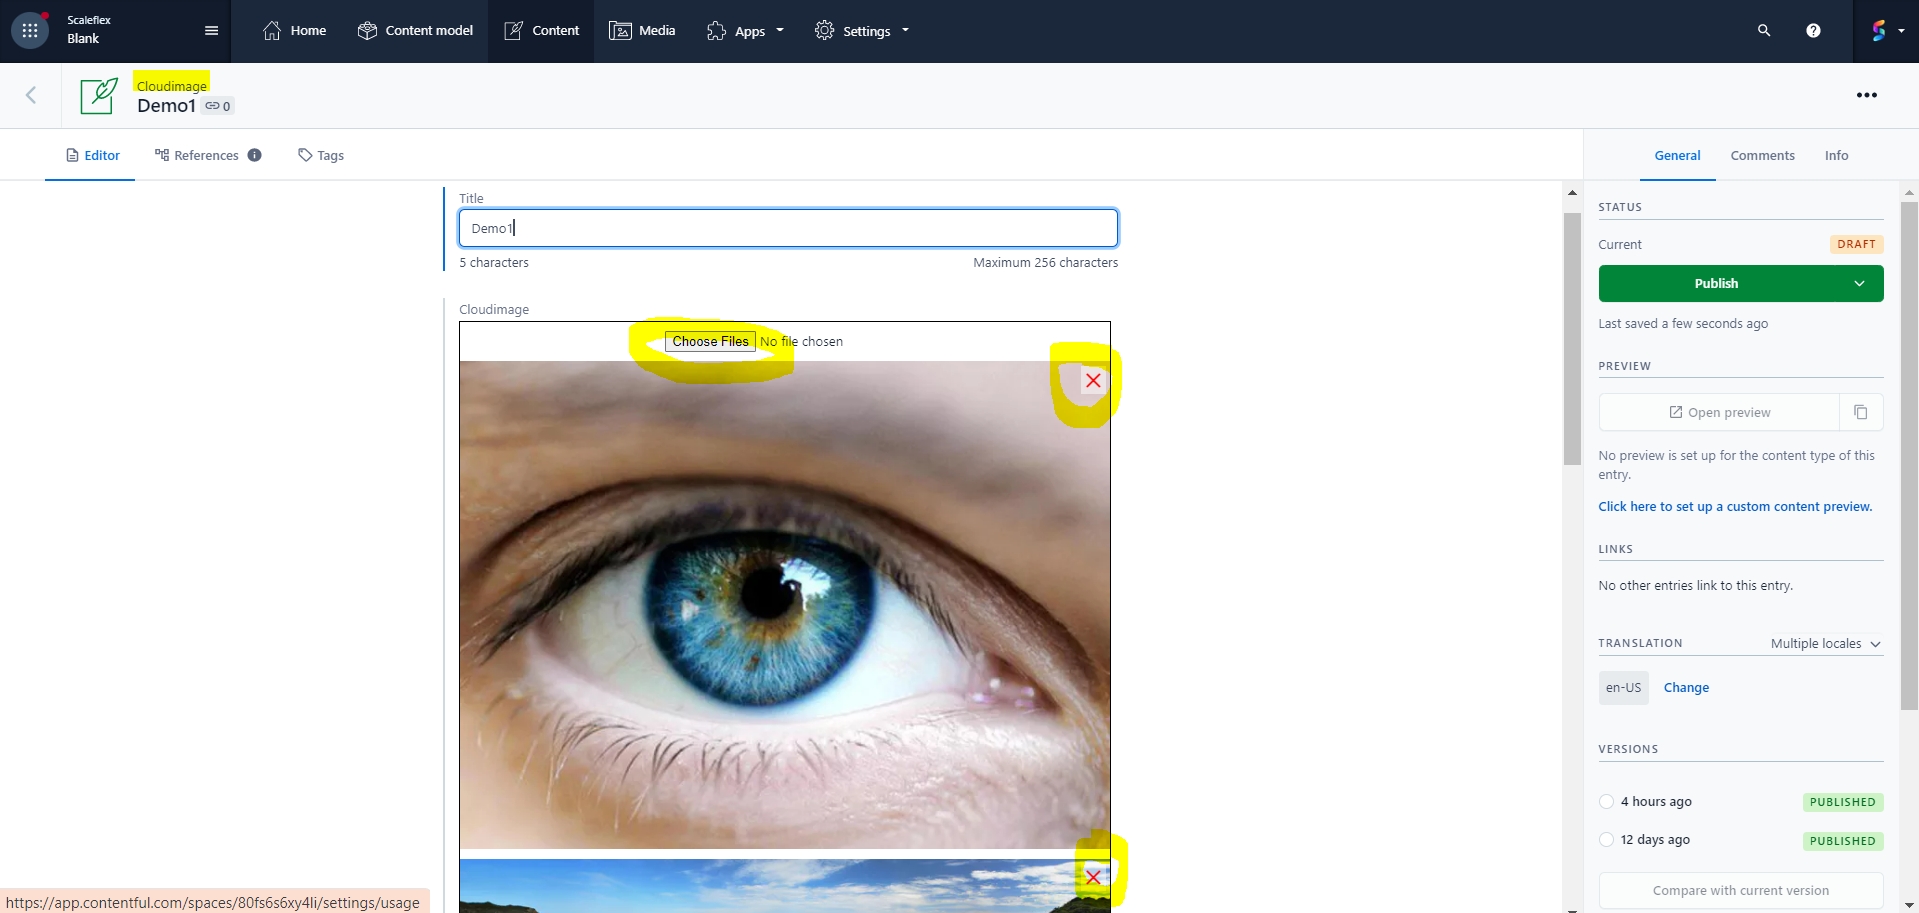
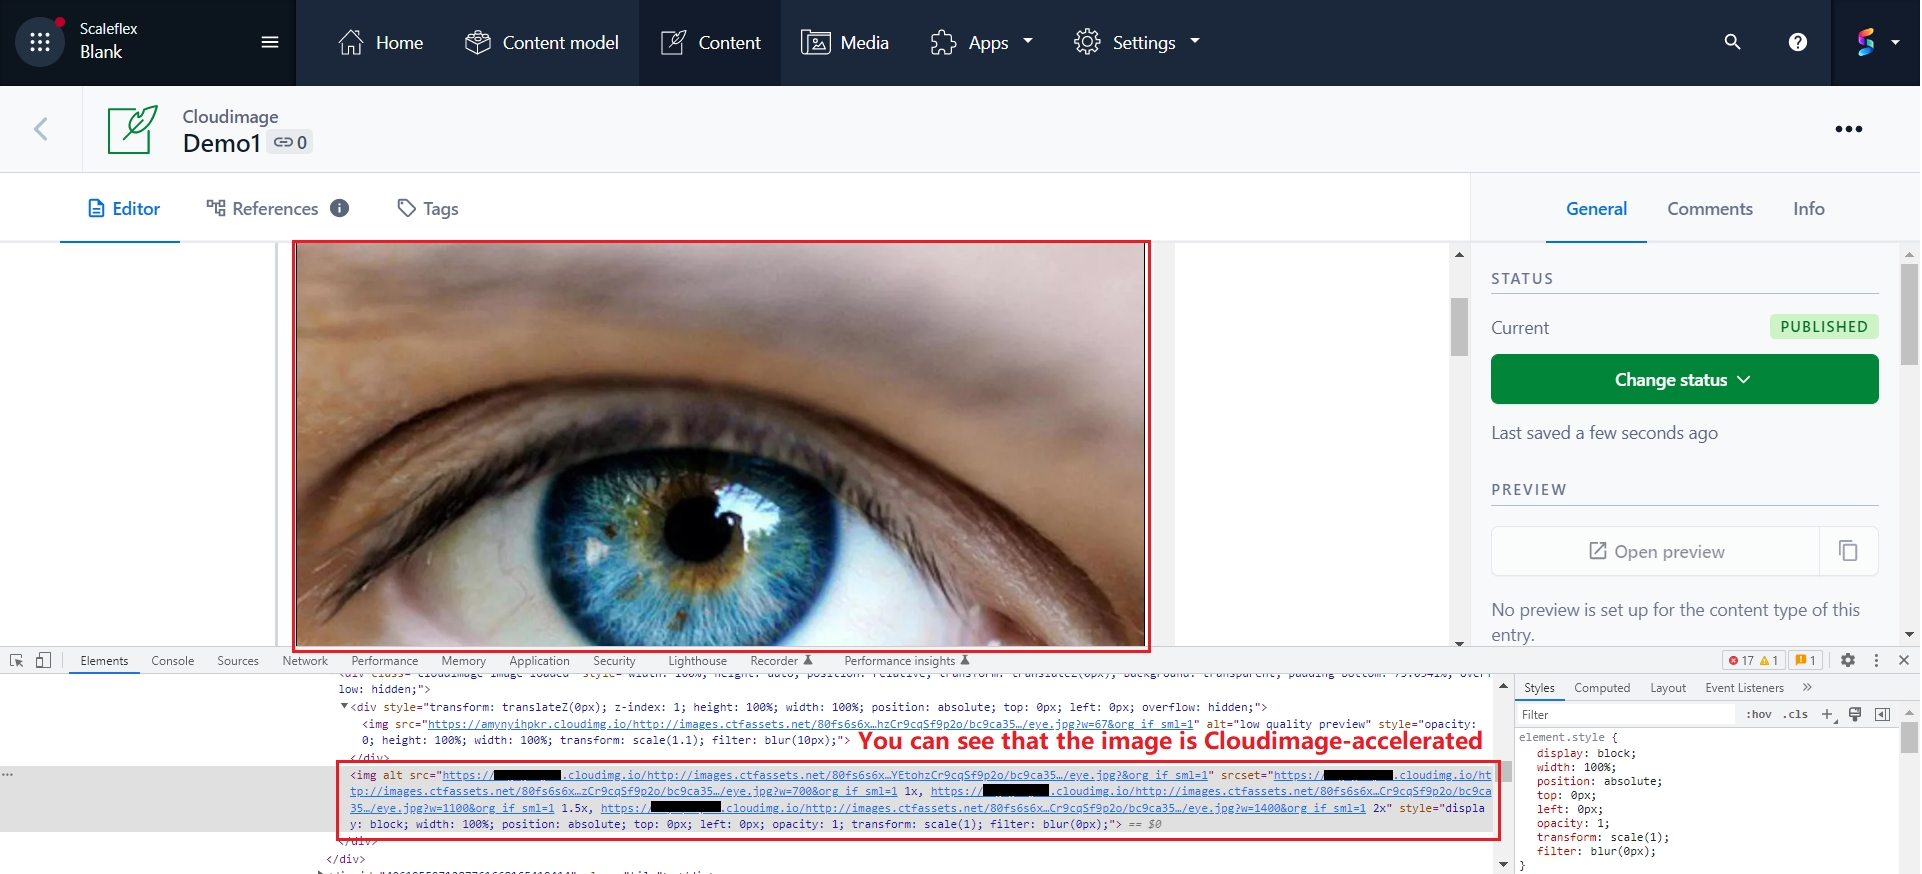
Now you can create a content item of Cloudimage type.
You can add and remove images.
Cloudimage will optimize those images in the background. (If you inspect in developer console, you will see the call to its infrastructure)
Shopify integration - frequently asked questions
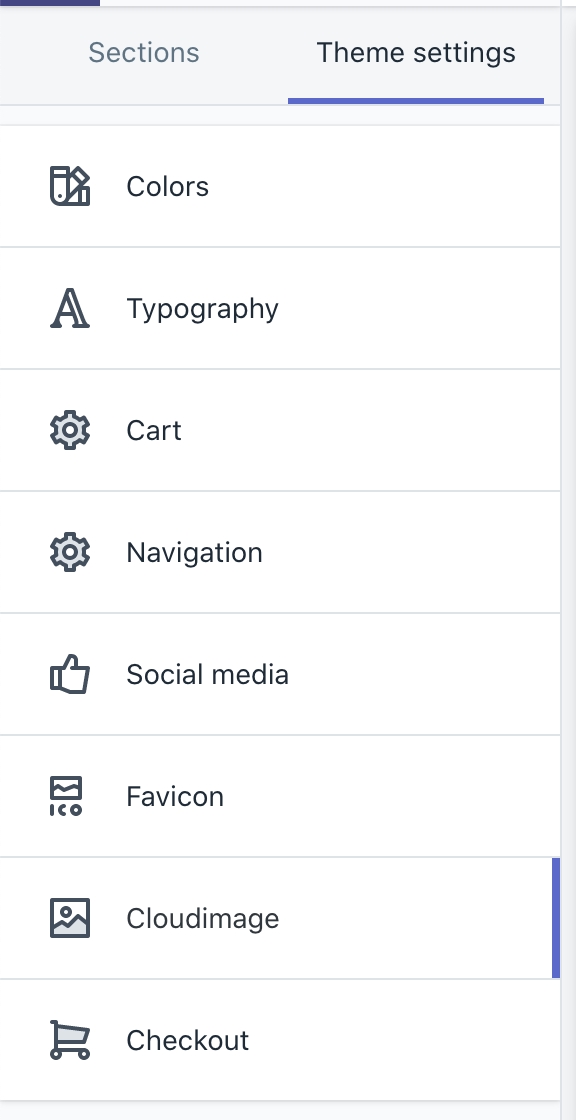
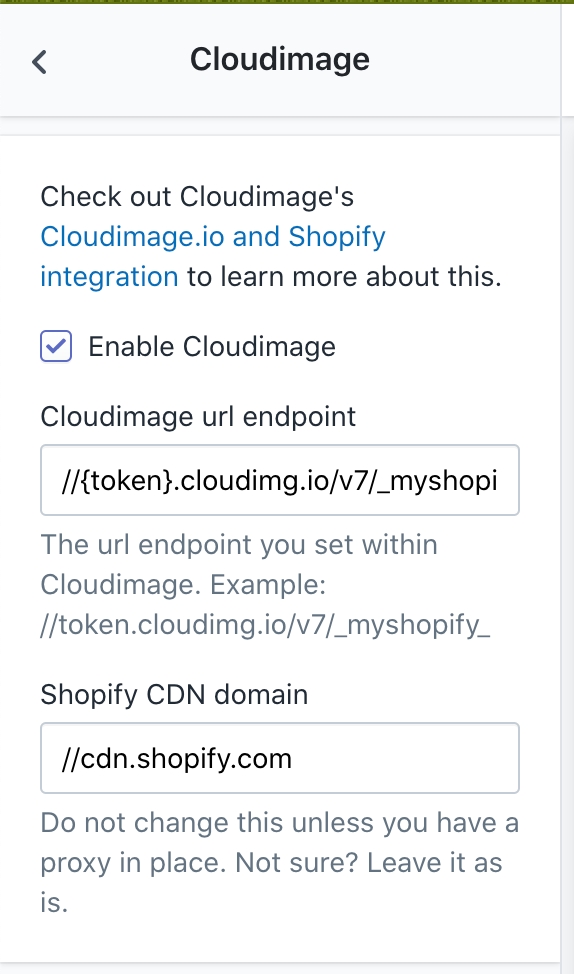
Can I disable Cloudimage with a single click?
Yes you can enable and disable Cloudimage on your Shopify store with a single click. Navigate to Online store > Themes > Customize theme. In the sidebar, under general settings open Cloudimage.io and enable/disable it.
Can Cloudimage automatically detect the right image dimension and load it?
No Cloudimage only changes the base URL of your images because there is no way the server would have knowledge of your website layout. However, just by loading images through Cloudimage URL-endpoint, your images are automatically optimised for format and quality.
How do I make sure my integration is working?
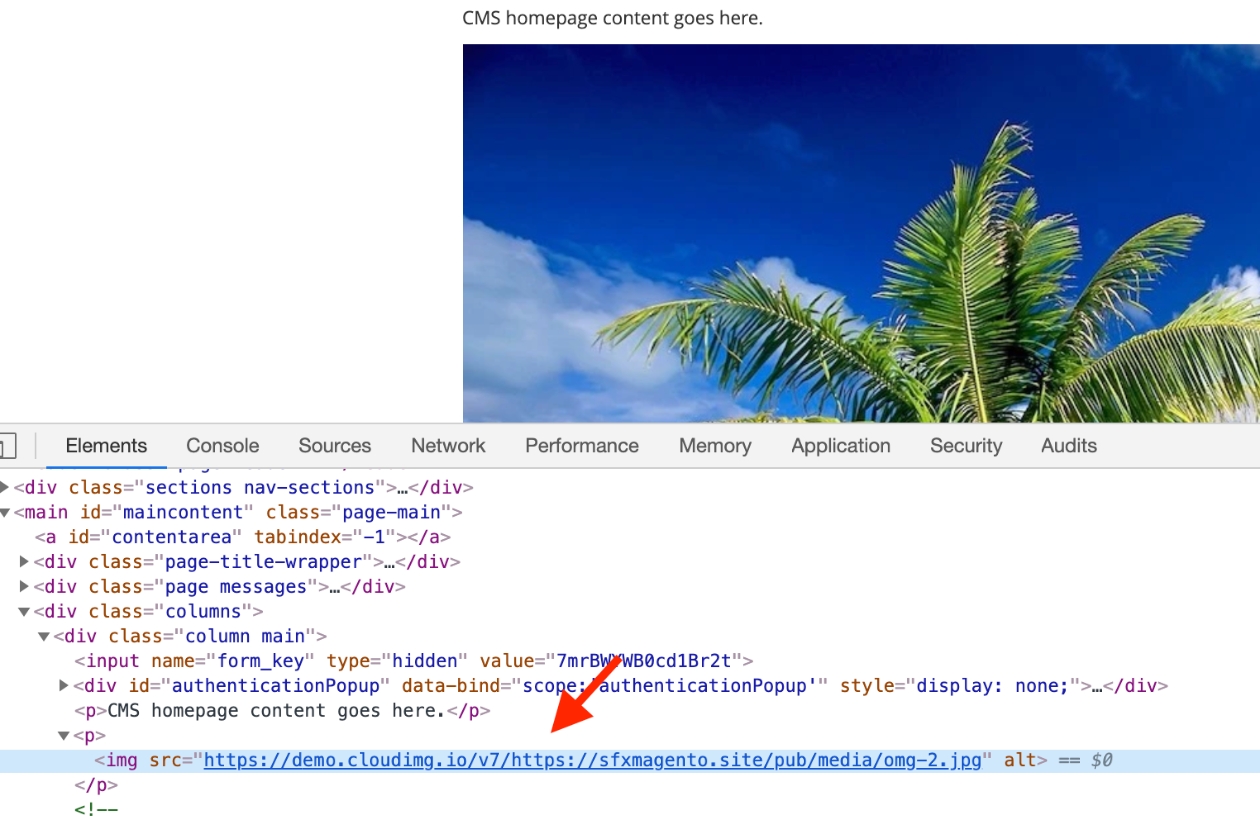
Once you are done editing these files, save these files. Now refresh the webpage for your Shopify store and check the image URLs. They should now load from URLs beginning with https://{token}.cloudimg.io/v7. You can use the Chrome Developer Tools to check that all the images are being loaded via Cloudimage.io and that all images are loading correctly. If you find that images on a particular page or section are still being served from Shopify, then find out the responsible theme file and edit it as well.
Magento simple implementation
This simple and fast implementation in Magento 2 enables JPEG optimization, WebP compression and CDN delivery of your images.
To use the plugin, you need to have a Cloudimage account. You can create one on the Cloudimage registration page.
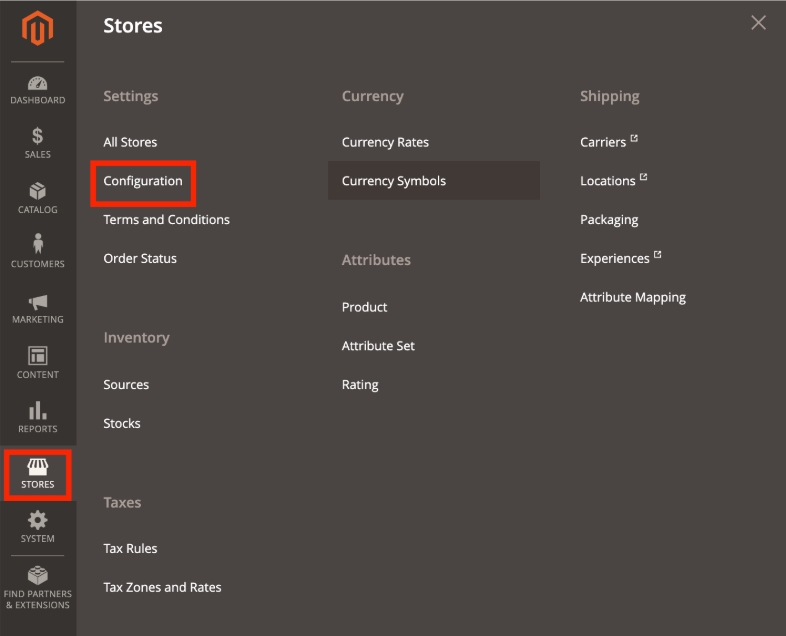
First, you need to log in to your Magento 2 website admin
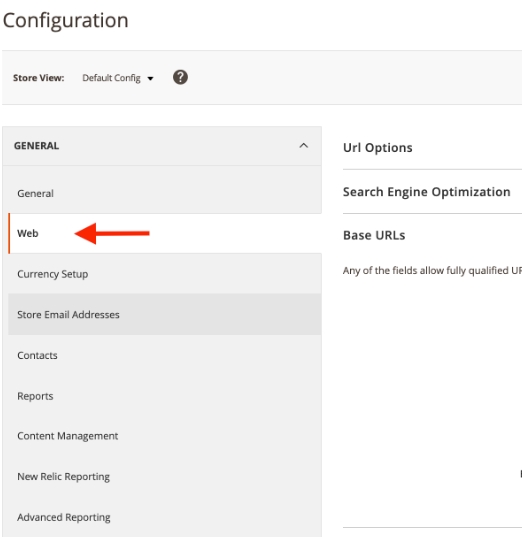
On the Admin sidebar, go to Stores > Settings > Configuration.
Navigate to the settings page - from the left panel, in the General group, choose Web.
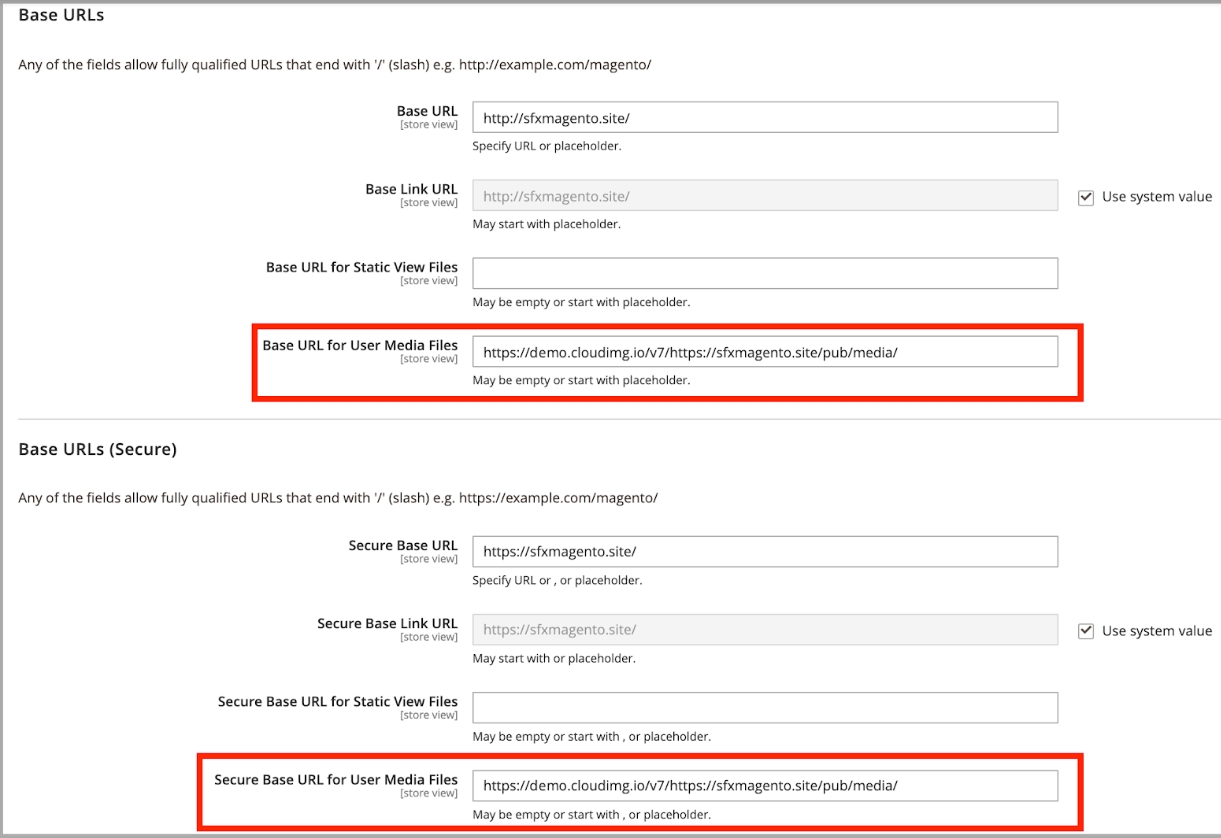
Then, you need to set up the Base URLs.
It is important to set this prefix in both - Base URL for User Media Files and Secure Base URL for User Media Files.
In Base URL for User Media Files in Base URLs and Base URLs (Secure) add the following value, replacing your token: https://<token>.cloudimg.io/{{secure_base_url}}pub/media/
For example, if your website is https://sfxmagento.site, and your token is demo, the final URL address should be: https://demo.cloudimg.io/https://sfxmagento.site/pub/media/
You can also use your own domain instead of {token}.cloudmg.io via CNAME records. Please and an engineer will help setting it up.
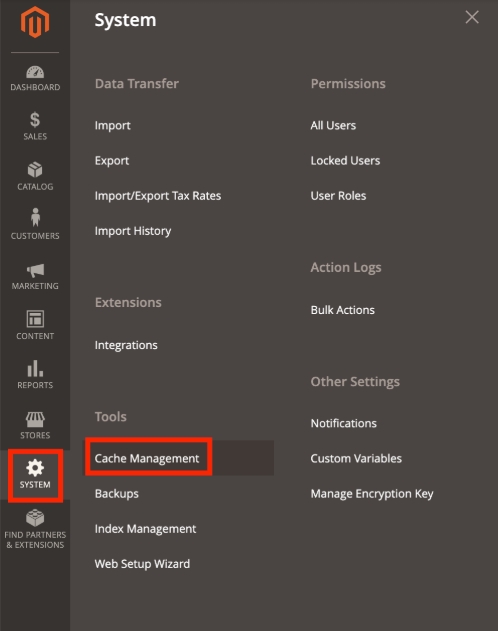
When complete, do not forget to click Save Config.
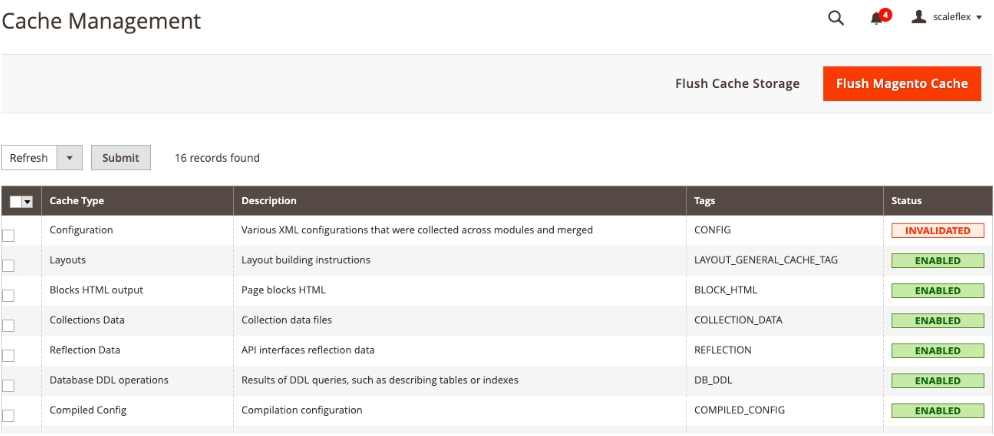
On the Admin sidebar, go to System > Tools > Cache Management and Flush the cache of Magento.
Magento’s cache management system is an easy way to improve the performance of your site. Whenever a cache needs to be refreshed, a notice appears at the top of the workspace to guide you through the process. Find additional information and tips in this .
Please ensure that you are properly delivering static content via the CDN.
You can now modify your template to resize your images with us.
Start up the Spryker shop and run:
composer require scaleflex/spryker-cloudimageTo get the package running, register the "Scaleflex" namespace into the config_default.php in the KernelConstants::CORE_NAMESPACES
Set these constants in the config, where it is needed. the BaseUrl and the ignoredUrlPaths need to be set according to the use case.
Register the Twig plugin in the Pyz\Yves\Twig\TwigDependencyProvider.php
Example
Use the TwigFilter for the images. Here is an example of how to extend the Pyz\Yves\ShopUi\Theme\default\components\molecules\lazy-image.twig. Everywhere this molecule will use Cloudimage and apply a grey filter.
How to use the plugin
Cloudimage documentation for the operations:
Cloudimage documentation for the filters:
Short clip optimization and transcoding for websites and web applications
Cloudimage helps you deliver videos faster and lighter by compressing high-resolution files and transcoding them for adaptive streaming. This feature is suited for short clips for websites and web applications such as hero videos or product videos.
Reduce the weight of your videos automatically upon upload. To set it up, go to Settings > Video Settings.
Automatic compression: toggle on to enable. Once done, Cloudimage will generate lower-resolution versions (1080p, 720p, 360p) in MP4 format for all videos stored in the Cloudimage Asset Library.
Target bitrate: default 400 Kbps
Cloudimage delivers compressed videos, ready to be played in any video player, including HTML5 native. This ensures faster load times, lower bandwidth usage, and smooth playback across devices.
For seamless viewing on any connection, Cloudimage can transcode your videos into HLS (HTTP Live Streaming) format. It automatically generates a manifest file compatible with players like .
Automatic transcoding: toggle on to enable. Once done, Cloudimage will transcode all videos after upload in the Cloudimage Asset Library.
This allows your audience to stream videos at the best quality their network can support, without buffering or manual adjustments.
Convert a specific page from a PDF document to an image
doc_page=X
When you provide a link to a PDF file, the first page is converted to an image and delivered via CDN. You can use all available resizing operations, image filters, watermarking capabilities, and image compression formats. To convert a specific page of the PDF document, use the doc_page=X option:
Crops by boundary coordinates
Allows to crop an image by providing the exact cropping area. It is useful when you want to crop a specific part of the image. To set the coordinates of the crop rectangle, use the tl_px and br_px operations or the X and Y Parameters are an alternative way to set the coordinates.
tl_px=X1,Y1
br_px=X2,Y2 X=X1 Y=Y1
Resize and crop to achieve the desired width and height
Resizes and crops the image to specified dimensions (width and height) while keeping proportions. The resulting image is then compressed and delivered via CDN.
func=crop
Use short pre-defined aliases for different origin servers
Aliases are a very easy way to hide parts of your URLs: They can be useful if your images come from different image repositories (for example: https://static.mycompany.com/bucket/img) and you do not wish these repositories to be publicly shown in your code. If you use only one repository for all your images, you can alternatively use .
With aliases, you can easily "mount" src0 to static.mycompany.com/bucket/img.
Migrating from another Image CDN
If your are transferring your image optimisation and CDN service from another provider, Cloudimage provides an easy way to migrate your images without code changes.
By migrating to Cloudimage, your images will need to be downloaded from their origin and cached by Cloudimage. Make sure your origin is able to process the initial load or to perform a warm-up.
Go back to the Cloudimage Console to finish the configuration.


Use origin URL
If enabled, the module will only add query parameters to the image source URL without prefixing it with {token}.cloudimg.io. This is required if you use a dedicated subdomain for delivering your images (media) in Magento. You will need to enable a custom CNAME in Cloudimage.
Ignore Image Size Node
Useful for improving compatibility with some themes.
Ignore Image Size Style
Useful for improving compatibility with some themes.
Lazy Loading
If enabled, images will be lazy-loaded for better loading times and user experience.
Inject Custom JS function
If enabled, you will be able to customize the JS function used to get the DOM information dynamically.
Custom JS function
The JS function to customize Cloudimage library.

$config[KernelConstants::CORE_NAMESPACES] = [
'Scaleflex',
...
];If your image is currently delivered via:
Then you need to replace the FQDN from yourdomain.provider.com to token.cloudimg.io/ for the <img src> to become:
If your image is currently available at http://token.provider/operations/sample.li/flat.jpg and referenced in your code as:
Then you need to adapt it to be:
Where:
token: your Cloudimage token you obtain after registering for a Cloudimage account
operations: the resizing operation(s) as listed under Image operations
filters: the filter transformation(s) as listed under Image filters
If your image is currently delivered via:
If your image is currently delivered via:
In both scenarios, migrating to Cloudimage only requires the change of your CNAME record for img.domain.com on your DNS provider.
Where:
token: your Cloudimage token you obtain after registering for a Cloudimage account
operations: the resizing operation(s) as listed under Image operations
filters: the filter transformation(s) as listed under Image filters
Cloudimage supports multiple image transformations format, contact us to discuss your migration project.
composer config repositories.cloudimage vcs https://github.com/scaleflex/magento-cloudimage-responsive
composer require cloudimage/module-responsive-plugin --sort-packagesphp bin/magento module:enable Cloudimage_Responsive
php bin/magento setup:upgradehttps://app.contentful.com/spaces/{Your Space ID}/homeuse Scaleflex\Shared\Cloudimage\CloudimageConstants;
$config[CloudimageConstants::TOKEN] = '{{YOUR_TOKEN}}';
$config[CloudimageConstants::BASE_URL] = 'http://yves.de.spryker.local';
$config[CloudimageConstants::IGNORED_URL_PATHS] = ['http://yves.de.spryker.local'];/**
* @return \Spryker\Shared\TwigExtension\Dependency\Plugin\TwigPluginInterface[]
*/
protected function getTwigPlugins(): array
{
return [
...
new CloudimageTwigPlugin(),
];
]{% block body %}
{% set data = data | merge({'imageSrc': data.imageSrc | cloudimage({}, {grey: 1}) }) %}
...
{% endblock %}cloudimage({YOUR_OPERATIONS}, {YOUR_FILTERS})<img src="https://yourdomain.provider.com/{image_url_or_path}?operations&filters" /><img src="https://token.cloudimg.io/{image_url_or_path}?operations&filters" /><src="http://img.provider.com/{token}/{operations}|{filters}/{path_fo_folder}/flat.jpg" /><src="https://token.cloudimg.io/v7m/{operations}|{filters}/{path_fo_folder}/flat.jpg" /><img src="https://img.domain.com/{image_url_or_path}?operations&filters" /><src="http://img.domain.com/{token}/{operations}|{filters}/{path_fo_folder}/flat.jpg" />crop operation - gravity is set to the trimmed edges so that the image is not cropped anymore on the trimmed edges.
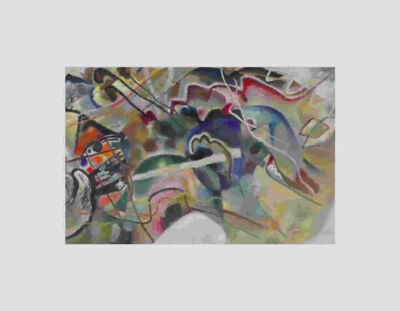
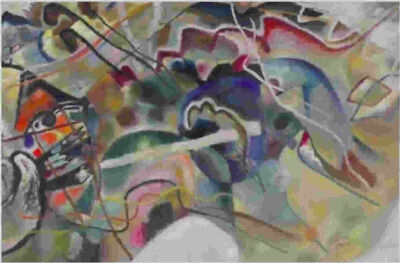
Original image: /samples.scaleflex.com/painting_big.jpg?w=400
Trimmed image: /samples.scaleflex.com/painting_big.jpg?w=400&trim=10
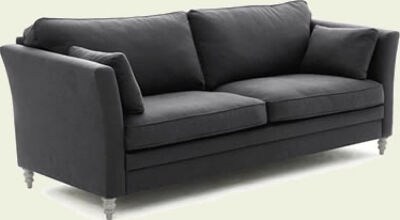
Original image: /samples.scaleflex.com/sofa.jpg?w=400
Trimmed image: /samples.scaleflex.com/sofa.jpg?w=400&trim=10
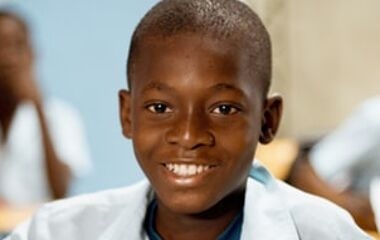
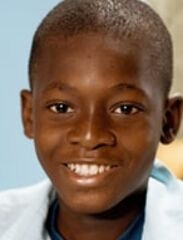
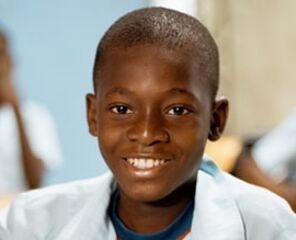
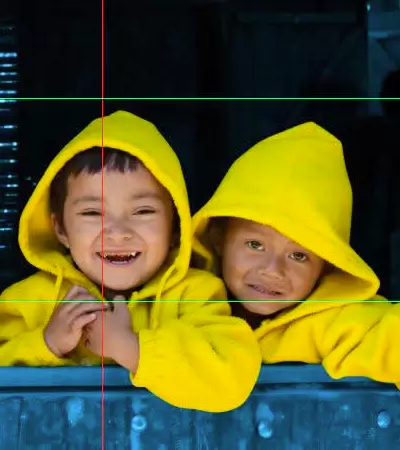
Origin image: /docs/kids.jpg
Positionable crop is a separate operation can be combined with all available resize functions - Width and height, Crop, Fit, Bound and Cover. This resize is always performed after the positionable crop.
Specifies which part of the image you wish to keep while cropping. If you omit the gravity option, central cropping is performed.
gravity=X
northwest
north
northeast
west
center | centre (default)
east
southwest
south
southeast
auto -
face -
smart -
X,Y -
Log in to your Cloudimage admin console, navigate to Image settings, and scroll down to Aliases. Configure up to 10 aliases:
All aliases have to be prefixed and suffixed by underscores. Make sure there are no leading or trailing slashes. Please note that all aliases have to be unique for your account - aliases set in the alias section cannot be used in the Storage sections (see Connecting storage bucket).
Due to the specific way aliases are matched, it is required to use only specific aliases that are not contained in part of other alias strings.
Example: If you define an alias _demo_one_ then you should not have:
_demo_
_demo_one_two_
_my_demo_one_
As those would all be matched according to the first overlap (in this example, _demo_). An easy way to overcome this is by both prefixing and suffixing aliases with double underscores.
Without Alias
With Aliases
use watermark
wat=1
(required) Activates the watermark function
watermark URL
wat_url=X
(required) The URL of the watermark image. Can be URL-encoded
watermark gravity
wat_gravity=X
X=[north|south][east|west]|center|
absolute|relative
Defines the position to "anchor" the watermark to
watermark scaling (relative to original watermark size)
wat_scale=X
X=0..100
Watermark image scaling defined in in percent of the watermark dimensions
watermark scaling (relative to output image size)
wat_scale=Xp
X=0..100p
Watermark image scaling defined in in percent of the output image dimensions
watermark padding
wat_pad=X[p][,Y[p]]
X/Y=0..100[p]
Adds padding from the anchoring point in pixels (X) or in percent (Xp)
watermark position
wat_pos=X[,Y]
sets the position in percent from the resized image; works only with wat_gravity=absolute and wat_gravity=relative
watermark opacity
wat_opacity=X
X=0..1
Defines watermark opacity
Standard crop: /samples.scaleflex.com/business-portfolio.jpg?w=400&h=300
Face crop with automatic aspect ratio: /samples.scaleflex.com/classroom.jpg?h=240&func=face
Allow upscaling (default): /samples.scaleflex.com/ny_doc.jpg?w=450
Prevent upscaling: /samples.scaleflex.com/ny_doc.jpg?w=450&org_if_sml=1
optipress=1
most conservative setting; image quality is prioritised
optipress=2
balanced setting
optipress=3
most aggressive setting; optimised for smaller file size
q=85, 543 kB: /samples.scaleflex.com/paris.jpg?force_format=jpeg&q=85 optipress=3, 347 kB: /samples.scaleflex.com/paris.jpg?force_format=jpeg&optipress=3
q=85, 246 kB: /samples.scaleflex.com/boat.jpg?force_format=jpeg&q=85 optipress=3, 150 kB: /samples.scaleflex.com/boat.jpg?force_format=jpeg&optipress=3


Apply image effects and adjustments
Filters allow you to modify images on the fly by applying different effects.
Most of the on-the-fly image transformations can be configured using the Asset Variation Builder, an in-line URL builder to preview each image transformation instantly.
To use more than one filter, you can either use separate parameters or concatenate them with commas into the f parameter:
Automatically detects the focal point
Chooses the most important image features and objects and sets the focal point on them when cropping.
gravity=smart
gravity=auto
gravity=face
Sets the crop focal point on the people in the image or on the most prominent features if no faces are detected. Useful for creating thumbnails from images with different aspect ratios.
Setting the gravity parameter to auto finds the focal point of the image based on entropy.
When using gravity=face, all images with one dominant face are focused on this face upon cropping. If there are many or no faces in the image, gravity falls back to auto.
Short clip resizing and delivery for websites and web applications
Cloudimage offers on-the-fly video processing with delivery via CDN using the Cloudimage URL for seamless integration. This feature is suited for short clips for websites and web applications such as hero videos or product videos.
Input files are limited to 500 MB, 4k resolution and maximum 60 seconds length. For longer videos, only the first minute will be optimized and delivered, resulting in a trimmed video.
//token.cloudimg.io/original_image_url.mp4?w=600&format=auto
Direct implementation using the Cloudimage URL API
If your Web application does not use a CMS (Wordpress, Drupal, ...), e-commerce platform (Prestashop, Magento, ...), or development framework (React, Angular, Django, ...), then you need to adapt your image URLs in your HTML <img> tags.
For example, if your origin image is available at the following URL::
https://samples.scaleflex.com/flat.jpg
Then you need to adapt it to be:
//token.cloudimg.io/https://samples.scaleflex.com/flat.jpg?operations&filters&watermarks
Where:
token: your Cloudimage token you obtain after registering for a Cloudimage account;
operations: the resizing operation(s) as listed under ;
filters: the filter transformation(s) as listed under ;
In your code, this URL can be used as a normal image in your <img> elements:
If you have implemented responsive design with the HTML <picture> and <srcset> elements, then you need to change every <srcset>:
Becomes:
You need to define the image size with operations1 and operations2 to deliver the lightest possible image. If you want Cloudimage to do the job for you and define the optimal size based on your container width, then look at our , and plugins.
ci_url_encoded=1
If a resource is versioned or dynamically generated using query strings, or the filename contains unsupported or reserved characters, you will need to url-encode the URL of the resource. In this case, you need to add the ci_url_encoded=1 parameter to the Cloudimage URL.
For example, in the origin below, the ?w=22 query string is part of the static resource (origin image):
To construct a Cloudimage URL from it, the resource is URL-encoded and the width operation can be now used correctly:
When using ci_url_encoded=1 to encode URLs with space in the filename, please consider the example: Image: https://freeaccessdemo.blob.core.windows.net/myfiles/Image with space in the name.jpg
Need to be encoded according to RFC-3986 (percent-encoding):
And if for example, we have extra values added to the origin resource like v=13, the final Cloudimage URL will look like this:
The following approach can be used in this case:
Cloudimage Drupal module
You can install the Cloudimage module from Github or by using Packagist.
Step 1: Download the latest version
Step 2: Extract the zip file at location "/modules"
Step 3: In Admin go to Extend -> find Cloudimage by Scaleflex -> Install
Step 1: Run "composer require 'drupal/cloudimage_by_scaleflex:^1.0'"
Step 2: In Admin go to Extend -> find Cloudimage by Scaleflex -> Install
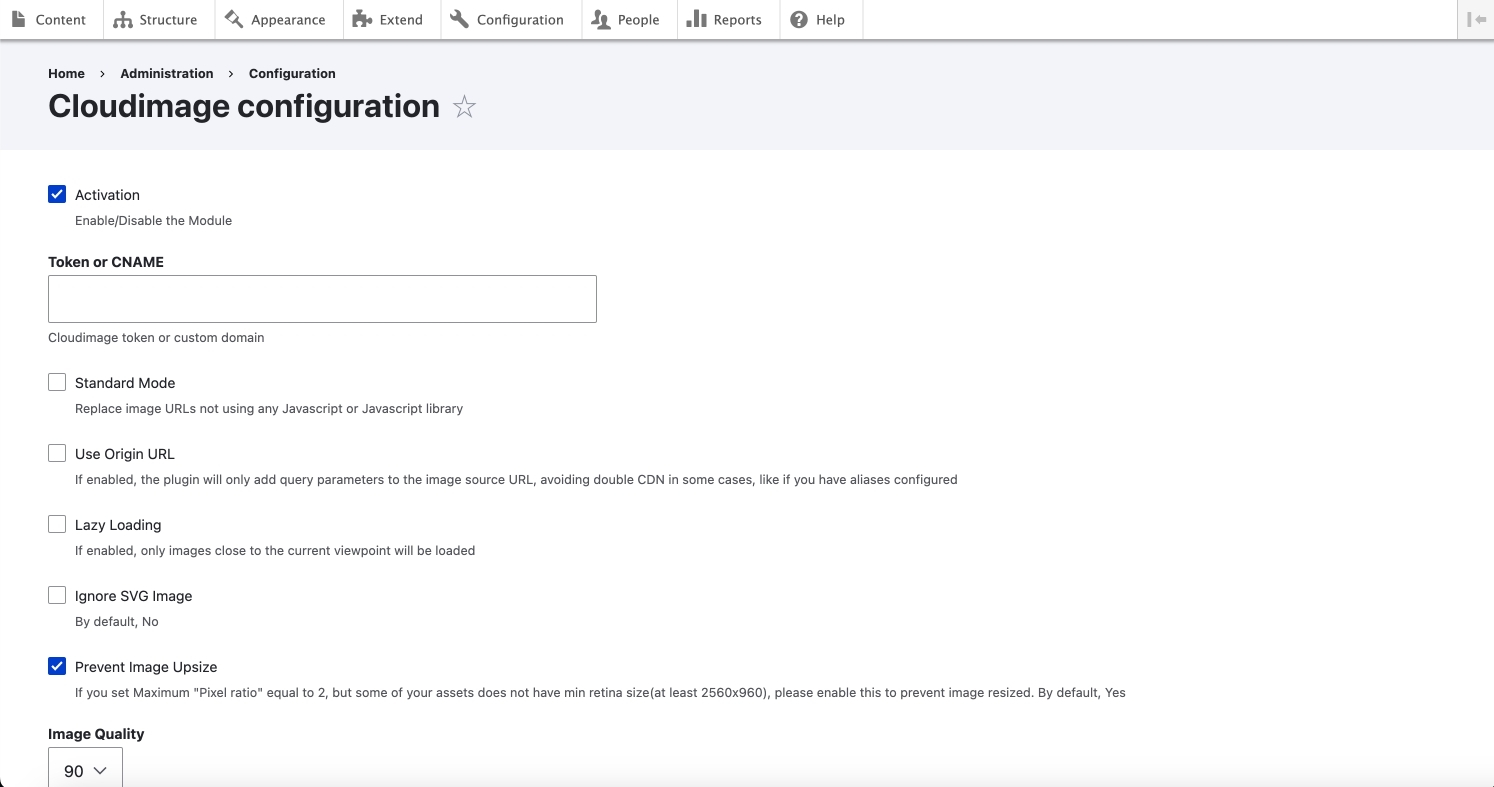
Activation: Enable/Disable the module
Standard Mode: Replace image URLs not using any Javascript or Javascript library.
Token or CNAME: Please enter your cloudimage token here (eg: abcdefgh), or your complete CNAME (eg. media.company.com) if the configuration is already validated in your Cloudimage Admin.
Custom JS Function: The valid js function starting with { and finishing with }
Custom Library Options: Modifies the library URL (to add transformations)
Cloudimage Prestashop module
The Cloudimage Prestashop Module will automatically adapt the image URLs in your Prestashop Theme to deliver your images rocket fast over the Cloudimage multi-CDN infrastructure. You only need to register with Cloudimage and install the plugin in your Prestashop Admin.
First, you need to have a Cloudimage account. You can create one on the .
Download the latest version
Unzip the file and change the folder name to "cloudimage"
Zip the file with the name "cloudimage.zip"
In Admin go to Modules/Module Manager -> Upload the Zipped file
In Admin go to Modules/Module Catalog search for "Clouldimage by Scaleflex"
Click "Install"
Go to Modules/Module Manager -> Other Section -> Click on Configure on "Cloudimage by Scaleflex"
Update configuration and activate the Module, then your site is ready to go. (Please clear the Cache)
Activation: Enable/Disable the module
Cloudimage API Key: Your Cloudimage Token
Prerender: If enabled, the plugin will disable JS Responsive and Change URL to {token}.cloudimg.io/{origin_url}
Auto Base URL Image: If enabled, Production with SSL only, The Plugin auto add base url to some missing Base URL Images
Advanced User
Custom JS Function: The valid js function starting with { and finishing with }
Custom Library Options: Modifies the library URL and must begin with the symbol &. Please read document before use.
Please note: if you are using an earlier version of Prestashop (v1.6.x or less) and / or this plugins is not compatible with some of your add-ons, it is always possible to make a manual integration of the Cloudimage acceleration, following the .
Scaleflex VXP Akeneo App
Once installed and connected, Cloudimage by Scaleflex seamlessly enhances your Akeneo product images through real-time image optimization and CDN delivery.
Here’s how it works:
Image Fetching: Cloudimage fetches your original product images directly from Akeneo via secure URLs. You can choose between public or authenticated (Basic Auth) endpoints for accessing media.
Image Optimization on the Fly: Each image is processed in real-time via the Cloudimage CDN. Optimization includes automatic WebP/AVIF conversion, resizing, cropping, quality tuning, and lazy loading – all based on your configuration or URL parameters.
Delivery through a Global CDN: Optimized images are delivered via Cloudimage’s ultra-fast global CDN. This ensures instant load times, performance gains, and bandwidth savings for your PIM users, storefronts, or connected systems.
Smart Caching & Transformation Control: All transformations are cached at edge locations, and you remain in full control of presets, filters, and security (token-based protection, signed URLs, etc.).
Compatible with Headless & Omnichannel Setups: Whether you are delivering images to a traditional storefront or a headless frontend (React, Vue, etc.), Cloudimage ensures every product image is delivered in the right format, size, and quality – instantly.
Once the application is activated, the access token is displayed only once for security reasons. If you leave or refresh the page without copying the token, it will no longer be accessible.
In such a case, you will need to re-activate the app in order to generate a new access token.
We recommend copying and storing the token securely immediately after activation to avoid any disruption.
Scaleflex DMO, integrated with Akeneo, enables seamless management, optimization, and distribution of images, videos, and digital assets across all channels. Assets are automatically standardized, compressed, enriched with metadata, and delivered via CDN — enhancing visual performance and accelerating time-to-market.
You need an active DMO account. if you don't already have one.
Log in to your Akeneo instance
Go to Connect - App store, search by name: "Scaleflex", App name: "Cloudimage by Scaleflex"
Click Connect: You will grant all permissions for the Akeneo App
When activation is done, you will be redirected to the "Scaleflex DMO Success Connected"
In the "Scaleflex DMO Success Connected", follow the steps in the guide:
Step 1: Copy the Access Token
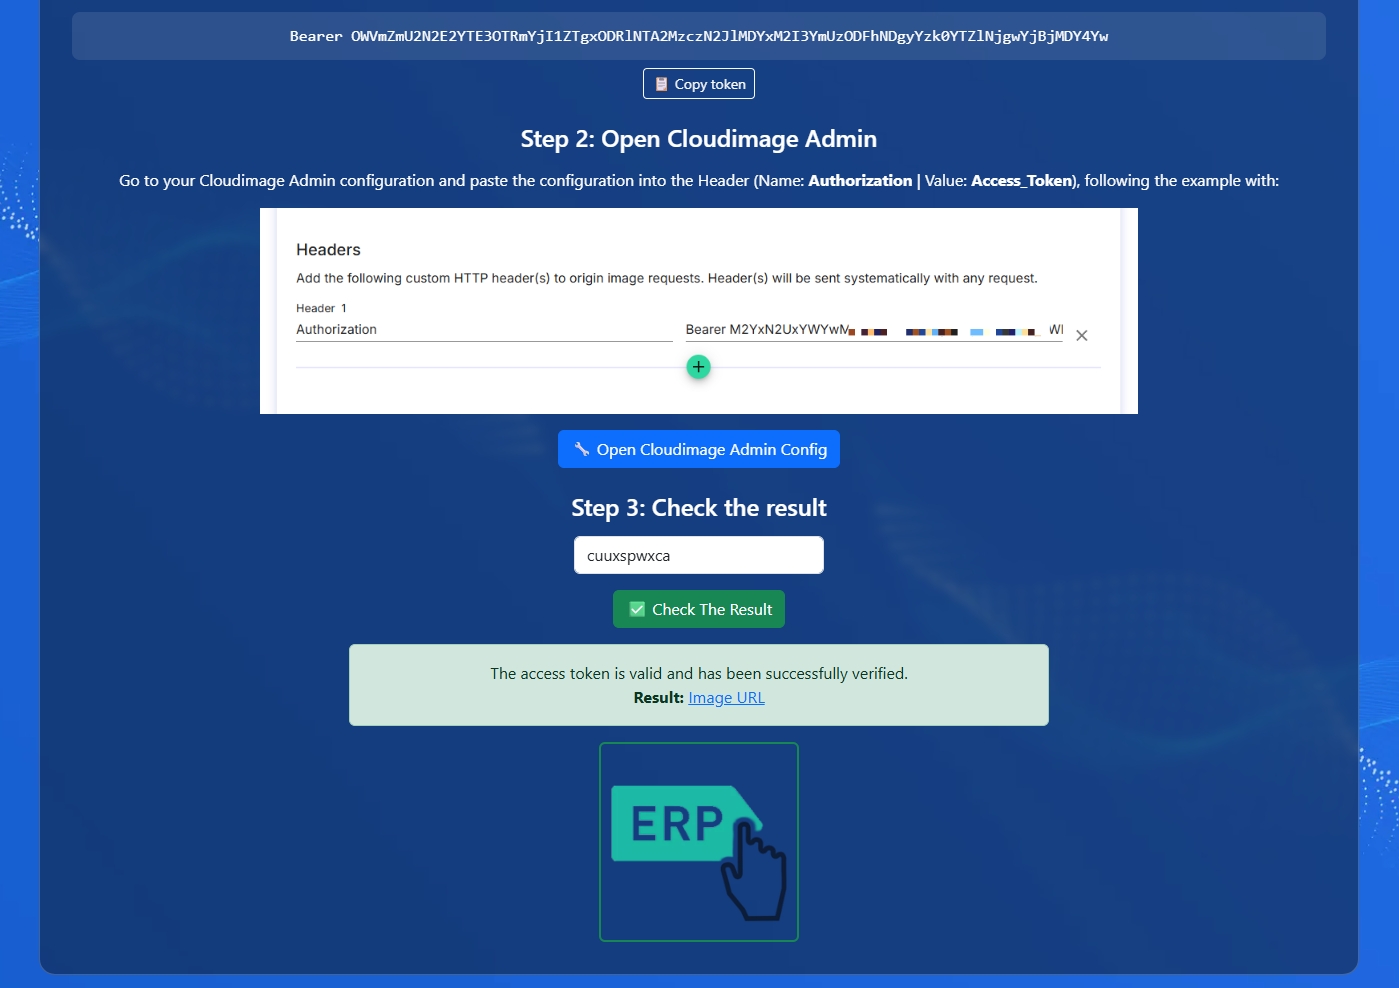
Step 2: Open the Cloudimage Admin
Click on the button "Open Cloudimage Admin Config"
Go to the "Headers" block and fill in the value. Name: Authorization | Value:
When all the configuration is correct, the result will be like this.
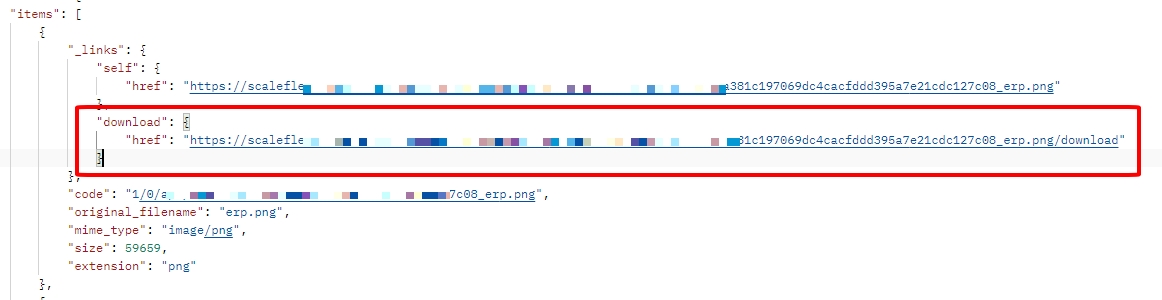
To use Cloudimage when all are connected, you need to get the product media download link
Use in HTML:
Cloudimage Shopware module
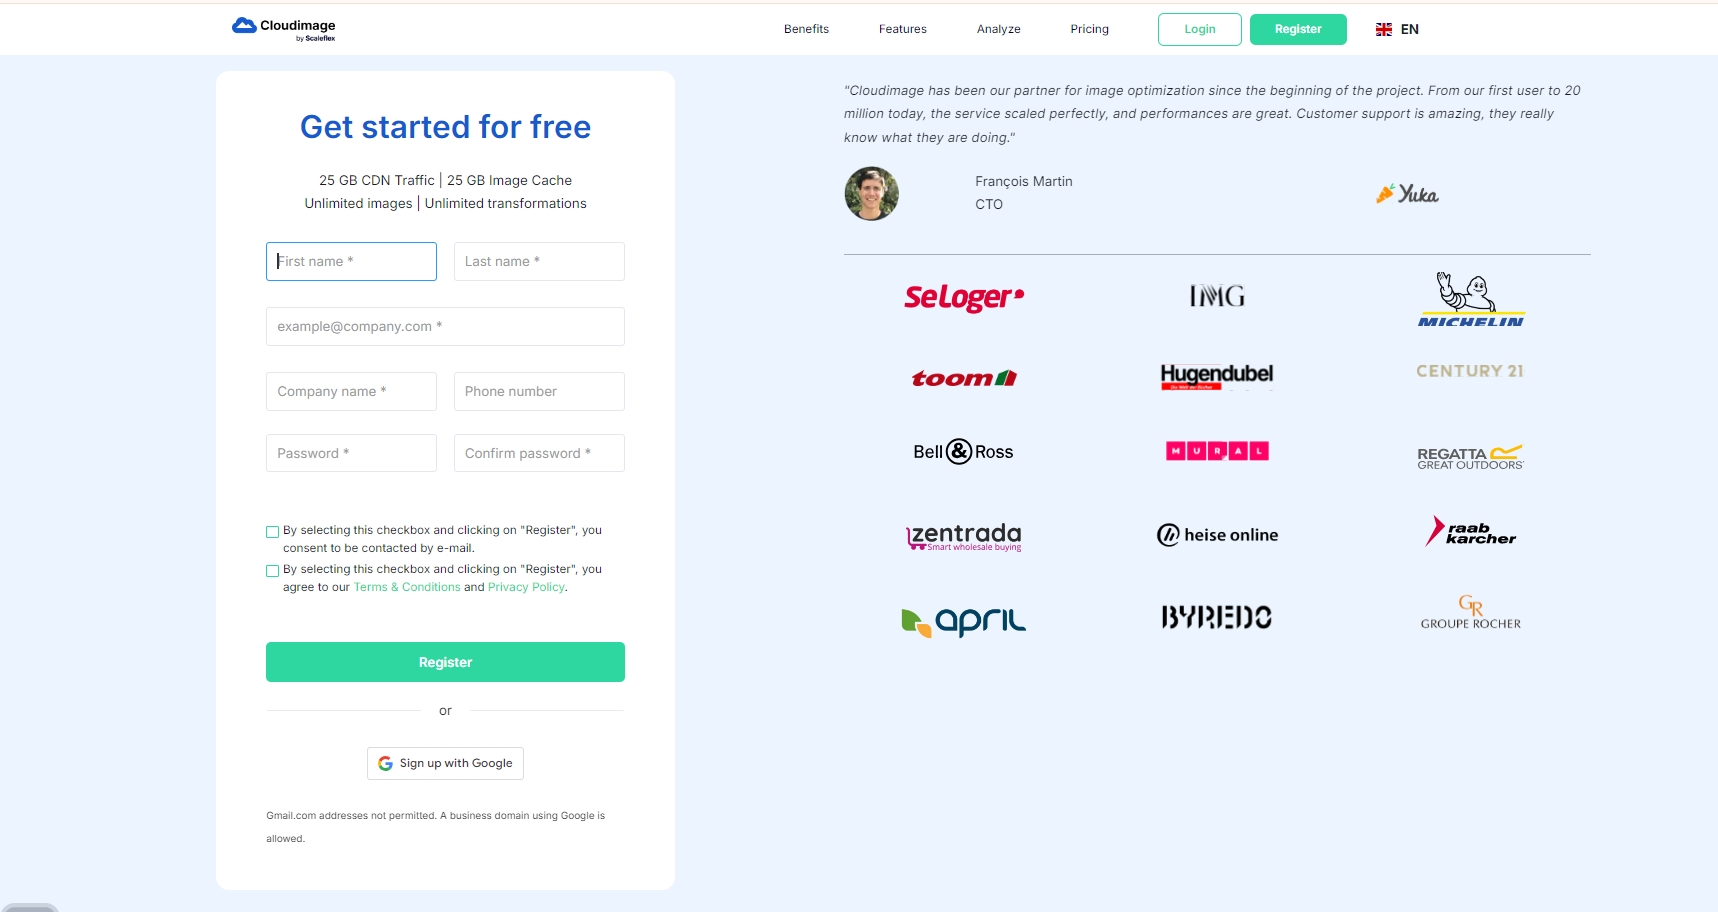
To use the plugin, you need to have a Cloudimage account. You can create one on the Cloudimage registration page.
Step 1: Download the latest version
Step 2: Zip the file with the name "cloudimage.zip"
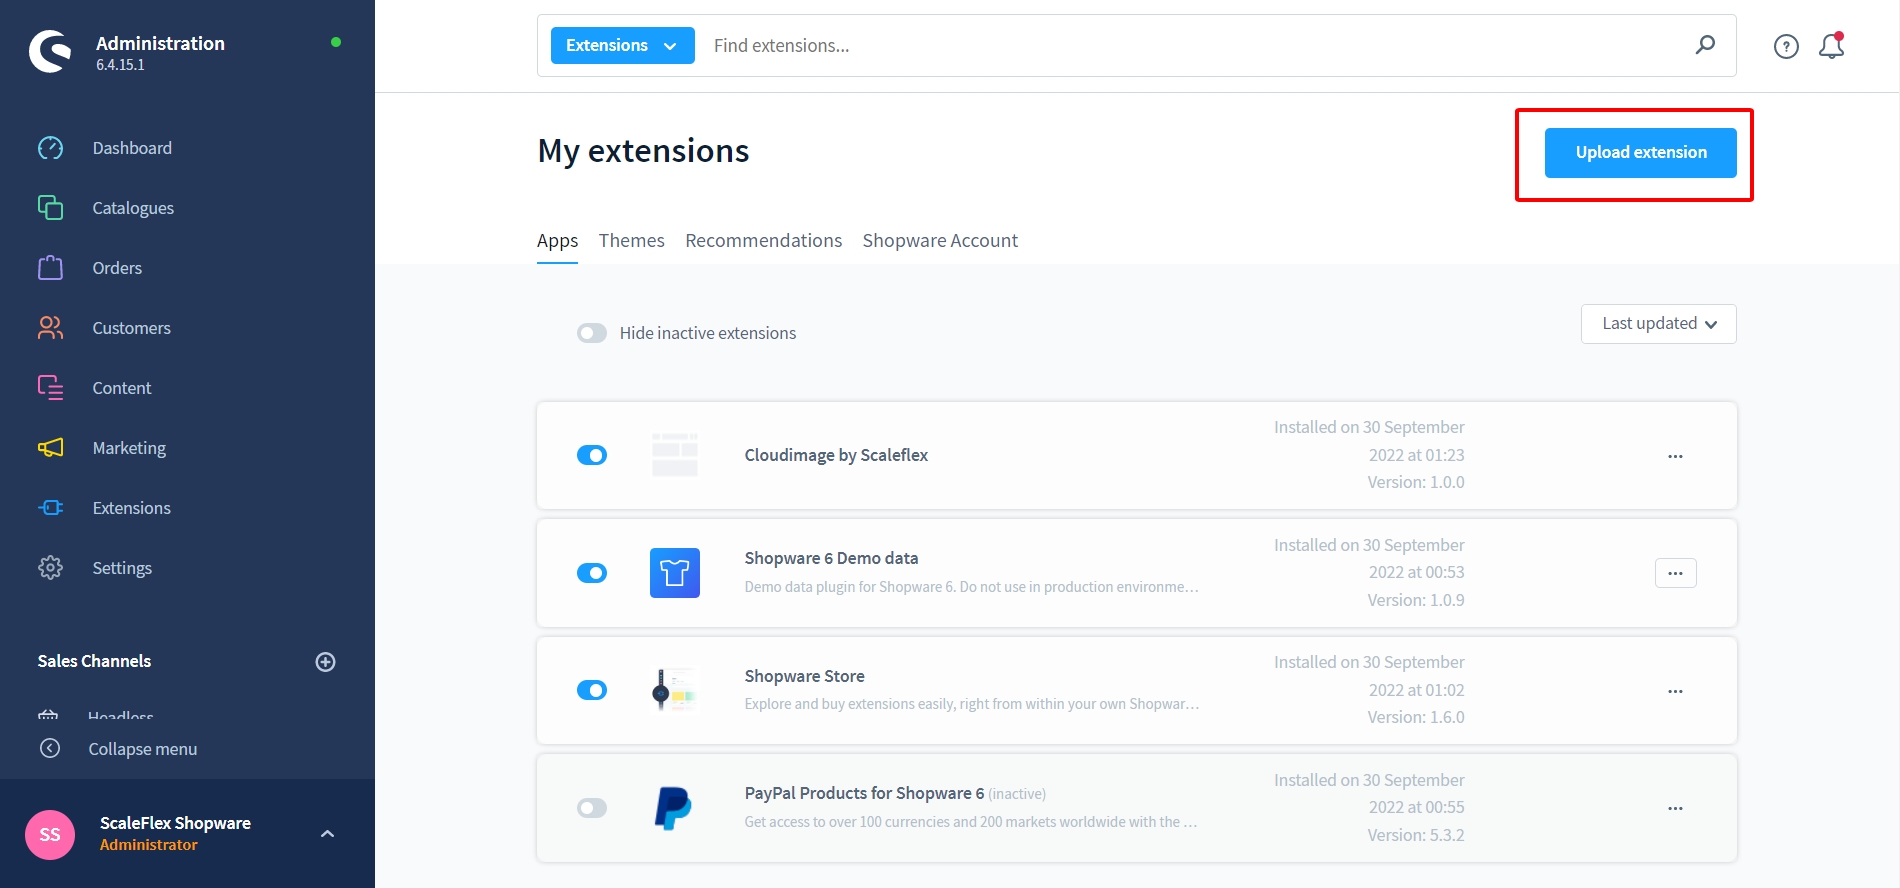
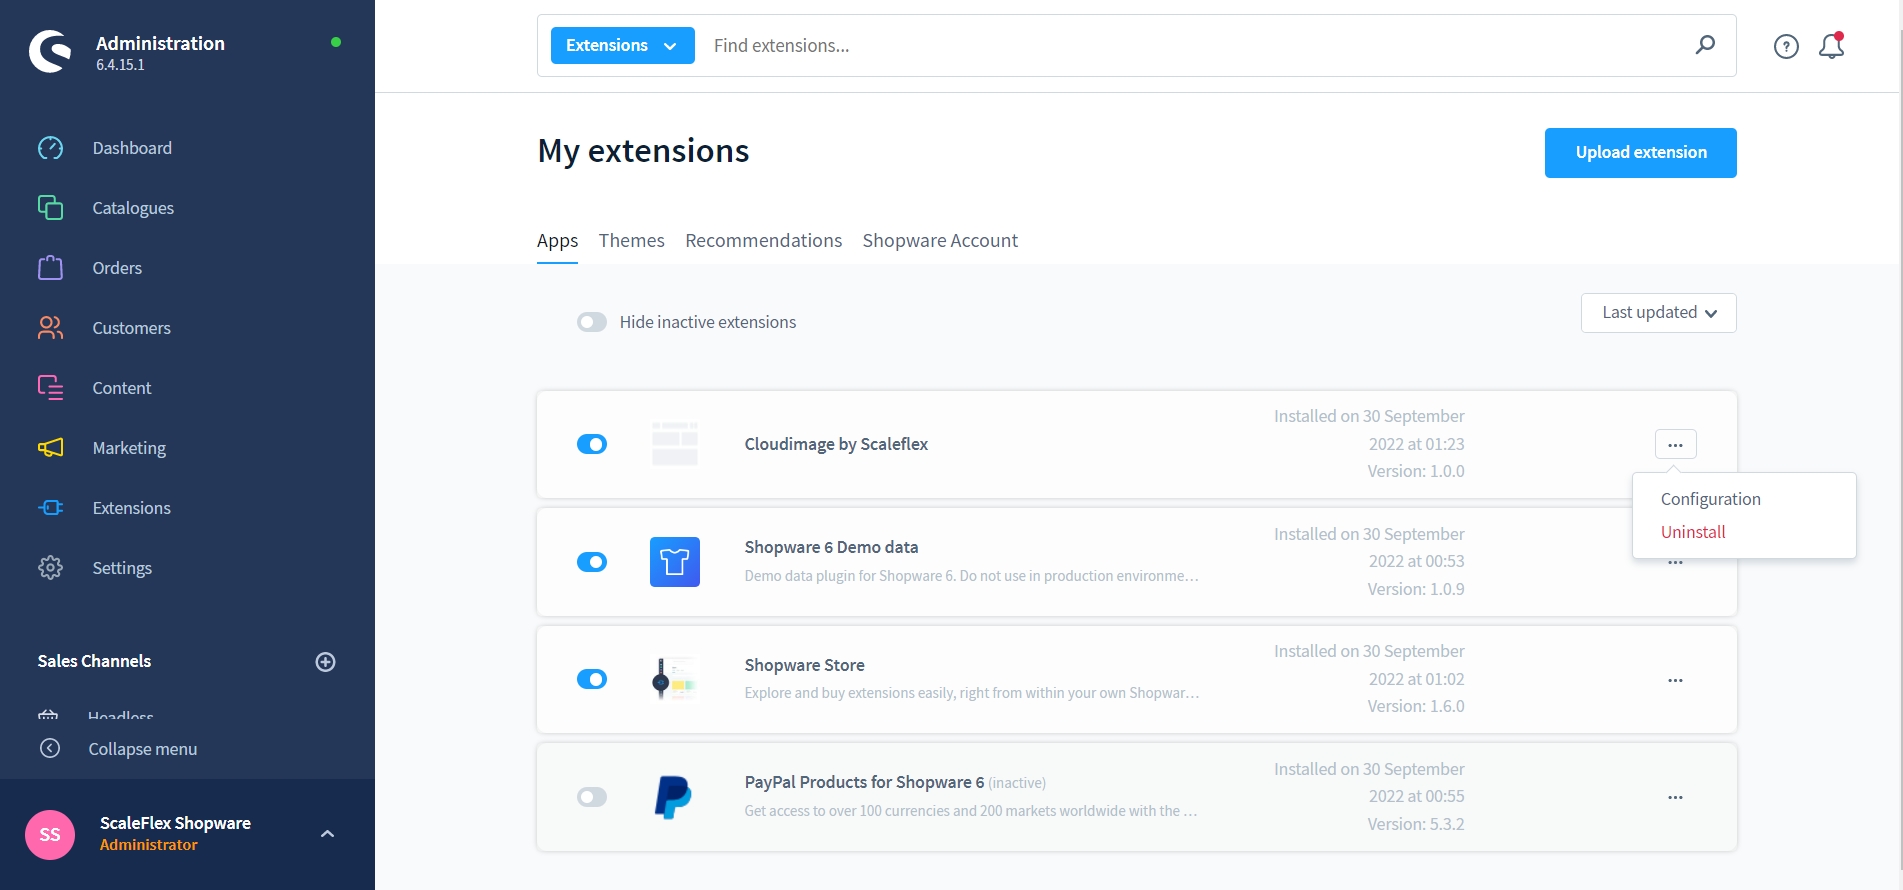
Step 3: In Admin go to Extensions -> My extensions -> Upload extension
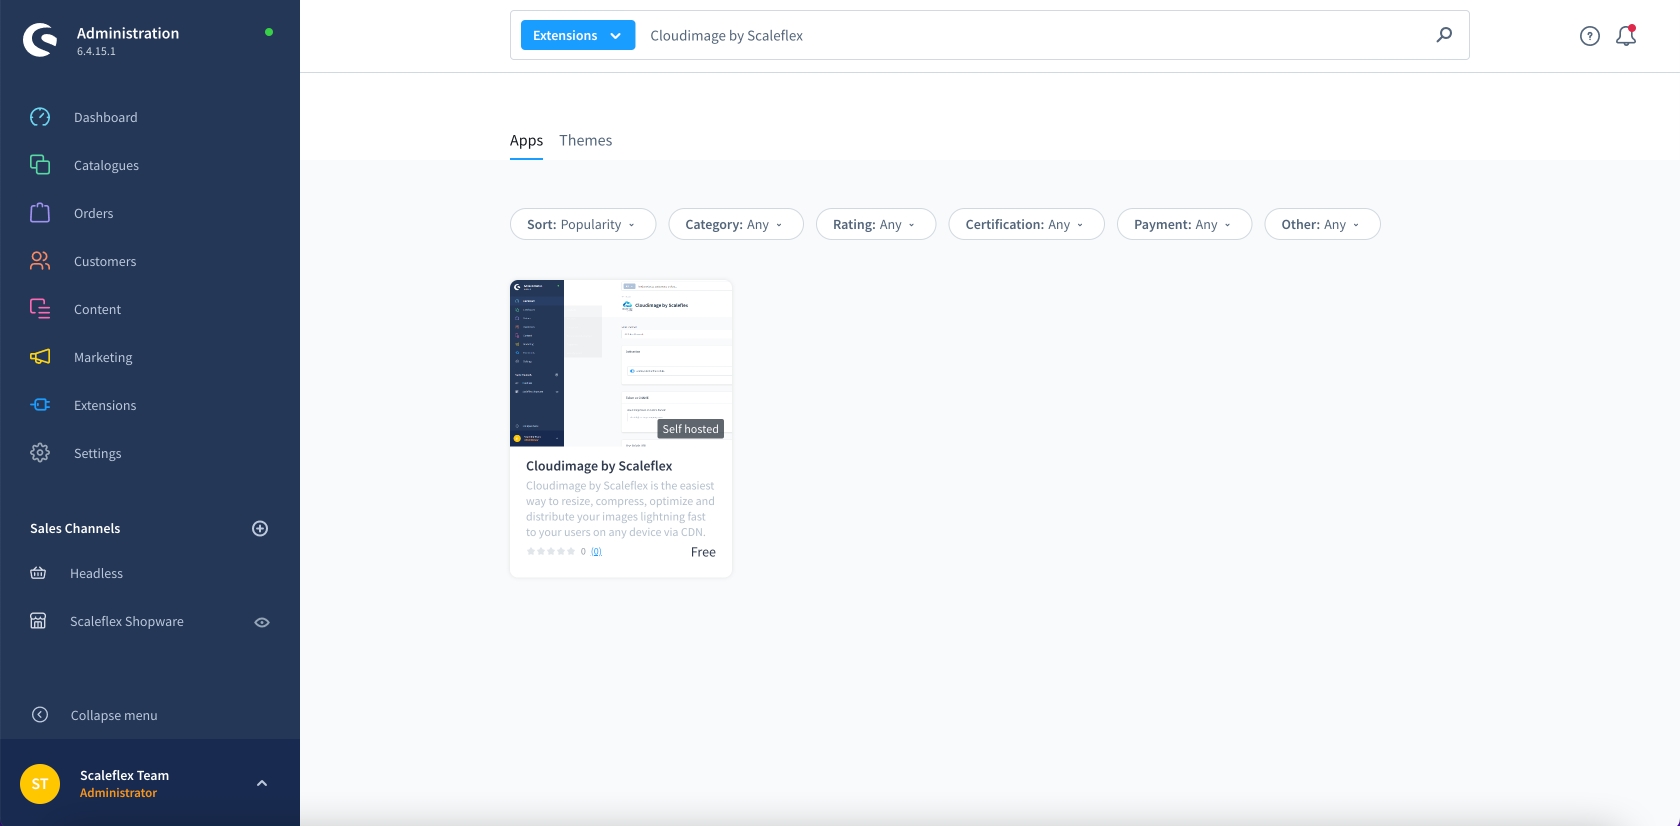
Step 1: In Admin go to Extensions -> Store -> Catalog and search for "Cloudimage by Scaleflex"
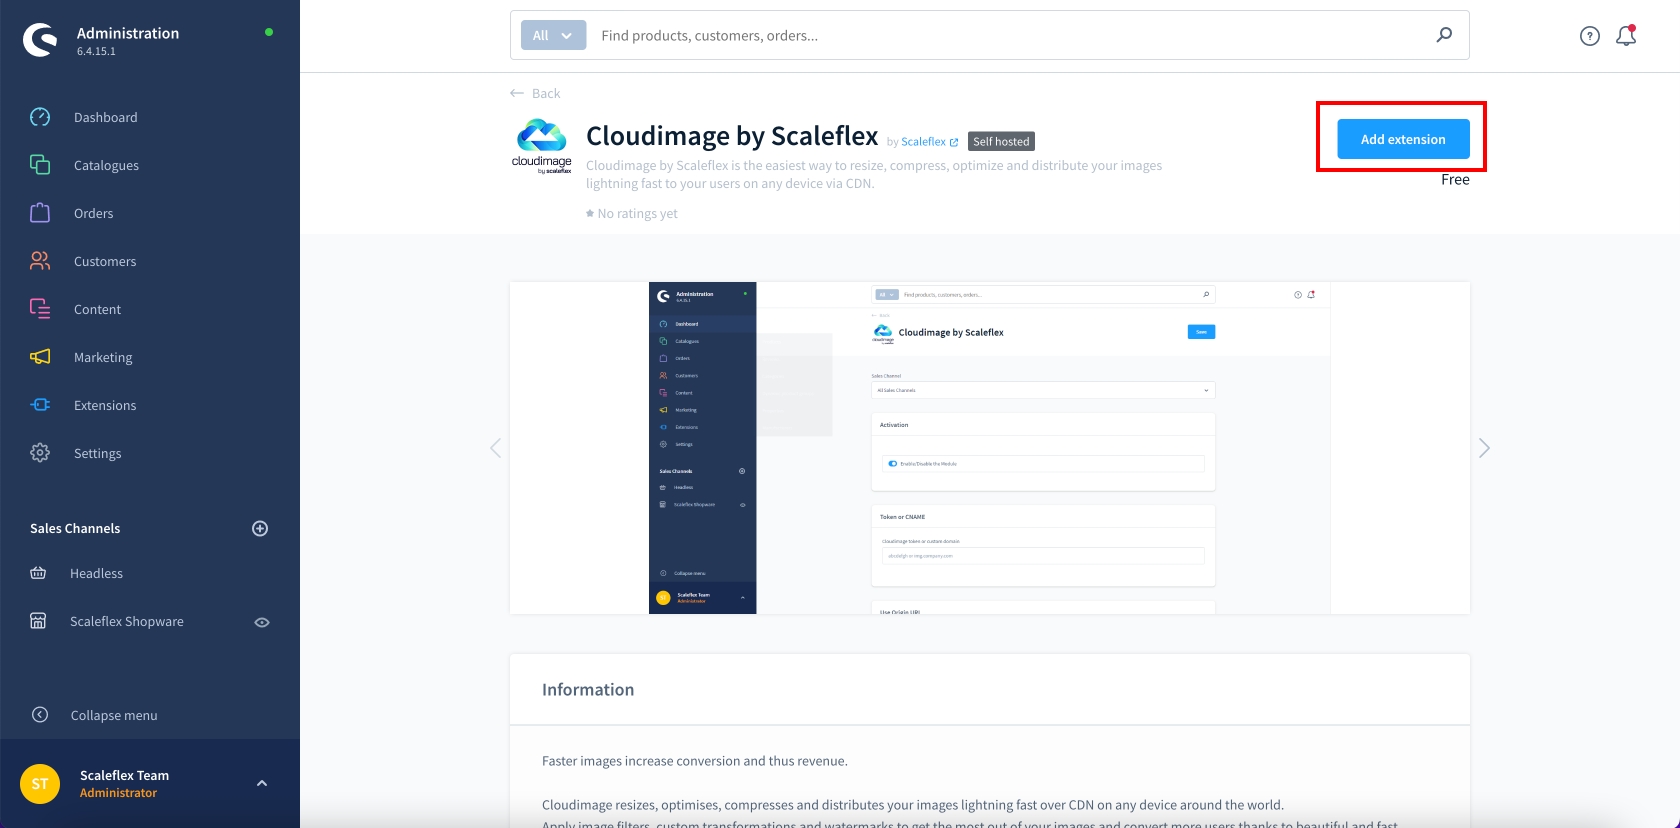
Step 2: Click on extension and after that "Add extension"
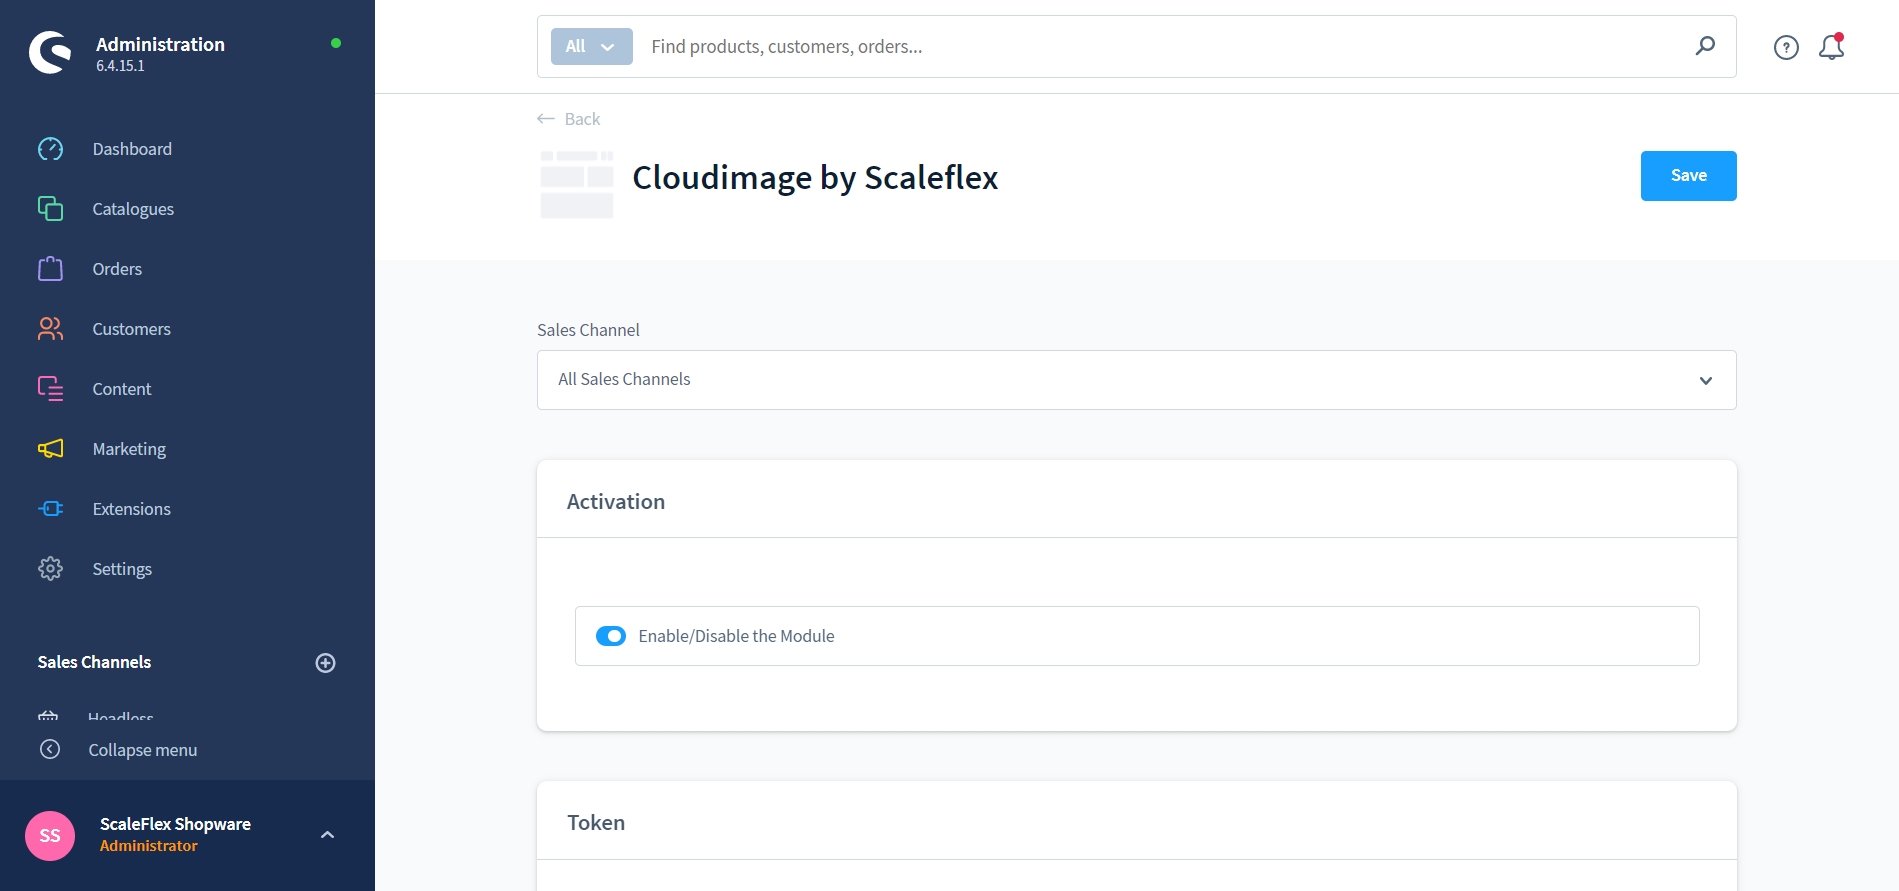
Step 3: Go to Extensions -> My extensions -> Cloudimage by Scaleflex -> Click on Configuration
Step 4: Update configuration and activate the Module, then your site is ready to go.
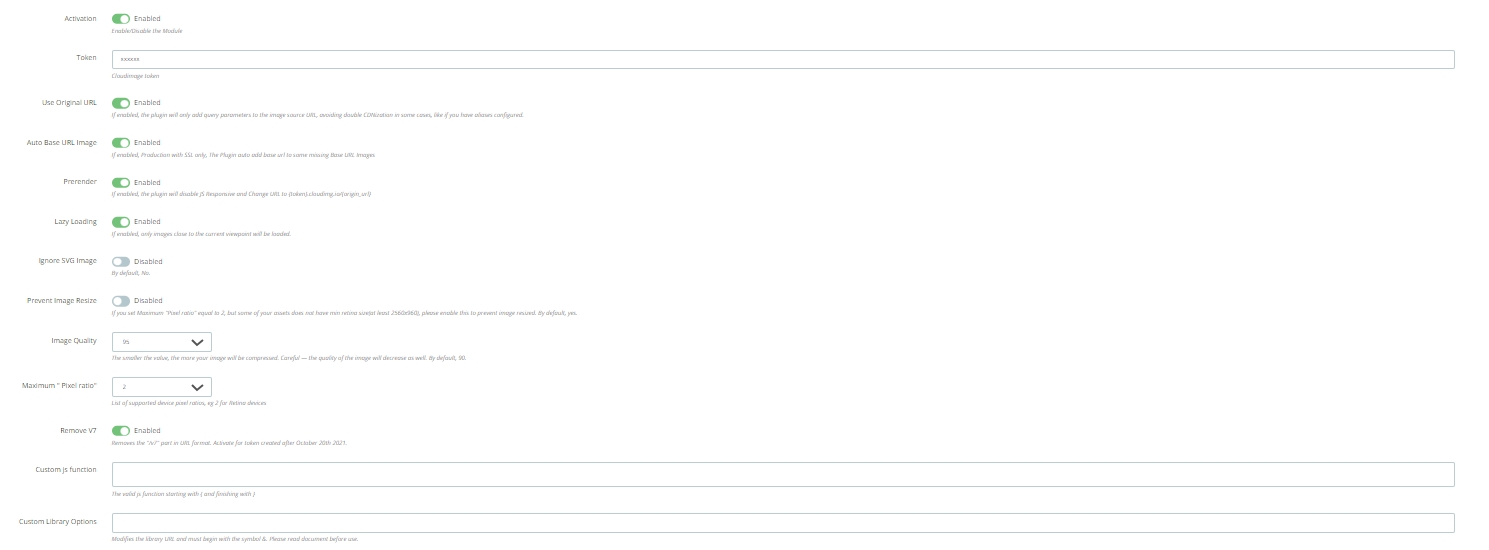
Activation: Enable/Disable the module
Standard Mode: Replace image URLs not using any Javascript or Javascript library.
Token or CNAME: Please enter your cloudimage token here (eg: abcdefgh), or your complete CNAME (eg. media.company.com) if the configuration is already validated in your Cloudimage Admin.
Advanced User's options
Custom JS Function: The valid js function starting with { and finishing with }
Custom Library Options: Modifies the library URL (to add transformations)
Implement Cloudimage on Prestashop 1.6+
This simple and fast implementation in Prestashop leverages JPEG optimisation, WebP compression and CDN delivery of your images. Contact us if you want to use Cloudimage at its full extend and also resize, watermark, transform and leverage responsive images on your Prestashop store.
Please note that to use your Cloudimage account with Prestashop, you need to use the Origin URL prefix function. This means that you will be able to use your Cloudimage token for delivering images only from your Prestashop site.
To use the plugin, you need to have a Cloudimage account. You can create one on the .
There are two basic configuration steps:
First, you need to contact us at [email protected] and let us know that you would like to use your Cloudimage token with Prestashop. We will lock your account to the v7 API of Cloudimage. Note: This step is required only for tokens created before November 1, 2021.
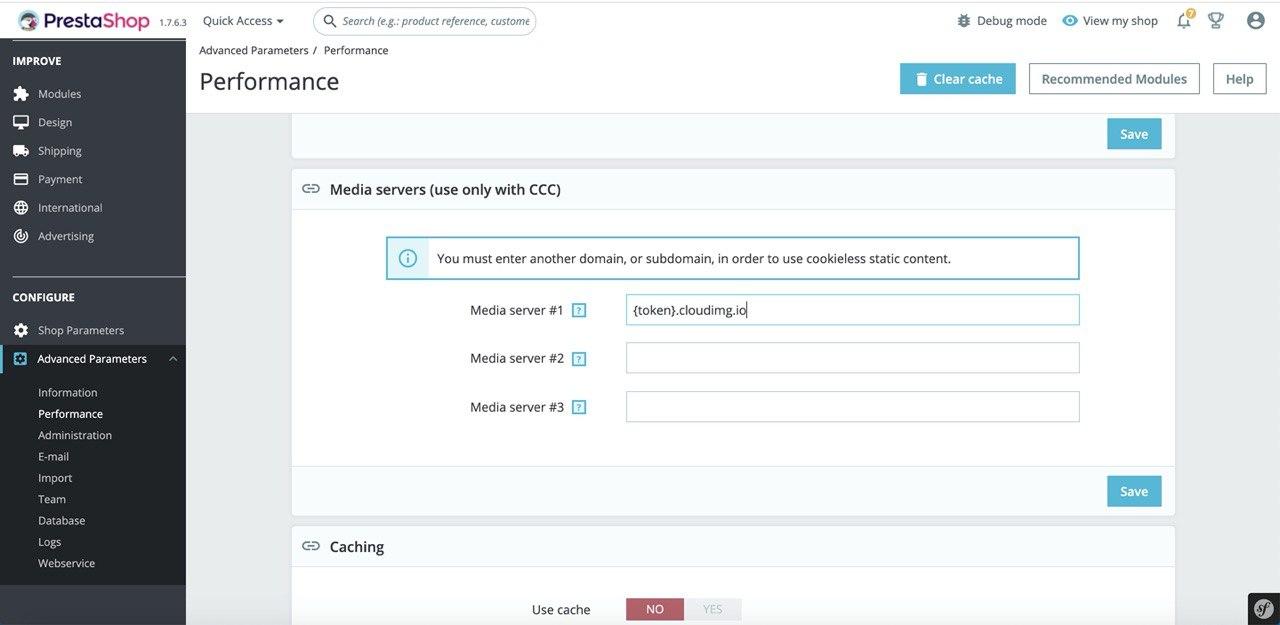
Then, you need to set up the Origin URL prefix in your Cloudimage admin to your Prestashop domain. By doing this, your token will fetch images only from your Prestashop site.
Add in Media Server #1, the Cloudimage domain and click to Save.
Please ensure that you are properly delivering static content via the CDN.
This simple and fast implementation in Prestashop leverages JPEG optimisation, WebP compression and CDN delivery of your images. Contact us if you want to use Cloudimage at its full extent and also resize, watermark, transform and leverage responsive images on your Prestashop store.
Save combinations of commonly used image and video transformations in Presets
Cloudimage Presets are reusable templates of assets transformations that you can apply to any image or video for consistent results with a single click.
If you wish to apply the same transformations on many assets, you can define Presets (p) and apply transformations only using the Preset name (X).
p=X
All and can be included in a Preset, as well as and parameters.
You can find all your Presets in the admin panel, Settings / Image Settings / Presets.
Cloudimage Opencart plugin
Secure part of your Cloudimage URLs against tampering
To prevent your customer from removing certain parameters, you can seal them. For example, if you don't want your users to get the image without a watermark or a certain filter, you can use the URL sealing feature. This system is similar to the feature but it is only sealing the ci_eqs parameters and allows you to add more filters and operations to the URL without re-generating the signature. This method is compatible with the .
Please be aware that when URL sealing is activated for your token, all Cloudimage URLs that are not signed properly will cease to work.
The signature is calculated as follows:
Signature = sha1('URI' + 'ci_eqs' + 'Salt') where URI = original_image_url and ci_eqs = value of the content of ci_eqs query string
Javascript implementation for pixel perfect design
Responsive images libraries adapt the image size according to the screen or container size of the end user, thereby allowing websites and mobile apps to load faster across various screen sizes.
For example, on an iPhone, Cloudimage will deliver smaller images than it would on a 24" desktop computer screen, thus accelerating the page loading time.
Managing a responsive site manually can be tedious, especially for a site with more than a handful of images needing to be displayed on the ever-growing number of different devices & various screen-sizes. Therefore, the Cloudimage team has developed a JS plugin to automate everything for you. Check it out as well as a .
Cloudimage caching and invalidation
Cloudimage leverages Content Delivery Networks to accelerate the delivery of your images worldwide. We work with multiple CDN providers to optimise the delivery of your images and provide superb reliability.
In addition to accelerating your images, the CDN provides DDoS (Distributed Denial of Service) protection, which will act as a shield to your servers and avoid any downtime.
CDNs cache images for faster delivery. They usually keep assets cached as long as it is stated in . When the original image changes, the CDN won’t automatically detect that, so you need to either change the image URL or invalidate the cached version.
To refresh your images, you can either update the Cloudimage URL or invalidate them to flush them from the resizing servers and the CDN.
{token}.cloudimg.io.Lazy Load: If enabled, only images close to the current viewpoint will be loaded.
Ignore SVG Size: If enabled, the module will ignore the image size node in the SVG file.
Image Size Attributes: Used to calculate width and height of images
Prevent Image Upsize: If you set Maximum "Pixel ratio" equal to 2, but some of your assets does not have min retina size(at least 2560x960), please enable this to prevent image resized. By default, yes.
Image Quality: The smaller the value, the more your image will be compressed. Careful — the quality of the image will decrease as well. By default, 90.
Maximum Pixel Ratio: The maximum pixel ratio of the image. By default, 2.
Remove V7: If enabled, the module will remove the "/v7" part in URL format. Activate for token created after October 20th 2021.

Use origin URL: If enabled, the plugin will only add query parameters to the image source URL, avoiding double CDNization in some cases, like if you have aliases configured.
Lazy Load: If enabled, only images close to the current viewpoint will be loaded.
Ignore SVG Size: If enabled, the module will ignore the image size node in the SVG file.
Prevent Image Resize: If you set Maximum "Pixel ratio" equal to 2, but some of your assets does not have min retina size(at least 2560x960), please enable this to prevent image resized. By default, yes.
Image Quality: The smaller the value, the more your image will be compressed. Careful — the quality of the image will decrease as well. By default, 90.
Maximum Pixel Ratio: The maximum pixel ratio of the image. By default, 2.
Remove V7: If enabled, the module will remove the "/v7" part in URL format. Activate for token created after October 20th 2021.

{token}.cloudimg.io.Lazy Load: If enabled, only images close to the current viewpoint will be loaded.
Ignore SVG Size: If enabled, the module will ignore the image size node in the SVG file.
Prevent Image Upsize: If you set Maximum "Pixel ratio" equal to 2, but some of your assets does not have min retina size(at least 2560x960), please enable this to prevent image resized. By default, yes.
Image Quality: The smaller the value, the more your image will be compressed. Careful — the quality of the image will decrease as well. By default, 90.
Maximum Pixel Ratio: The maximum pixel ratio of the image. By default, 2.
Remove V7: If enabled, the module will remove the "/v7" part in URL format. Activate for token created after October 20th 2021.


trim - more info


<img src="https://token.cloudimg.io/https://samples.scaleflex.com/flat.jpg?operations&filters&watermarks" /><picture>
<source media="(min-width: 650px)" srcset="/samples.scaleflex.com/flat.jpg">
<source media="(min-width: 465px)" srcset="/samples.scaleflex.com/flat.jpg">
<img src="img_orange_flowers.jpg" alt="Flowers" style="width:auto;">
</picture><picture>
<source media="(min-width: 650px)" srcset="token.cloudimg.io/samples.scaleflex.com/flat.jpg?operations1&filters">
<source media="(min-width: 465px)" srcset="token.cloudimg.io/samples.scaleflex..com/flat.jpg?operations2&filters">
<img src="img_orange_flowers.jpg" alt="Flowers" style="width:auto;">
</picture>nonehttps://freeaccessdemo.blob.core.windows.net/myfiles/Image%20with%20space%20in%20the%20name.jpgnonehttp://doc.cloudimg.io/https%3A%2F%2Ffreeaccessdemo.blob.core.windows.net%2Fmyfiles%2FImage%2520with%2520space%2520in%2520the%2520name.jpg%3Fv%3D13?w=600&ci_url_encoded=1encodeURIComponent( path ).replace( /%20/g, '%2520' )pixelate=X | f=pixelate:X | pixellate=X | f=pixellate:X
pixelates the image into X-pixel-sized blocks
blur=X | f=blur:X
applies Gaussian blur
sharp=X | f=sharp:X
applies unsharp mask to sharpen the image
blur_faces=X
detects all faces in the image and applies blur to conceal them
bright=X | f=bright:X
adjusts the brightness of the image
contrast=X | f=contrast:X
adjusts the contrast of the image
saturate=X | f=saturate:X
adjusts the saturation of the image
gray=1 | f=gray | grey=1 | f=grey
converts the image to a black and white one
colorize=X | colourise=X
Separate parameters: /samples.scaleflex.com/ny_doc.jpg?bright=15&contrast=30&gray=1
Concatenate into the f parameter: /samples.scaleflex.com/ny_doc.jpg?f=bright:15,contrast:30,gray
applies a color overlay
hex color code / color name
Background (padding) color (for use with func=fit)
bg_img_fit
1
Use blurred version of the video for background / padding (for use with func=fit)
format
auto (default) | mp4 | webm | h264.mp4 | h265.mp4 | vp9.webm
Defines the video format
bitrate
10k..20000k | 1m..20m (ex.300k, 2m)
Sets the compression bitrate (in kilobits or megabits per second)
w
>100
Sets the target video width
h
>100
Sets the target video height
func
crop (default) | fit | cropfit | bound | boundmin | cover
Sets the resize function if both width and height parameters are provided
Simple resize: /samples.scaleflex.com/waterfall-hd.mp4?w=400
Crop function: /samples.scaleflex.com/waterfall-hd.mp4?w=400&h=300
Fit function with blurred background: /samples.scaleflex.com/waterfall-hd.mp4?w=400&h=300&func=fit&bg_img_fit=1
Sets the compression bitrate in kilobits or megabits per second. /samples.scaleflex.com/waterfall-hd.mp4?bitrate=1000k
bg_color
Step 3: Go back to the "Scaleflex DMO Success Connected" browser tab, enter your Cloudimage Token, and click on the button "Check The Result".

Most of the on-the-fly image transformations can be configured using the Asset Variation Builder, an in-line URL builder to preview each image transformation instantly.
Imagine you’re preparing images for an e-commerce product page. With the Asset Variation Builder, you can:
Open the image from the Preset Settings page.
Apply transformations:
Crop to a square ratio (1:1) for consistency across product listings
Automatically center the crop on the model face
Define webp as the best forced format
Preview in real time how the image will look once delivered.
Save as a Preset called “E-commerce Hero”.
Now, every product photo uploaded to Cloudimage can instantly use this Preset, ensuring all visuals share the same style, quality, and format — without manual edits or developer input.
Presets can be previewed in the Cloudimage Asset Library in Asset Details / Variations
gallery_thumb
w=250&h=250&gray=1
gallery_medium
w=450&h=300&radius=10&force_format=jpeg&q=85
gallery_large
You can use additional operations together with a preset. Here is an example:
red_ref_number
w=400&h=200&wat=1&wat_gravity=northeast&wat_pad=10&wat_font=Arial-Black&wat_fontsize=18&wat_colour=660000


To use the plugin, you need to have a Cloudimage account. You can create one on the Cloudimage registration page.
To get the plugin, you need to open Opencart Extension Marketplace.
Then, search for "Cloudimage" in the search bar.
Select the Cloudimage by Scaleflex plugin and click on Download. The Download button will be available on the right side. This will download the .zip file.
First, you need to log in to your Opencart Admin:
Then, navigate to Extension->Installer.
Click on "Upload" and upload the .zip file that you downloaded in the previous step:
Navigate to Extensions->Modifications and select refresh in the Modification panel. Refresh button will be available on the top right corner as shown below:
Navigate to Extensions->Extensions->Modules.
Select Cloudimage from the list of modules and click on Edit.
Enable the plugin and enter Cloudimage Token or CNAME
You need to enter your Cloudimage account token which you have received upon account creation (step 1).If you need a CNAME please contact our sales team.
After you enter your token and save the changes, the plugin will start to deliver your images via Cloudimage.
Remove v7 from URL
If your token/CNAME was created after 20th October 2021 you need to tick this option.This option will remove the "v7" part from image URLs.
Enable debug image overlays
For troubleshooting purposes to view details about resizing and compression. Note:This will print information over your images.
Cloudimage image output quality
To increase or decrease the quality of images delivered by cloudimage.Slide to the right to increase quality.
Javascript Mode
To turn on responsive images,this option makes use of . All img tags "src" is changed to "ci-src" .
When Javascript Mode is active, make sure that no other module is overwriting the plugin's delivery with "ci-src" image source.
//token.cloudimg.io/original_image_url?ci_eqs=Sealed_parameters&ci_seal=Signature
The Salt string is a shared secret between you and Cloudimage and only you will be able to calculate the signature of your images.
Before activating URL sealing, please make sure that all Cloudimage URLs contain the proper signatures (see the Usage section below).
To activate this feature, you need to navigate to Image Settings / Security and activate the URL security toggle.
In the Add Security modal, you need to choose URL Sealing and place a string you will be using as salt when generating the sealed parameter signature.
To watermark an image at the URL samples.scaleflex.com/birds.jpg with query string wat=1&wat_url=http://samples.scaleflex.com/louis-vuitton-logo-white.png&wat_scale=45&wat_gravity=southwest&wat_pad=15, you need to first base64-encode the query string:
becomes
d2F0PTEmd2F0X3VybD1odHRwOi8vc2FtcGxlLmxpL2xvdWlzLXZ1aXR0b24tbG9nby13aGl0ZS5wbmcmd2F0X3NjYWxlPTQ1JndhdF9ncmF2aXR5PXNvdXRod2VzdCZ3YXRfcGFkPTE1
The signature has to be created by sha1-hashing the string 'URI' + 'ci_eqs' + 'Salt':
The final signature is:
a355cce069fbfb18a4c39113067bf626ead2ebab
//token.cloudimg.io/original_image_url?ci_eqs=Sealed_parameters&ci_seal=Signature
The final URL becomes:
You can use the URL as is or append more parameters to the query string:
Any parameters that are included in the sealed portion cannot be overwritten in the URL. For example, if a watermark is activated with wat=1 and sealed, appending wat=0 in the URL will not remove the watermark:
Vanilla JS:
React:
React Native:
code sandbox (tba)
Angular:
Vue.js:
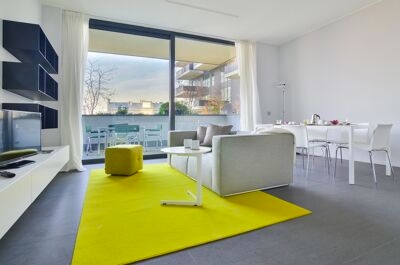
Original image (650x500 pixels):
Cropfit to 500x350:
Original image (400x250 pixels):
Cropfit to 500x350:
If you include the Trim operation in the URL, the image will be trimmed first (if possible) and then either cropped or fitted to the desired size.
Original image:
Cropfit + trim:
Content model (left hand side) > Create new > Custom element (right hand side). You will then have the below view.
Hosted code URL: https://scaleflex.cloudimg.io/v7/plugins/cloudimage-kontent/cloudimage.html?func=proxy
Parameters are the information that Kontent-Cloudimage needs to accelerate your images. See below:
note: "mgmtApiKey" is obtained from:
Content & asset (left hand side) > Create new > Chose type: Cloudimage. Chose add/remove some images, publish. You will then have the below view.
After publishing, it will look like below. The URLs are Cloudimage accelerated.
Here, you can find a tutorial on how to set up a preview: https://kontent.ai/learn/tutorials/develop-apps/build-strong-foundation/set-up-preview/
Go to Settings > API Keys. For this, you will definitely need your Project ID. You may also need your API Key (depends on what you want to do, but for simple things Project ID is enough).
Write a client app that utilizes the Delivery API
Recall that Kontent have 3 set of APIs that you can interact with
Delivery APIs in plain HTTPS form can be taken from https://kontent.ai/learn/tutorials/develop-apps/get-started/postman-collection/ , imported into POSTMAN
For the 3 content items that comes out of the box, Kontent already have an example client app, which we can imitate.
This example app was made by using React JS https://github.com/Kentico/kontent-sample-app-react
Hosted on Github Pages: https://kentico.github.io/kontent-sample-app-preview-react/{restof the URL}
After writing and hosting your client app, go to Settings > Preview URLs and define your Preview URL formats.
See how Kontent defined their preview URLS for their example app
Codename, URLSlug & ItemId are obtained as follows:
Once you done all the above, you can preview by clicking Preview
-avatar.jpg
func=crop&w=300&h=300&radius=max
Here is an image using the rules from above:
You can add additional operations together with a preset. If an operation or a filter already exists, the value provided in the URL will take precedence over the one in the rule. Here is an example:
-avatar.jpg
func=crop&w=300&h=300&radius=max
Adding more parameters or overriding some of the parameters from above:

Old image:
//doc.cloudimg.io/sample.li/flat.jpg?w=500
New image:
//doc.cloudimg.io/sample.li/flat.jpg?w=500&vh=xx (where 'xx' represent random numbers)
If you cannot change the image URLs when changing the origin image, you can still invalidate (flush) the image from the Cloudimage admin console. Log in to the console and navigate to Invalidation, or go to this page - https://admin.cloudimage.io/project/invalidation
First, you need to select the scope of the Invalidation:
Original -> targets specific image URLs. Enter up to 10 URLs, separated by commas or line breaks.
All -> this option will erase the entire cache generated for your token. Please use it with caution, because after invalidation, the cache needs to be rebuilt, and your first requests would take more time for execution.
Do not use the full path of your image but only the origin_image_url part as invalidation path.
For example, to invalidate doc.cloudimg.io/sample.li/flat1.jpg?w=500, you need to input /sample.li/flat1.jpg.
🟢 Correct format for invalidation: /sample.li/flat1.jpg
🔴 Incorrect formats for invalidation:
/sample.li/flat1.jpg?w=500
doc.cloudimg.io/sample.li/flat1.jpg
doc.cloudimg.io/sample.li/flat1.jpg?w=500
This will remove the image(s) from all CDN nodes and Cloudimage resizing servers.
When the Invalidation request is submitted, it appears in the Invalidation log. Both manual and automatic invalidations are logged there.
Every request has the following parameters:
Status - the status of the request:
Received - request received successfully
Preparing - the Invalidation server prepares the request for execution
Flushing Scaleflex servers - deleting the cache in the resizing servers
Flushing CDN servers - deleting the cache of the CDN servers
Done - the invalidation finished successfully
ERROR_CDN_NODE - error in the CDN invalidation step
ERROR - general error in some of the invalidation steps
Scope - the scope of the request (original / all)
Date - the datetime when the request has been submitted for execution. The value is in the local time zone.
Invalidation ID - the unique identifier of the request.
Invalidation path - if you click on "See links", you can inspect which URLs have been requested for invalidation (applicable for the invalidations with scope "original")
Retry - resend the invalidation request if it failed.
Click the Refresh button to reload the invalidation log and view the latest updates.
You can also automate invalidations by calling the Invalidation API. This is useful for developers managing large-scale projects or CI/CD workflows.
use watermark
wat=1
(required) Activates the watermark function
watermark text
wat_text=X
(required) The text to be overlayed. Can be URL-encoded
watermark gravity
wat_gravity=X
X=[north|south][east|west]|center|
absolute|relative
Defines the position to "anchor" the watermark to
watermark padding
wat_pad=X[p][,Y[p]]
X/Y=0..100[p]
Adds padding from the anchoring point in pixels (X) or in percent (Xp)
watermark position
wat_pos=X[,Y]
sets the position in percent from the resized image; works only with wat_gravity=absolute and wat_gravity=relative
watermark opacity
wat_opacity=X
X=0..1
Defines watermark opacity
watermark font
wat_font=X
Choose the font family for the overlay
watermark color
wat_color=X | wat_colour=X
Sets the text color
watermark font size
wat_fontsize=X | wat_fontsize=Xmax
Sets the font size. If the Xmax syntax is used, the size is reduced if the text cannot fit in the image
Statically defined image overlay
This function will watermark selected images with the same watermark - an image set in the Cloudimage admin console. This is useful for placing your company logo, name, or other copyright information. If you would like to watermark different images with different watermarks, please refer to the Dynamic watermark section.
Log in to your Cloudimage admin console, navigate to Image Settings / Watermark, and upload your default watermark using the uploader.
To activate the watermark function, you need to include the wat=1 parameter.
The wat_gravity parameter allows you to define the position of the watermark. You can choose between "fixed" anchor points (east, northeast, north, northwest, west, southwest, south, southeast, and center) or define the exact position (relative, absolute).
When using "compass" point gravity, the wat_pad parameter defines the offset from the chosen position. The padding can be defined in pixels (wat_pad=X[,Y]) or in percent of output size (wat_pad=Xp[,Yp]). The padding is applied after scaling the final image and then it is compressed (see Compression) and delivered via CDN.
To set the exact position of the watermark, you can choose absolute or relative gravity and use the wat_pos parameter to define the position of the top left or center point of the watermark, respectively. The position is always defined in percent of the resized image dimensions.
The watermark can be scaled relative to the original watermark image (wat_scale=X) or relative to the output image (wat_scale=Xp).
Please note that the watermark cannot be larger than the image - if larger, it is always scaled down first to match the image dimensions. Then, the wat_scale parameter values are applied.
Crop by aspect ratio or aspect ratio range
Sets target aspect ratio or aspect ratio range when cropping. Aspect ratios can be set as decimal values (1.778) or ratios (16:9).
aspect_ratio=AR | ar=AR
aspect_ratio=AR1,AR2 | ar=AR1,AR2
If you provide only one dimension parameter (width or height) and aspect_ratio, the other dimension will be calculated. If you include both width and height in the URL, aspect_ratio is ignored.
If you provide only aspect_ratio and no dimensions (width or height), the image will be cropped without resizing.
You can specify a range of aspect ratio values, for example, aspect_ratio=4:3,16:9. Images that fall within this range, will not be cropped. Useful to avoid very wide or very tall images by cropping them to the closest aspect ratio.
Compose image or text layers over the main image
Cloudimage can place a watermark on top of your images if you want to protect them from copying or tag them with a serial number or custom text. There are three types of watermarks - click on each one for more details.
Most of the on-the-fly image transformations can be configured using the Asset Variation Builder, an in-line URL builder to preview each image transformation instantly.
Apply the same image watermark to all the images you decide to watermark (e.g. your company's logo).
Specify the watermark in the Cloudimage URL to apply different watermarks to different images.
If you need to tag images, use the text watermark to dynamically embed text to the images you need tagged.
You can overlay multiple watermarks by indexing the parameters in the URL wat[1]=1&wat[2]=1. The wat=1 parameter must be indexed and contain all watermarks to activate the feature.
All parameters without indices will be applied to all watermarks in the image.
?wat[1]=1&wat[2]=1&wat_scale[1]=50&wat_scale[2]=10&wat_opacity=0.5
In the above fragment, wat_opacity=0.5 will be applied to both watermarks.
Combining multiple watermark types is also possible.
?wat[1]=1&wat[2]=1&wat[3]=1&wat_url[2]=sample.li/Angular.png&wat_text[3]=text
In the above fragment, there are three watermarks. Watermark 2 is a dynamic watermark, watermark 3 is a text watermark, and watermark 1 is a static one.
The Ruby wrapper allows you to seamlessly interface with the Cloudimage API.
Supported with Ruby 2.4+, JRuby, and TruffleRuby
Add this line to your application's Gemfile:
And then execute:
Or install it yourself as:
The only requirement to get started is your customer token. You can find it within your Admin interface.
In order to interact with Cloudimage, we'll first initialize a client service object:
The Cloudimage client accepts the following options:
The calling path on the client object returns an instance of Cloudimage::URI. It accepts the path to the image as a string and we we will use it to build Cloudimage URLs.
Here are some common approaches for constructing Cloudimage URLs using this gem:
Hash of params
Pass a hash to to_url. Every key becomes a param in the final Cloudimage URL so this gives you the freedom to pass arbitrary params if need be.
Chainable helpers
Every param supported by Cloudimage can be used as a helper method.
While every key passed into the to_url method gets appended to the URL, chainable helper methods will throw a NoMethodError when using an unsupported method.
This is useful for catching typos and identifying deprecated methods in case Cloudimage's API changes.
Method aliases
The gem comes with a handful of useful aliases. Consult the Cloudimage::Params module for their full list.
From the example above you can see that parameters that only serve as a flag don't need to accept arguments and will be translated into param=1 within the final URL.
<img src="https://{token}.cloudimg.io/{akeneo_product_media_download_link}">base64('wat=1&wat_url=http://samples.scaleflex.com/louis-vuitton-logo-white.png&wat_scale=45&wat_gravity=southwest&wat_pad=15')sha1('samples.scaleflex.com/birds.jpg' + 'd2F0PTEmd2F0X3VybD1odHRwOi8vc2FtcGxlLmxpL2xvdWlzLXZ1aXR0b24tbG9nby13aGl0ZS5wbmcmd2F0X3NjYWxlPTQ1JndhdF9ncmF2aXR5PXNvdXRod2VzdCZ3YXRfcGFkPTE1' + 'salt')json{
"token": "your_token",
"baseURL": "your_base URL",
"lazyLoading": true/false,
"mgmtApiKey": "your Management API key",
}gem 'cloudimage'$ bundle install


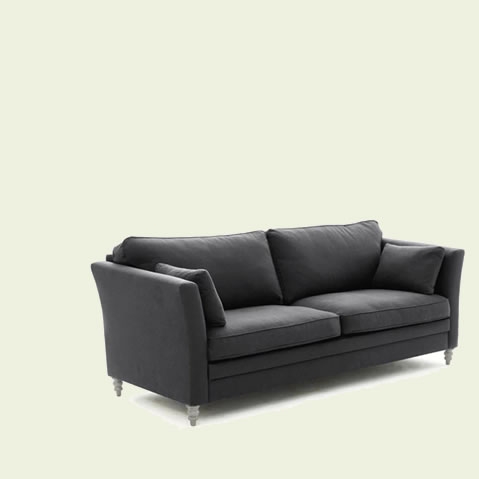
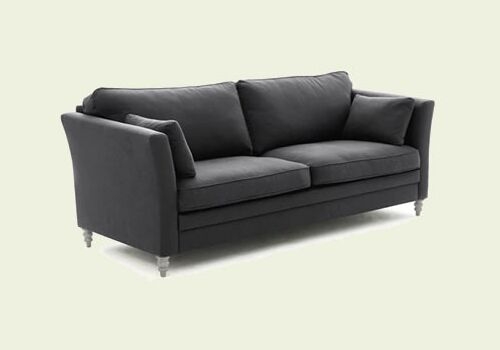
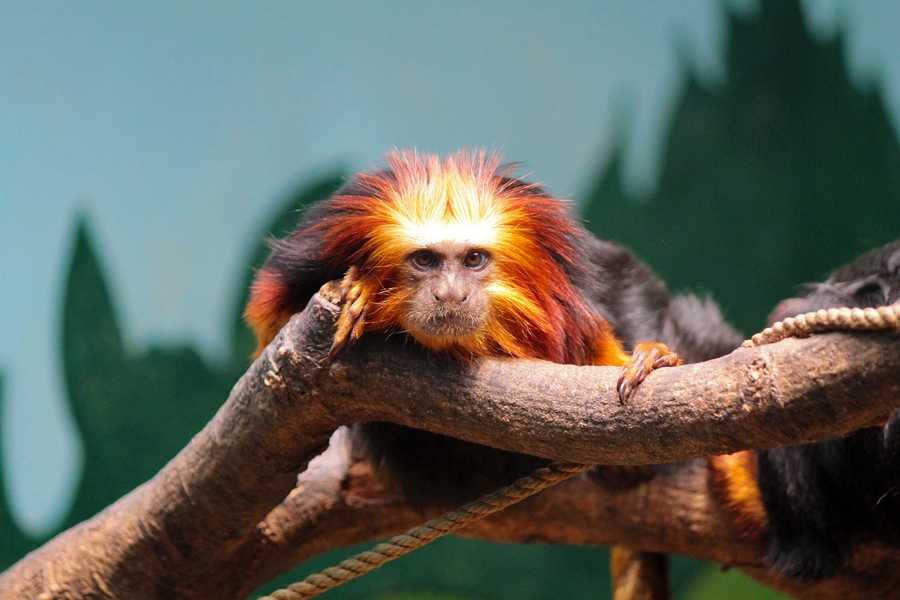


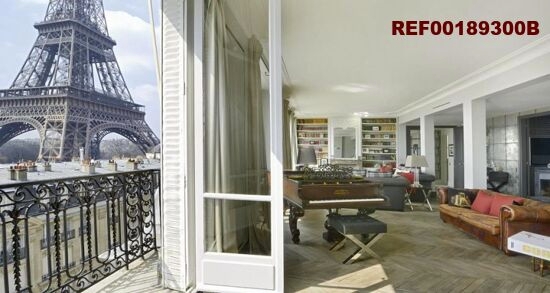


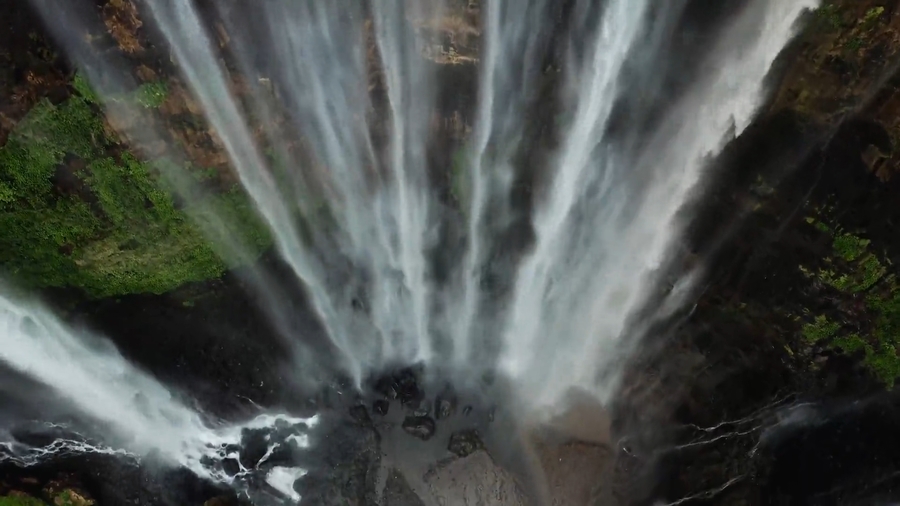
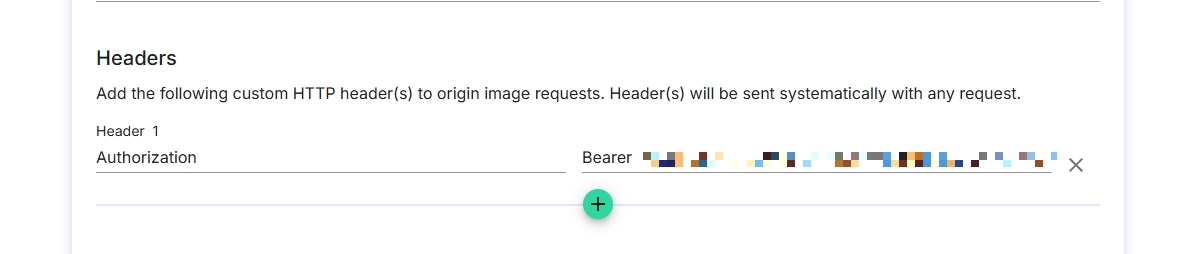

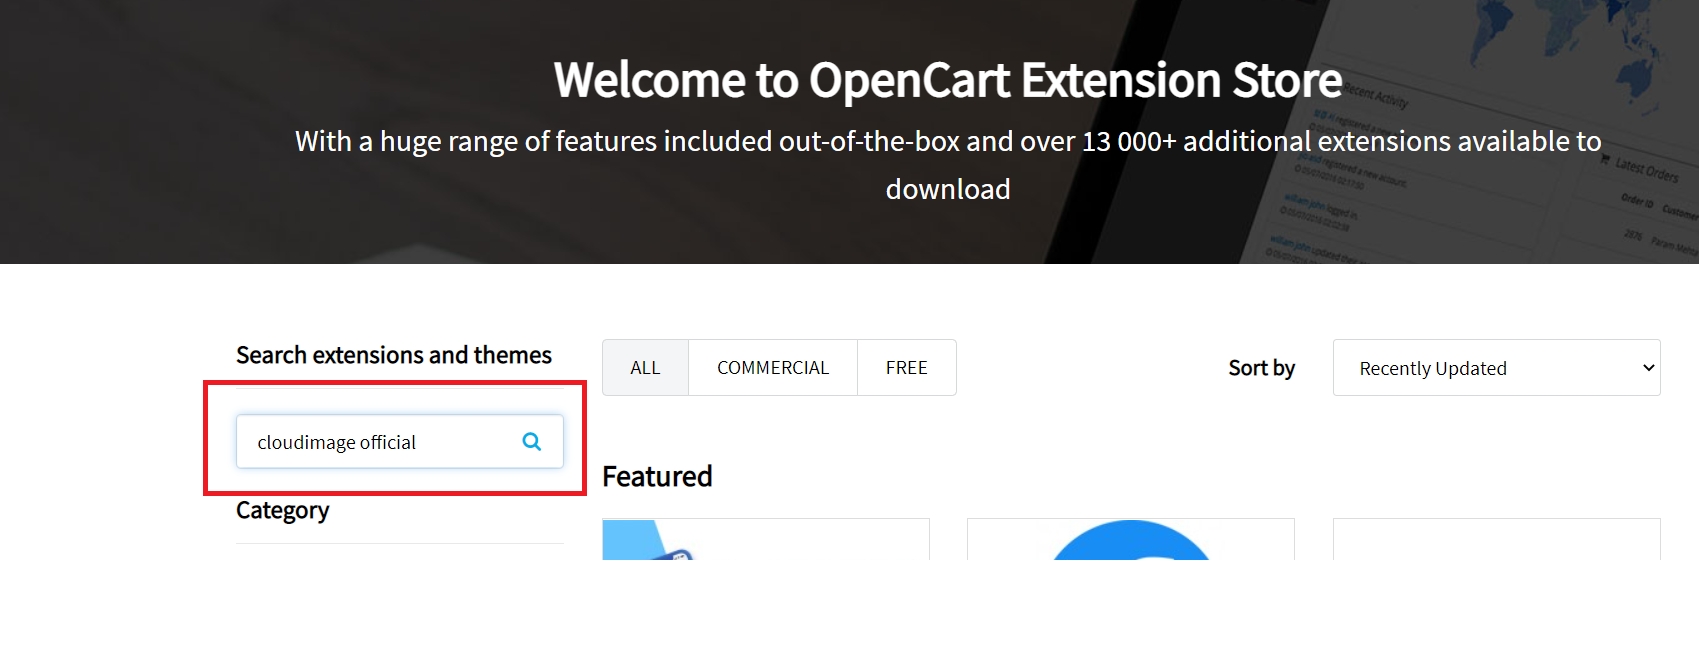
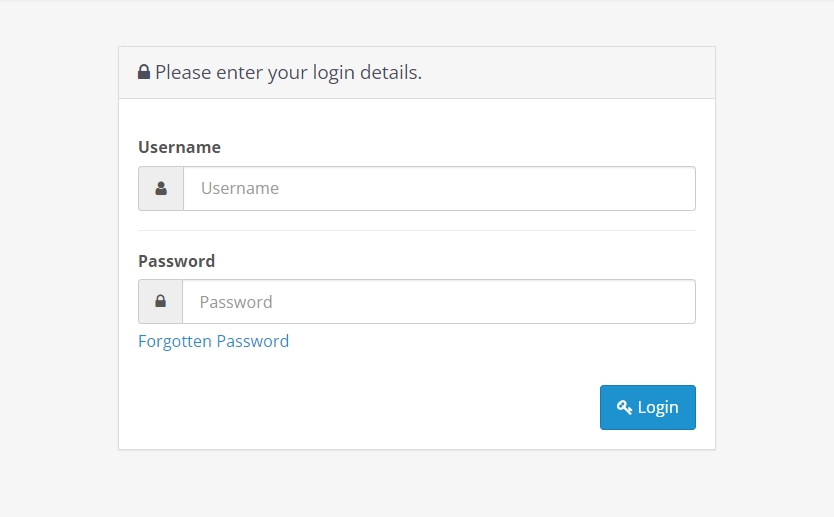
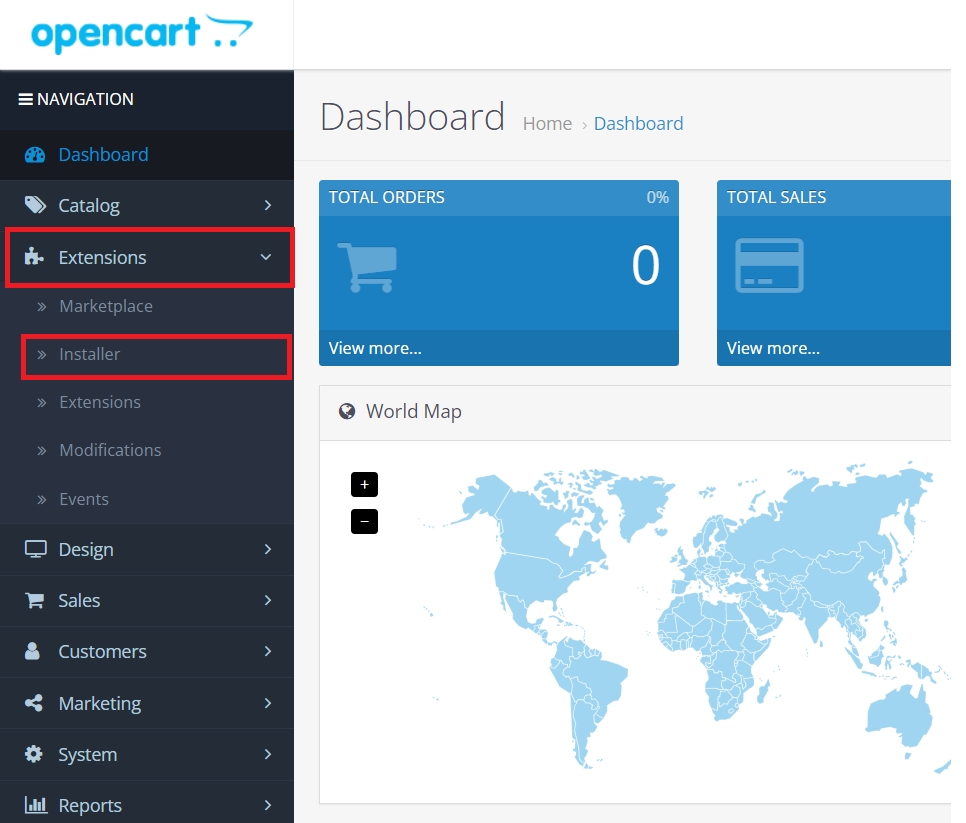
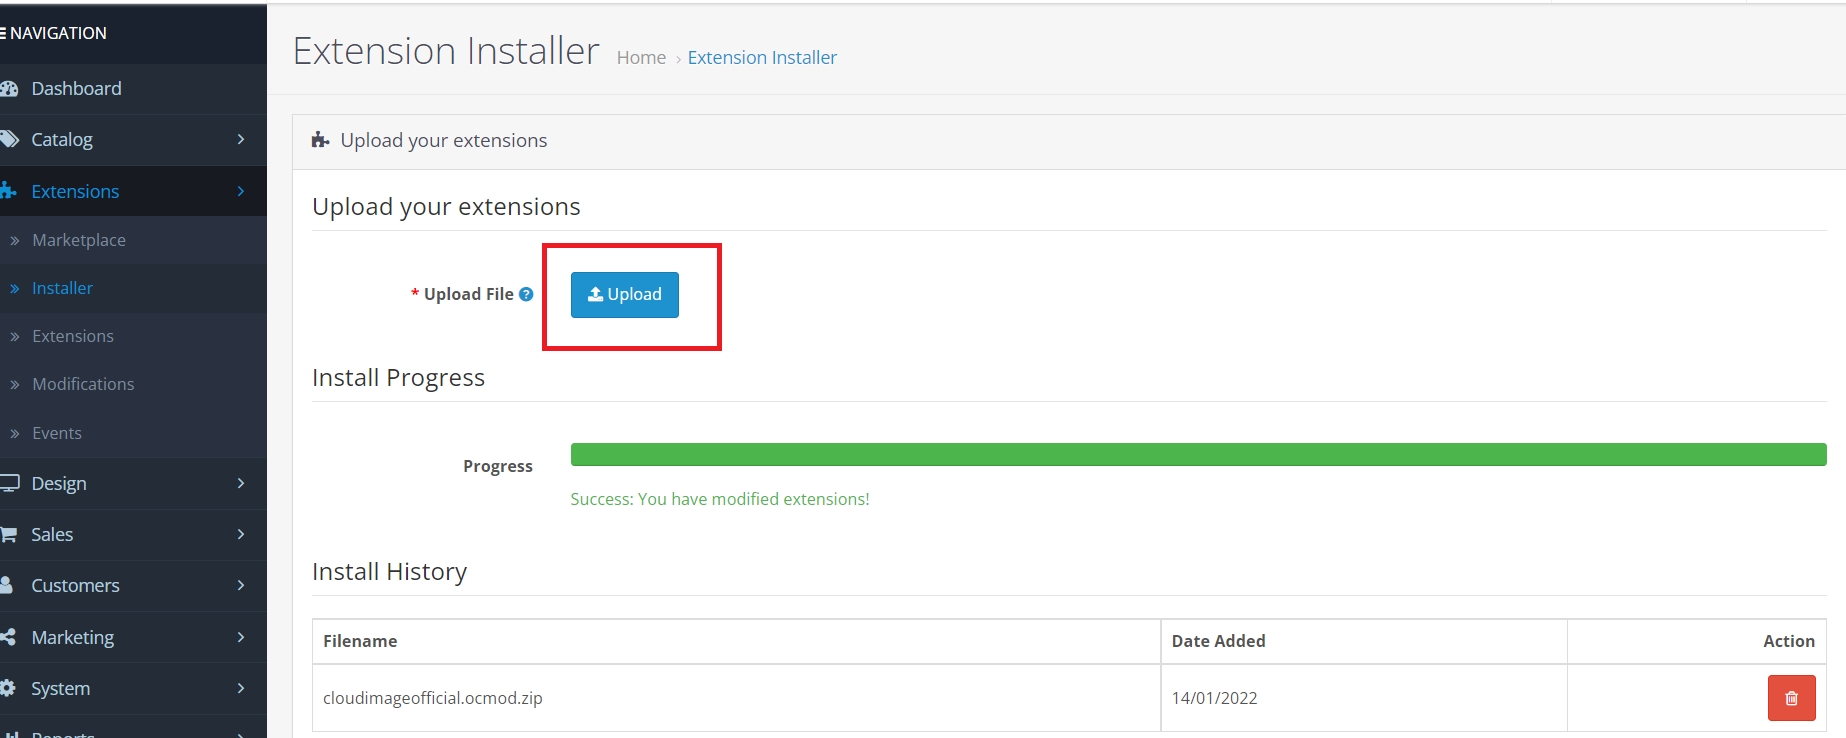
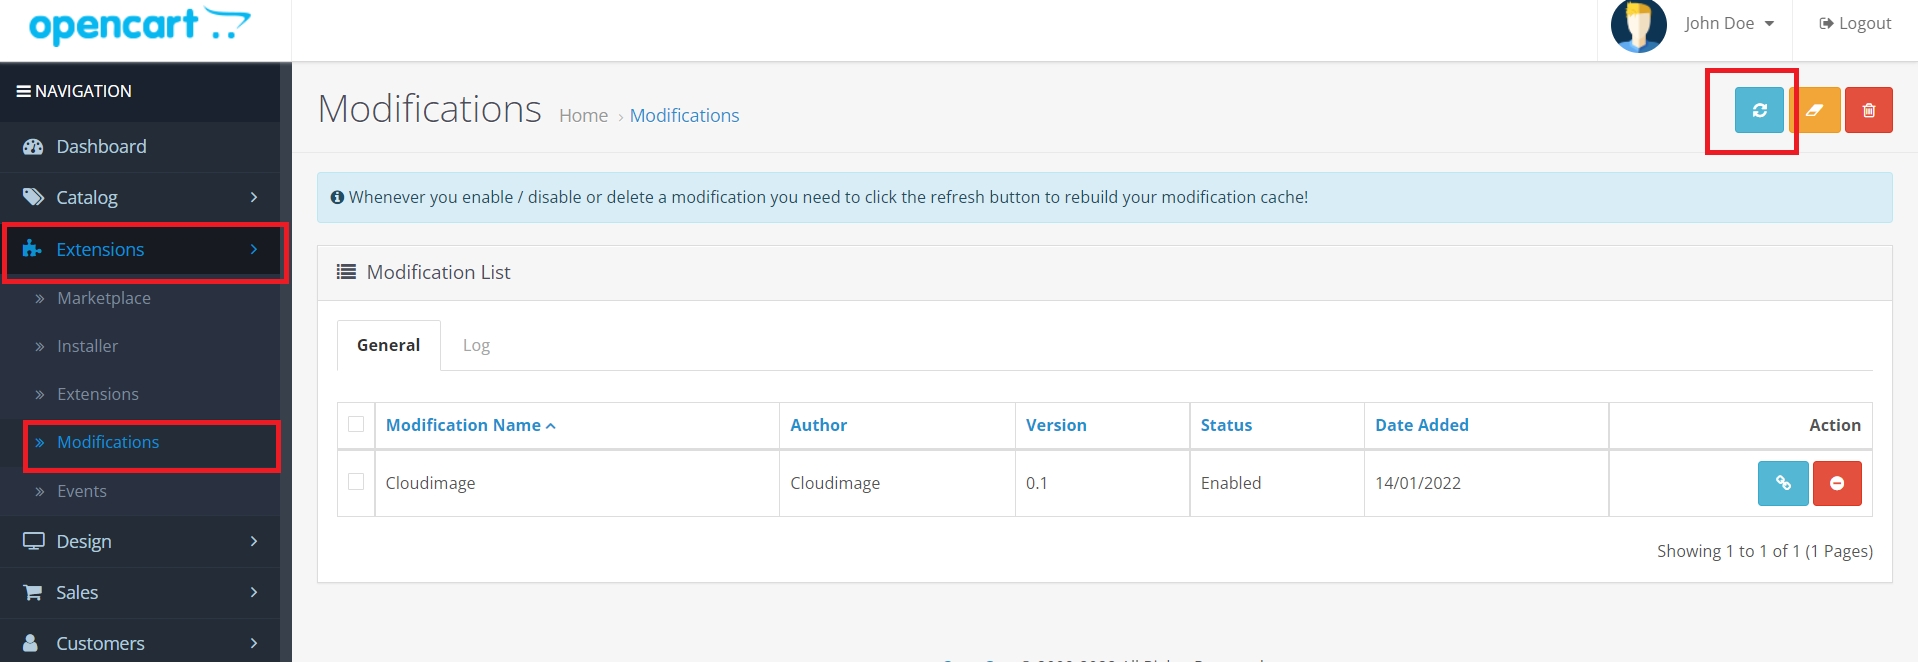
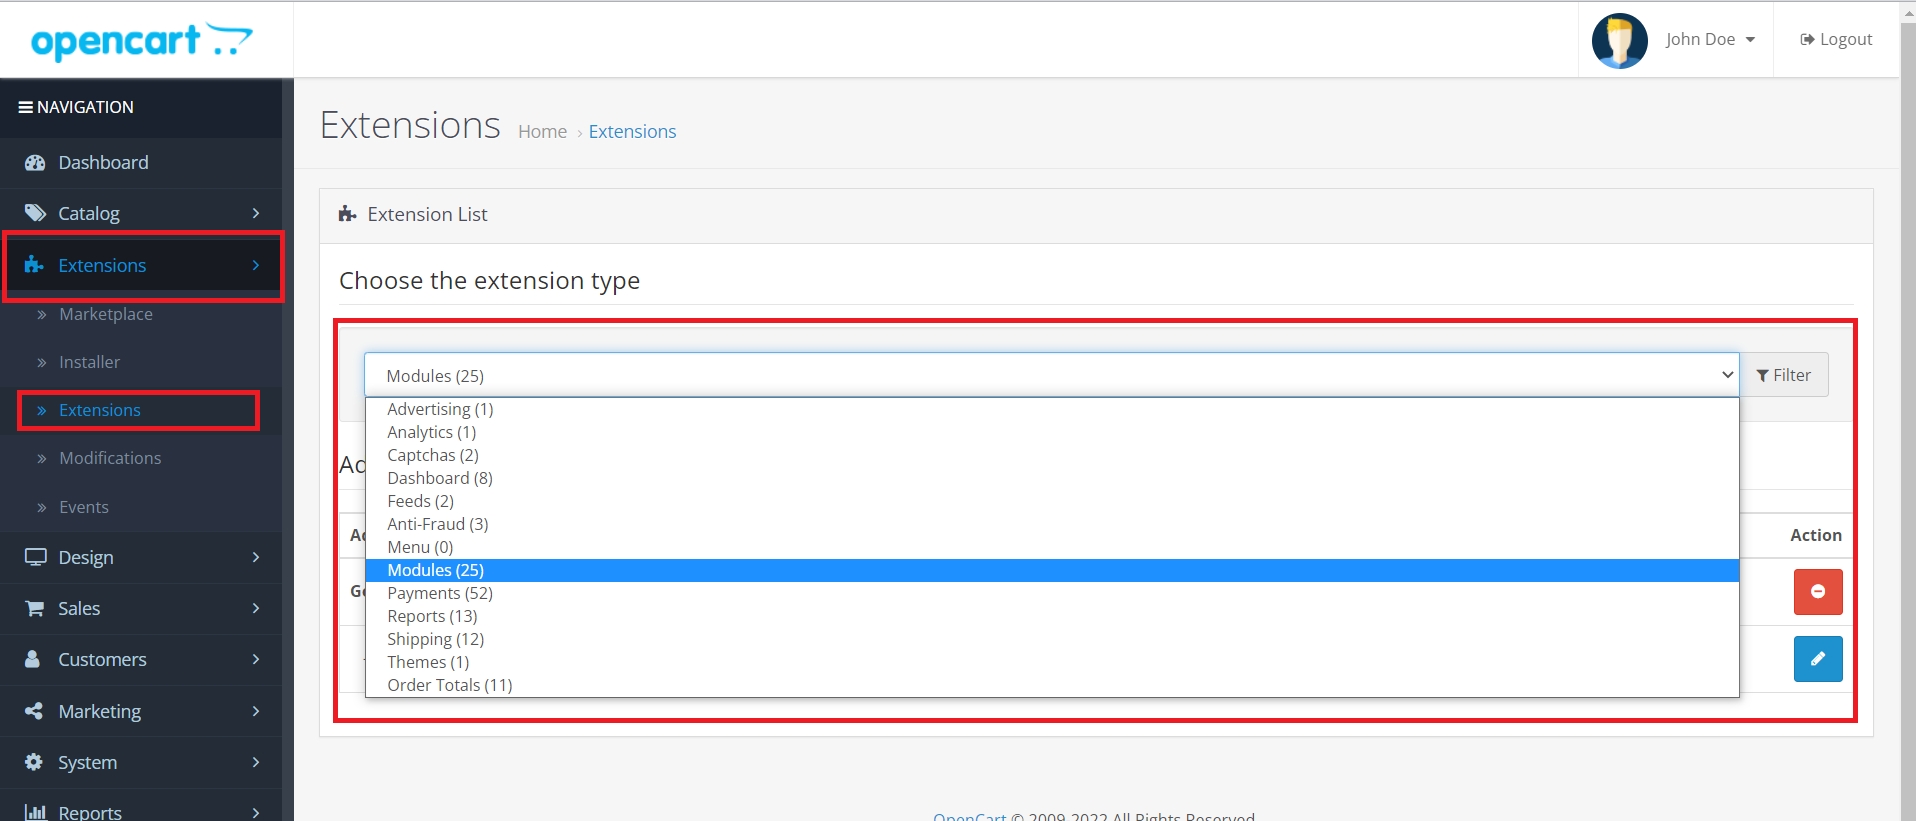

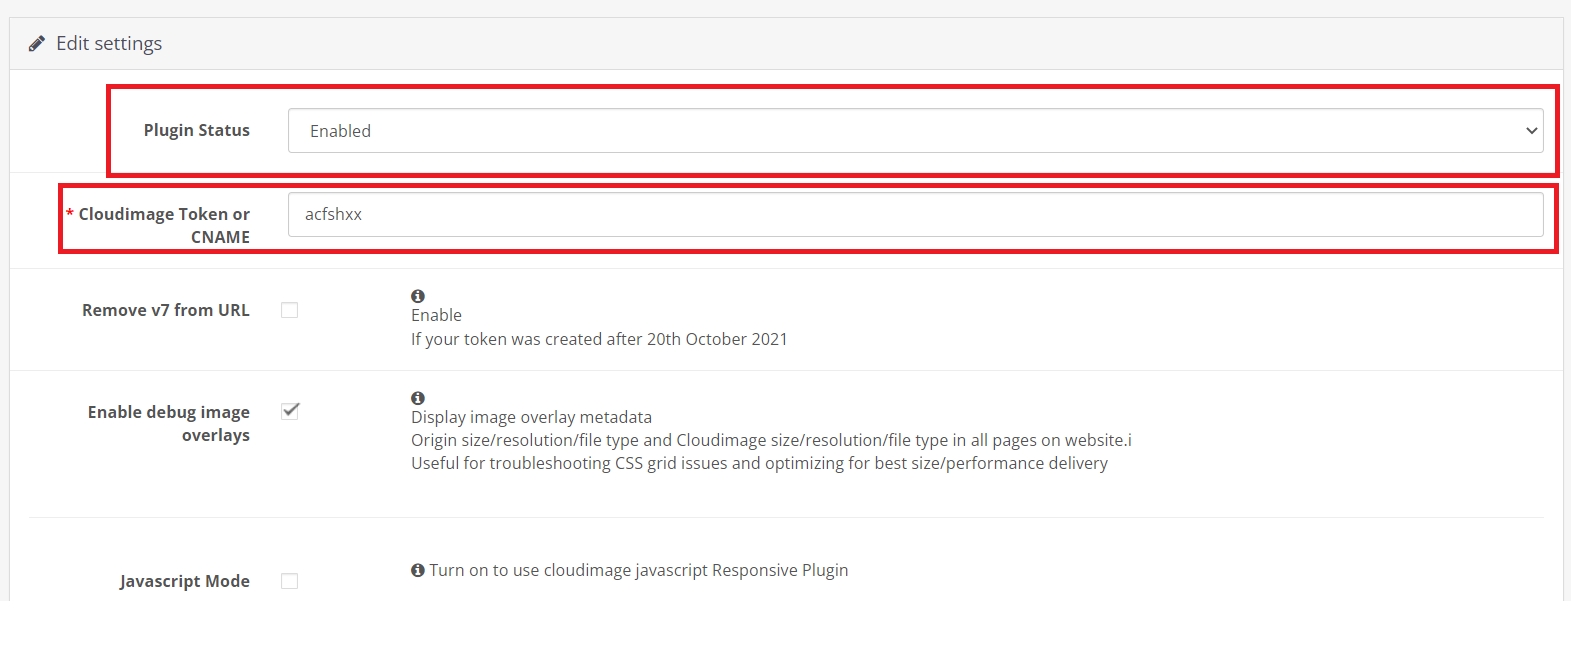

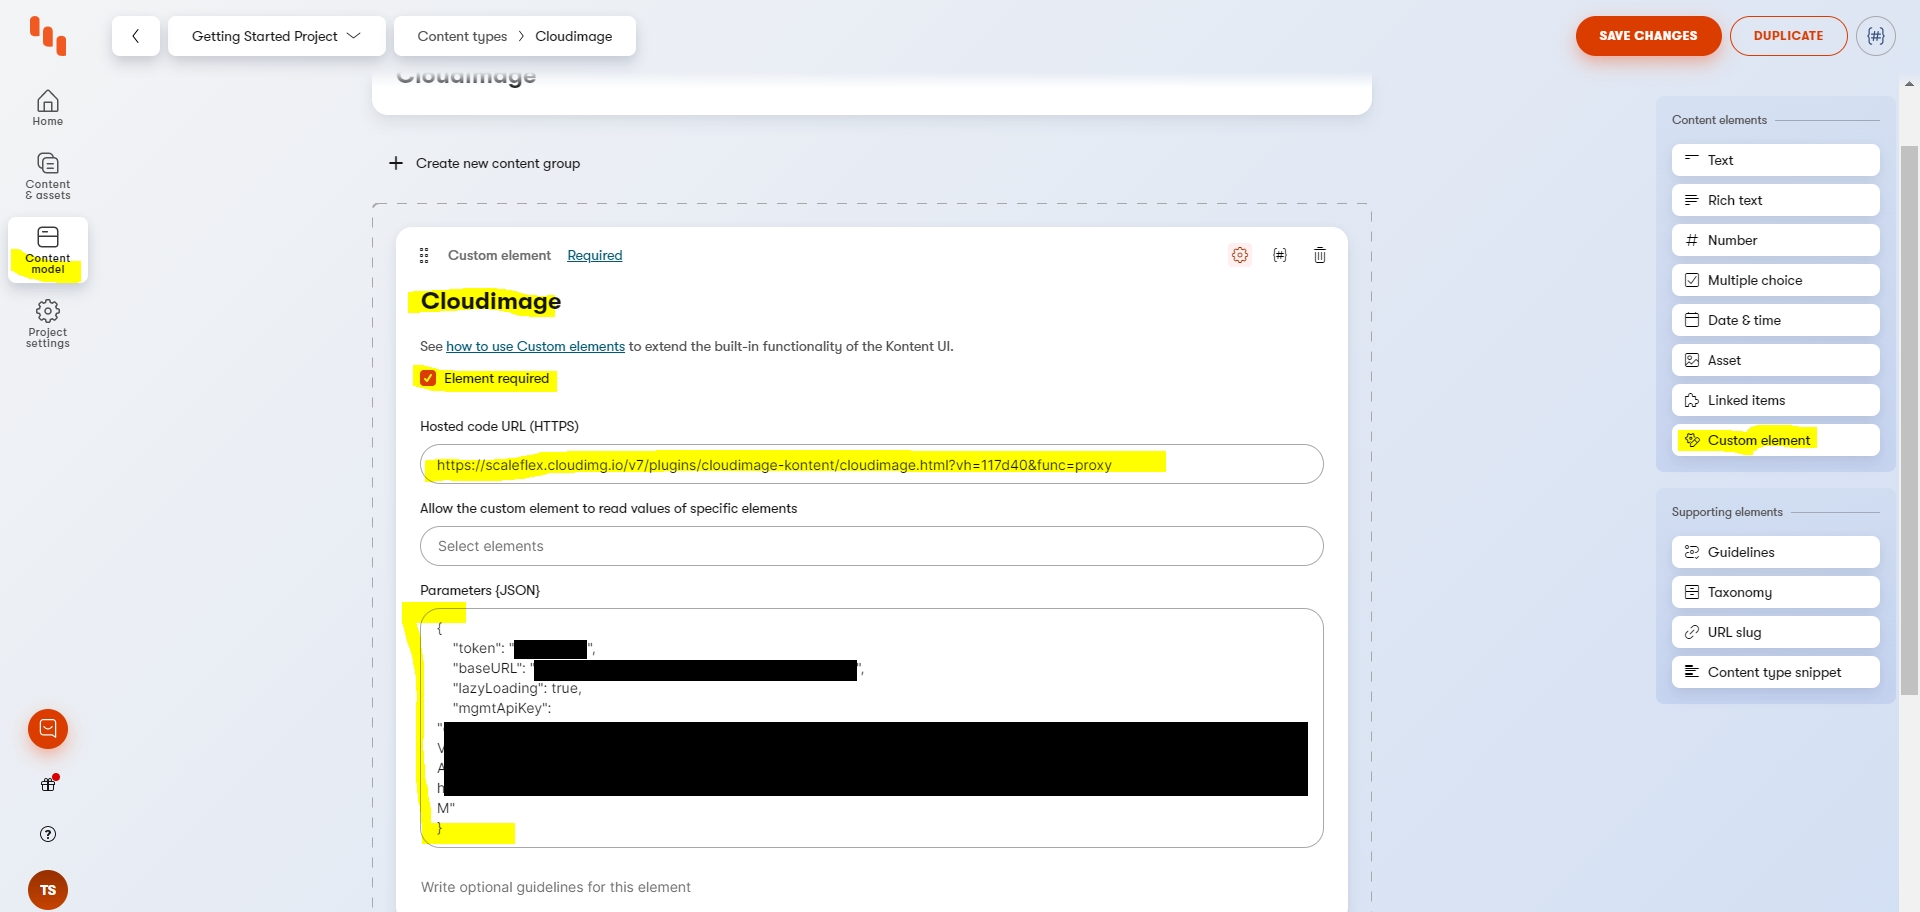
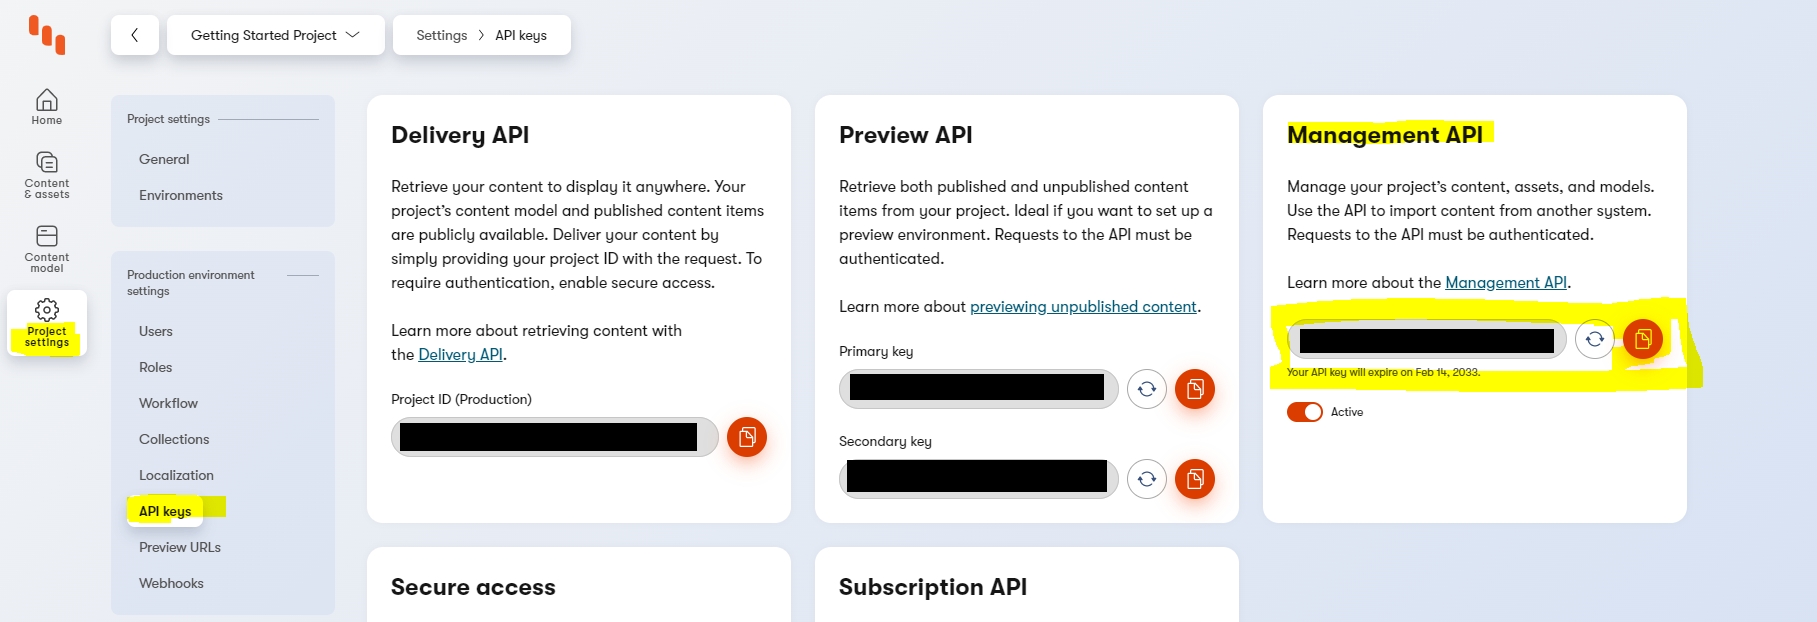
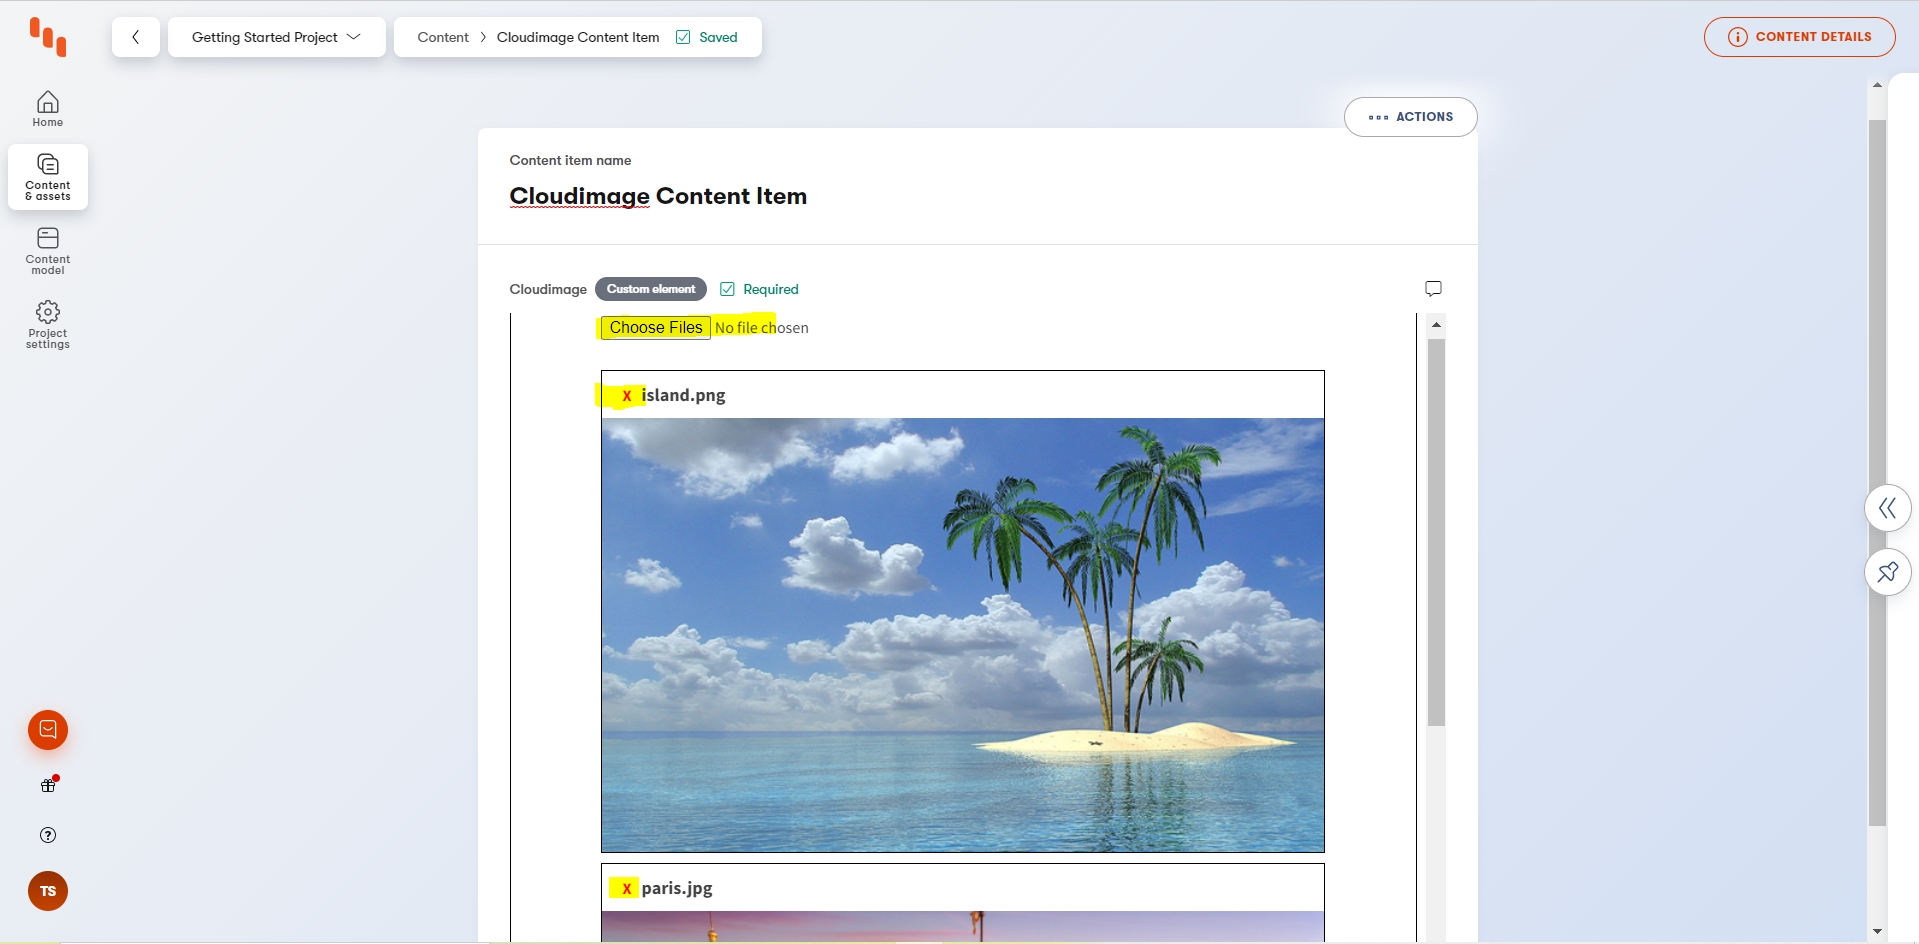
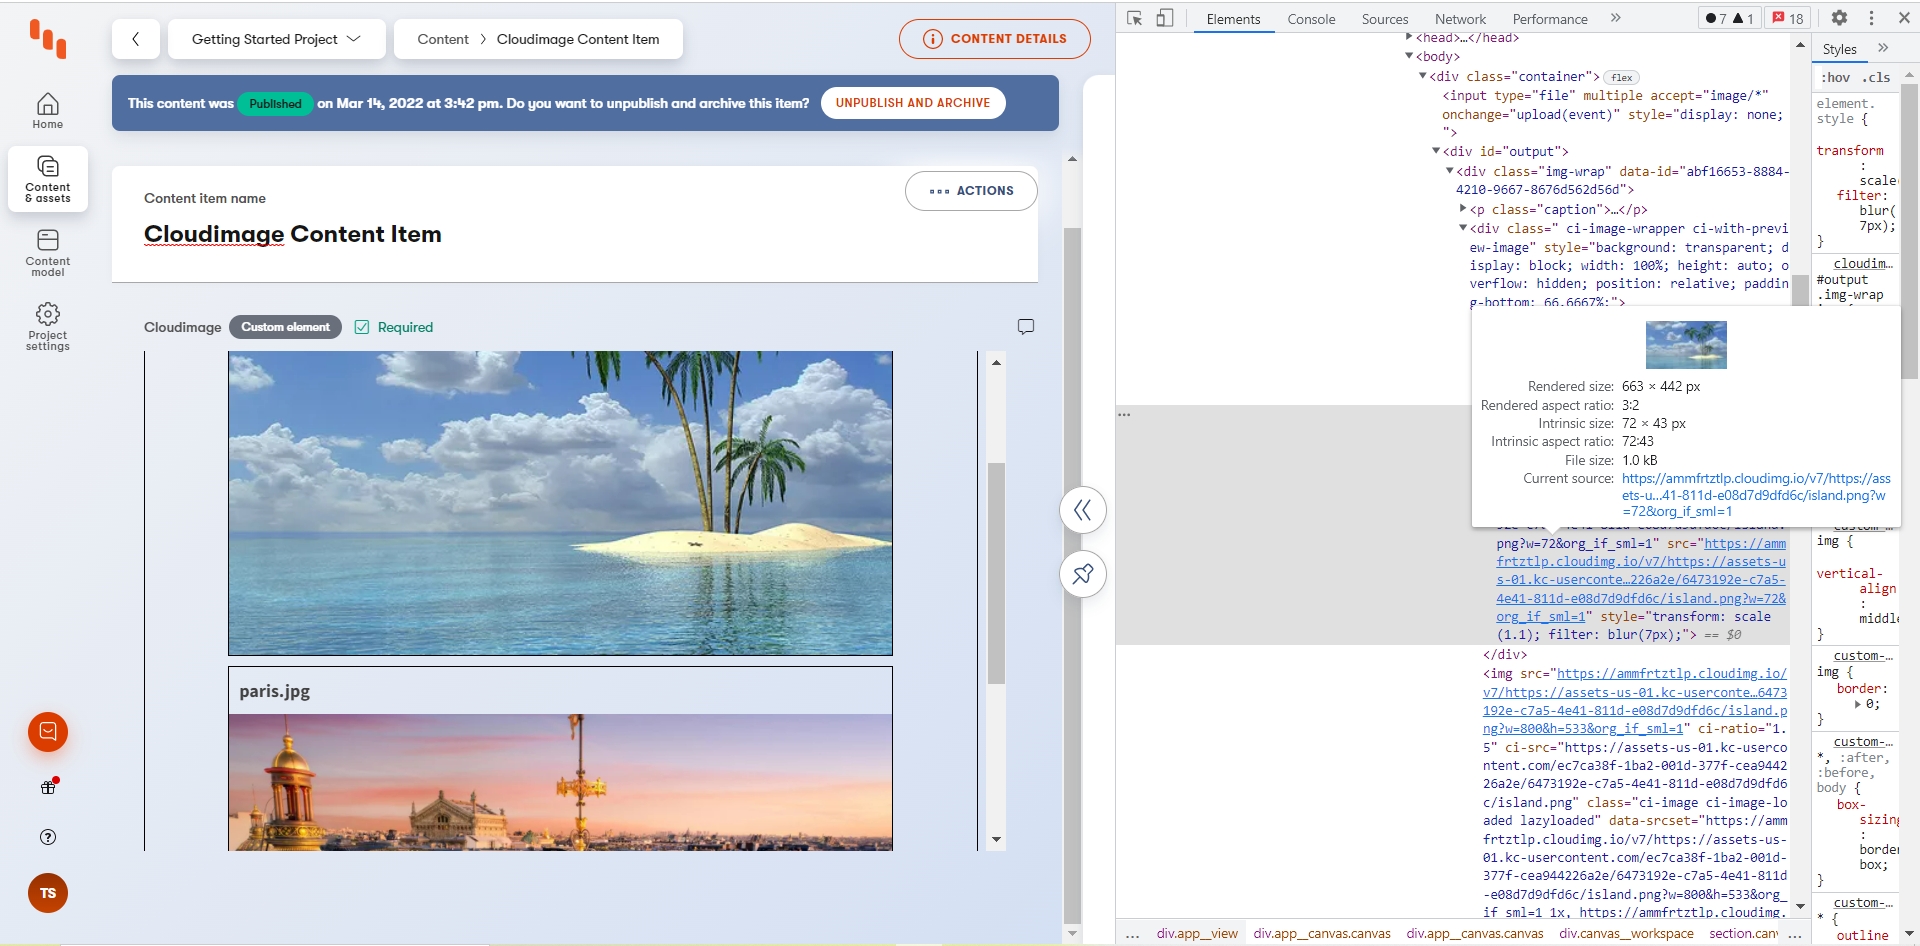
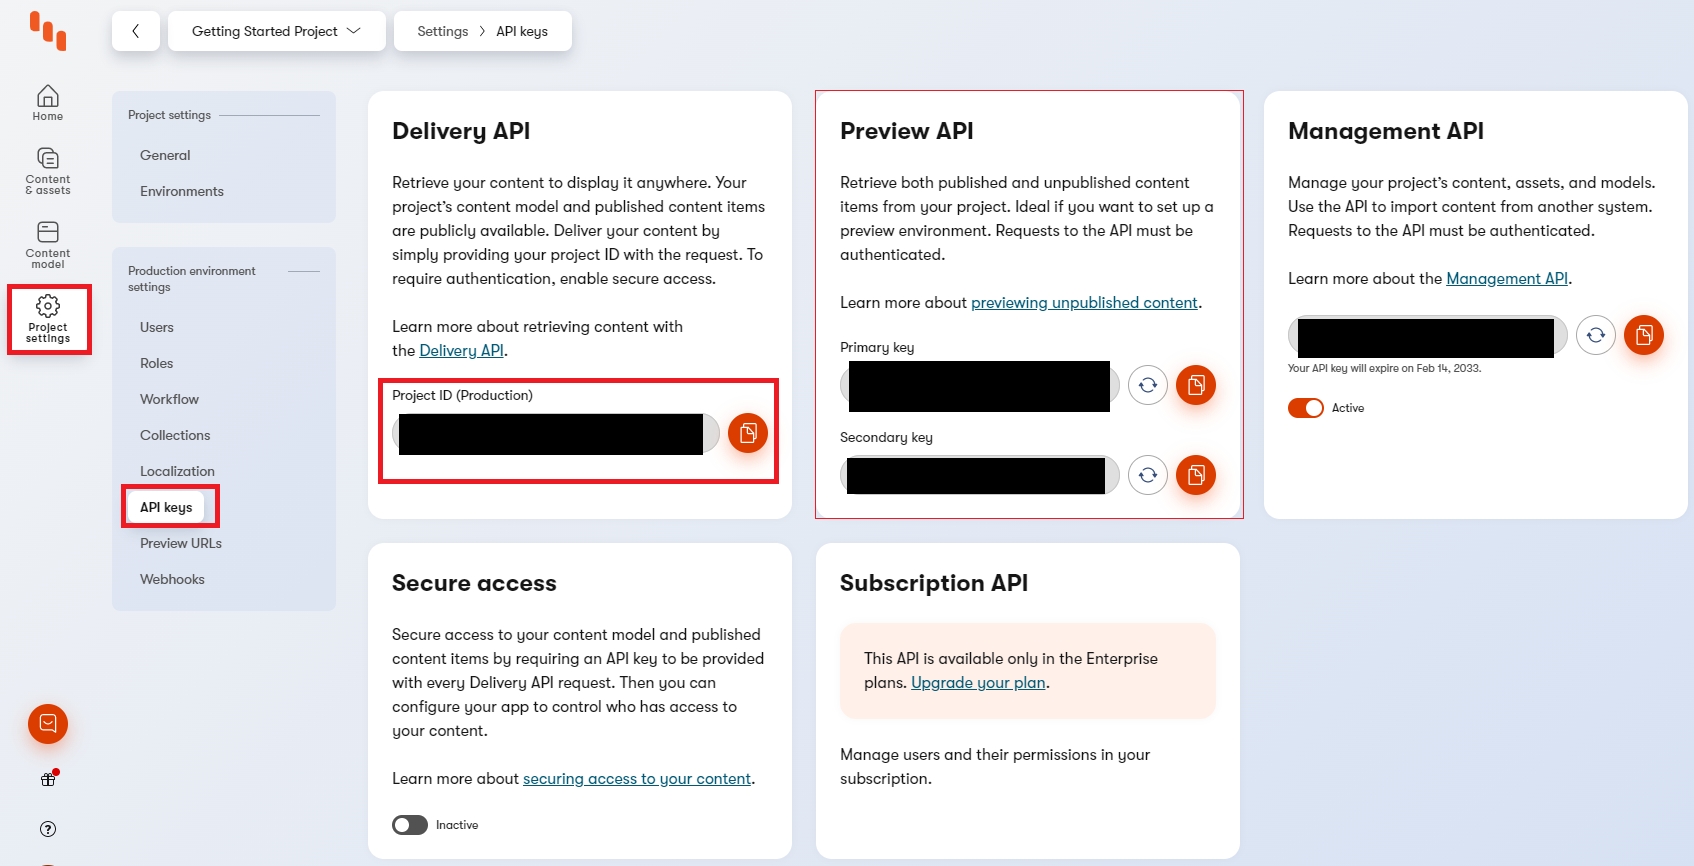
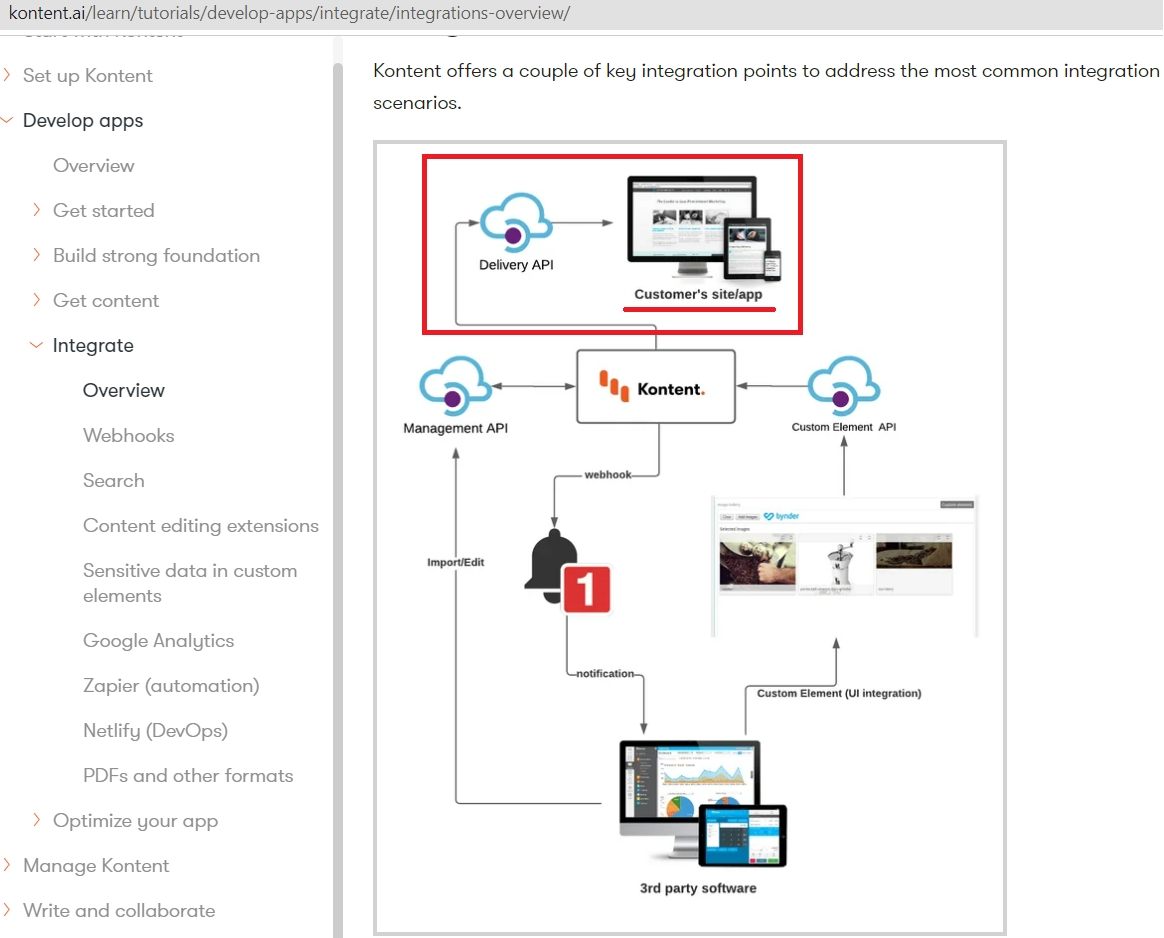
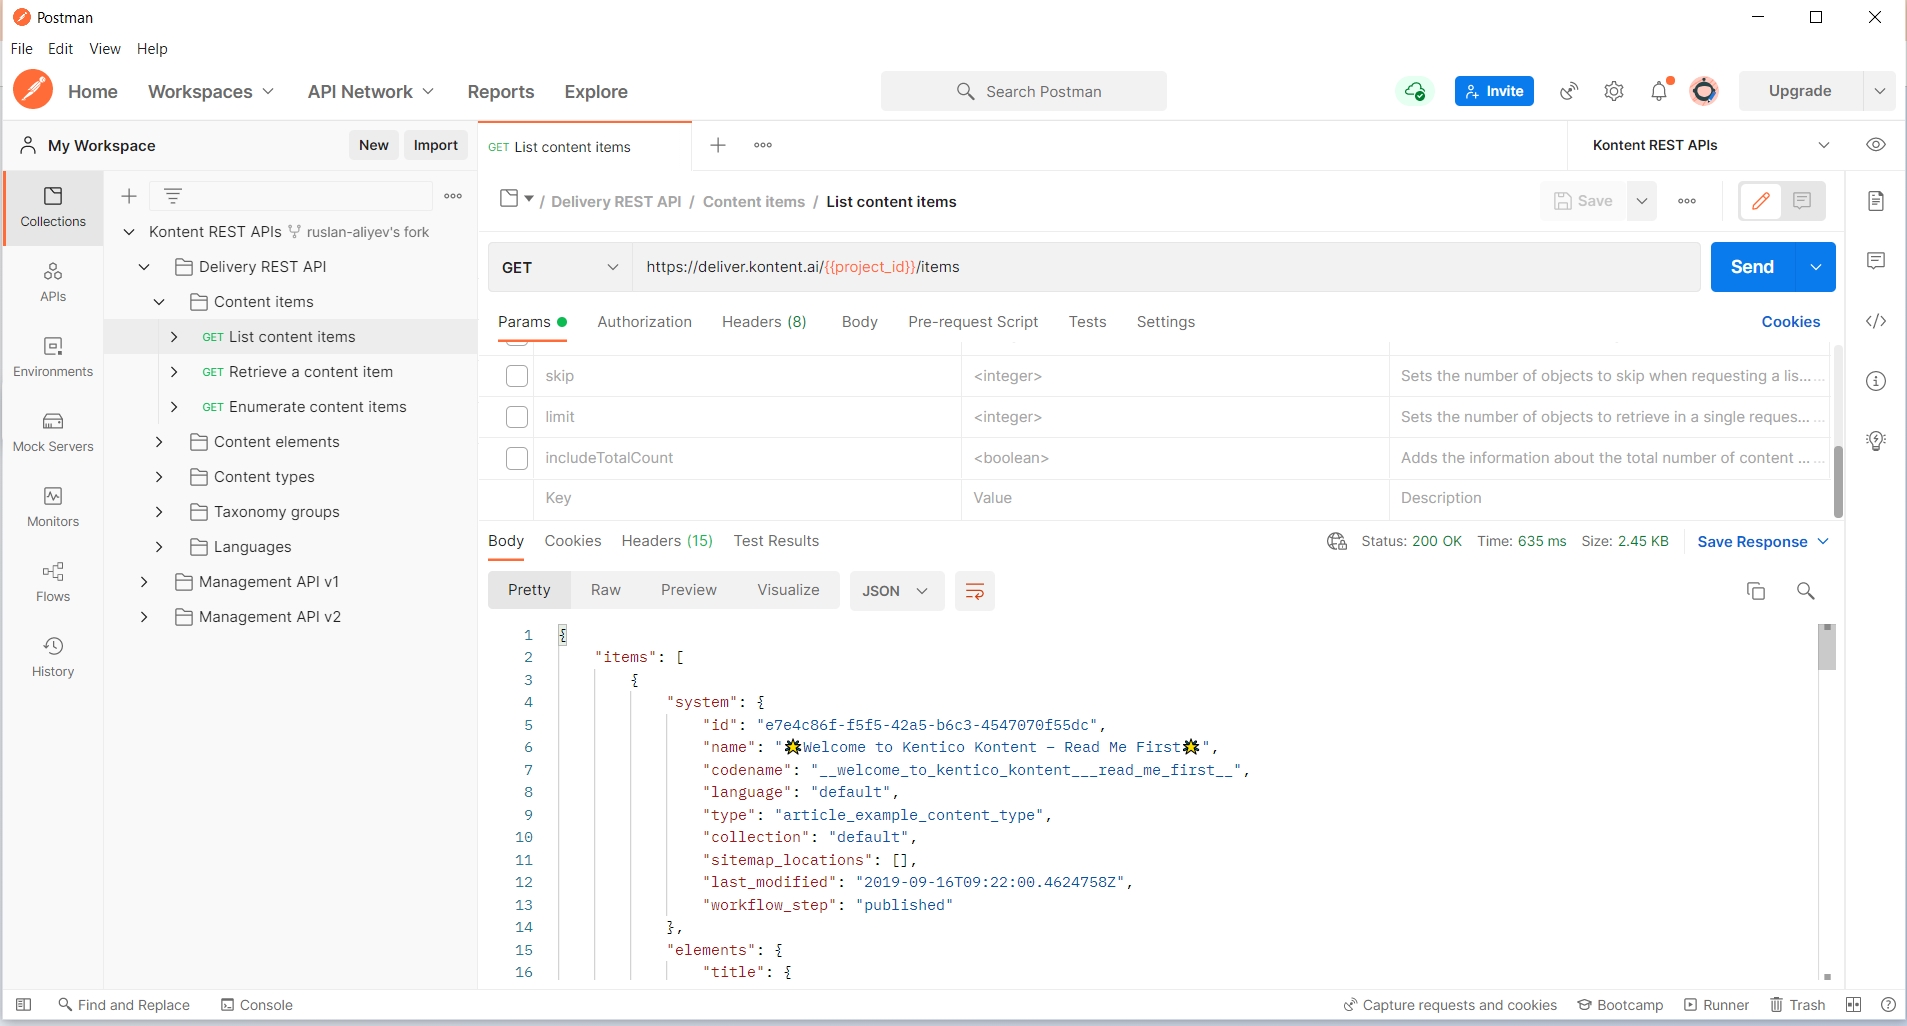
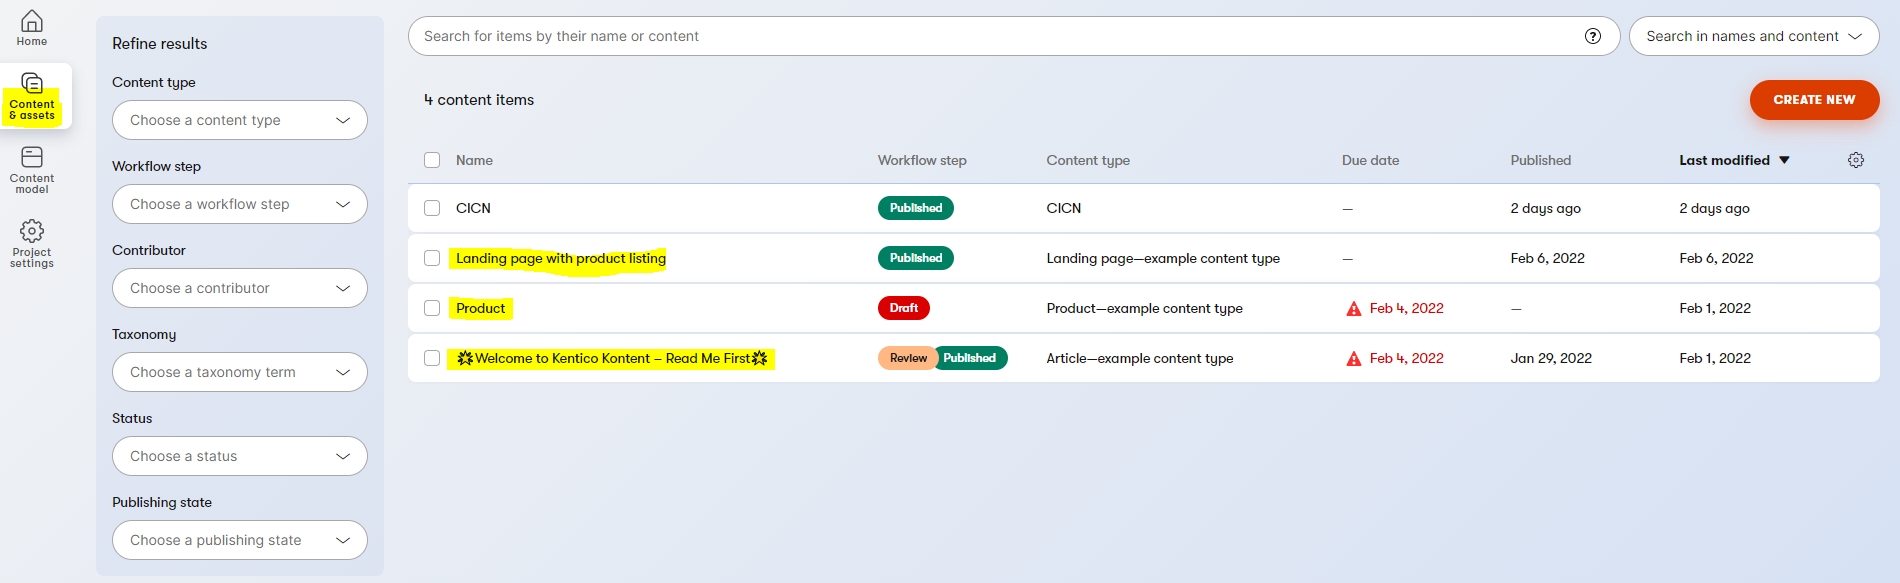
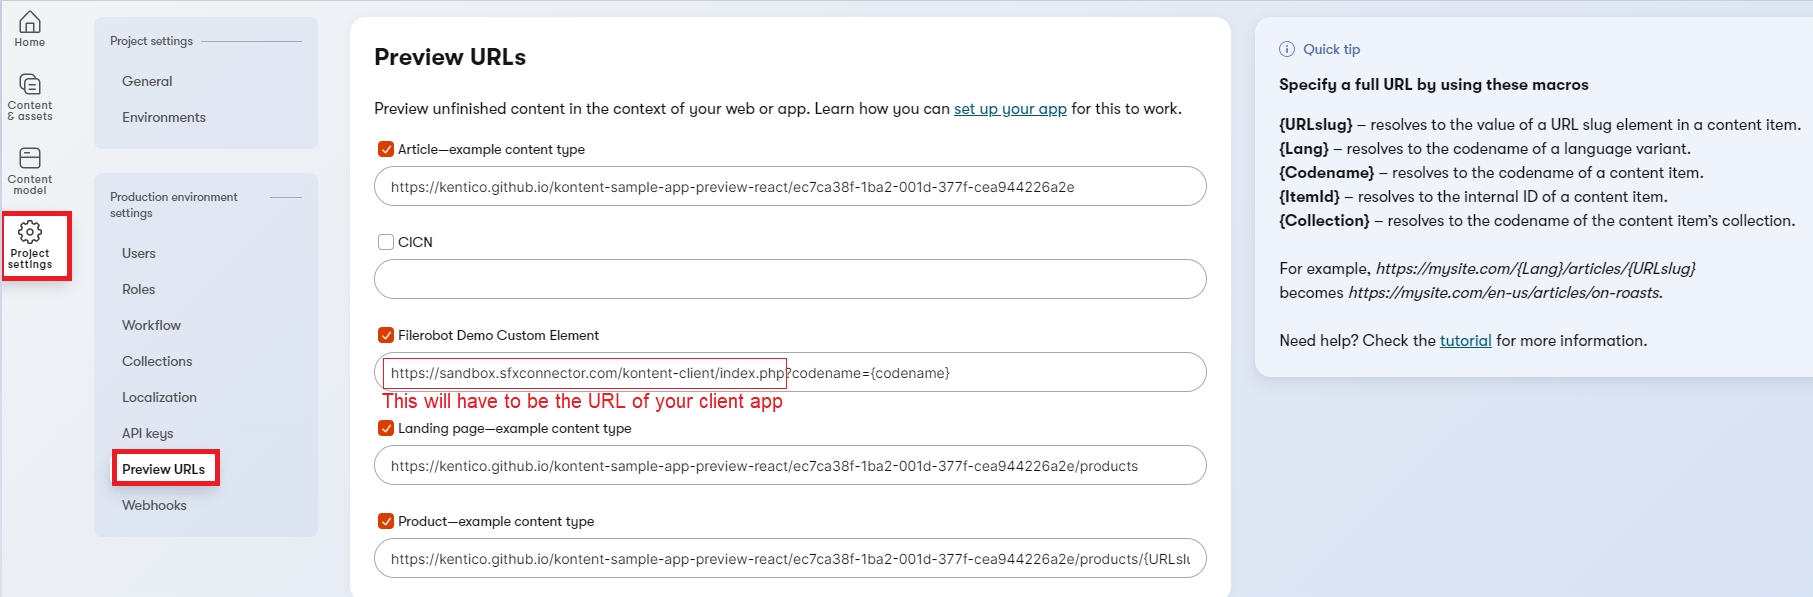
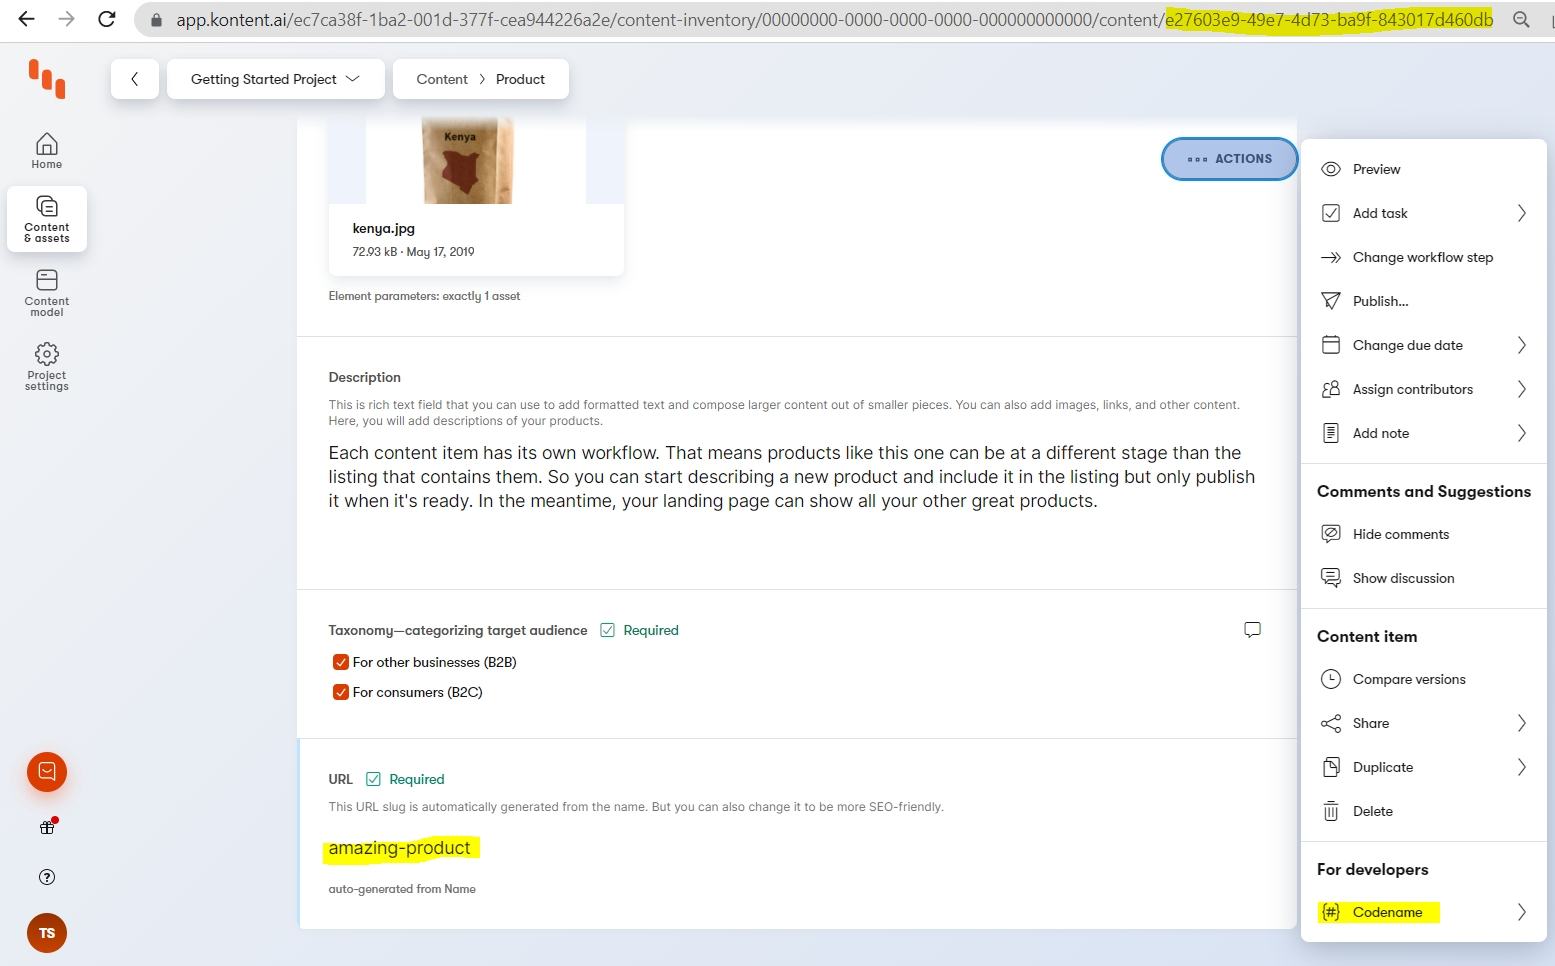


integer
Optional. Integer value in the range 6..40. Defaults to 18.
sign_urls
boolean
Optional. Defaults to true. See Security.
aliases
hash
Optional. See URL aliases.
token
string
Required if cname is missing.
cname
string
Required if token is missing. See CNAME.
salt
string
Optional. See Security. Needed if you are using URL sealing or URL signatures.

signature_length
$ gem install cloudimageclient = Cloudimage::Client.new(token: 'mysecrettoken')uri = client.path('/assets/image.png')uri.to_url(w: 200, h: 400, sharp: 1, gravity: 'west', ci_info: 1)
# => "https://mysecrettoken.cloudimg.io/assets/image.png?ci_info=1&gravity=west&h=400&sharp=1&w=200"uri.w(200).h(400).gravity('west').to_url
# => "https://mysecrettoken.cloudimg.io/assets/image.png?gravity=west&h=400&w=200"uri.height(200).to_url
# NoMethodError (undefined method `height' for #<Cloudimage::URI:0x00007fae461c42a0>)uri.debug.prevent_enlargement.to_url
# => "https://mysecrettoken.cloudimg.io/assets/image.png?ci_info=1&org_if_sml=1"wat_scale=Xp
X=0..100p
Watermark image scaling defined in in percent of the output image dimensions
watermark padding
wat_pad=X[p][,Y[p]]
X/Y=0..100[p]
Adds padding from the anchoring point in pixels (X) or in percent (Xp)
watermark positon
wat_pos=X[,Y]
sets the position in percent from the resized image; works only with wat_gravity=absolute and wat_gravity=relative
watermark opacity
wat_opacity=X
X=0..1
Defines watermark opacity
Absolute positioning - the top left corner of the watermark is position at 7% and 5% of the image width and height, respectively:
use watermark
wat=1
(required) Activates the watermark function
watermark gravity
wat_gravity=X
X=[north|south][east|west]|center|
absolute|relative
Defines the position to "anchor" the watermark to
watermark scaling (relative to original watermark size)
wat_scale=X
X=0..100
Watermark image scaling defined in in percent of the watermark dimensions
Watermark scaled down to 45% of its original size (1178px), results in 530px watermark: /samples.scaleflex.com/tesla.jpg?w=1400&wat=1&wat_gravity=southwest&wat_scale=45&wat_pad=15
Watermark scaled relative to the output image dimensions (618px watermark): /samples.scaleflex.com/tesla.jpg?w=1400&wat=1&wat_gravity=southwest&wat_scale=45p&wat_pad=15
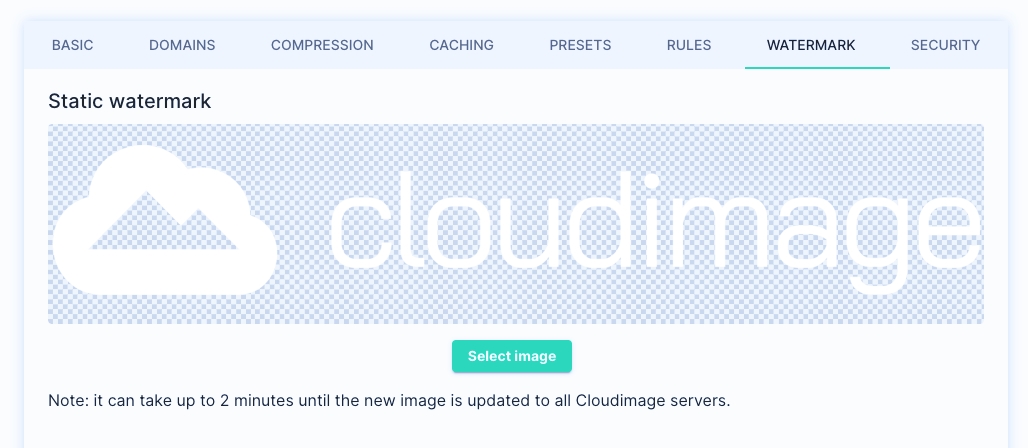
watermark scaling (relative to output image size)
w=1200&force_format=jpeg&optipress=2&wat=1&wat_gravity=northwest&wat_scale=60&wat_pad=20&wat_opacity=0.4


Original aspect ratio (3:2 or 1.5): /samples.scaleflex.com/car1.jpg?w=400
Cropped to 1.8: /samples.scaleflex.com/car1.jpg?w=400&aspect_ratio=1.8
Original aspect ratio (1.323): /samples.scaleflex.com/frog.png
Cropped to 3:2 (1.5): /samples.scaleflex.com/frog.png?aspect_ratio=3:2
Original aspect ratio 1.5: /samples.scaleflex.com/car1.jpg?w=400
Aspect ratio range 1.5..2 (no crop needed): /samples.scaleflex.com/car1.jpg?w=400&aspect_ratio=1.5,2.0
Original aspect ratio 2.25:1 (2.25): /samples.scaleflex.com/kids.jpg?w=400
Aspect ratio range 3:2..2:1 (1.5..2): /samples.scaleflex.com/kids.jpg?w=400&aspect_ratio=3:2,2:1


Fits the image in a box with padding when needed
Resizes the image to fit into a specified width and height box, adds padding (image or solid color) to keep proportions, and delivers the resulting image via CDN.
func=fit
The padding can be customized using the following additional operations:
When using func=fit along with (trim=X), you can set gravity=trim. This way, upon a successful trim, the gravity will be resolved to a compass position so that the canvas will not be extended on the non-trimmed edges.
margin=X
If only one value is provided (margin=X), this sets the same minimum margin for all four edges. When two values are provided (margin=V,H), this sets the vertical (top and bottom) and horizontal (left and right) margins. If four values are listed (margin=N,E,S,W), they refer to the four image edges - north (top), east (right), south (bottom) and west (left).
By default, the margin is defined in pixels and applied before resizing. Alternatively, you can also use percentages (eg. margin=5p) of the destination size or absolute values in pixels (margin=100a) to define the margins.
Supported output image formats
The JPEG compression format is suitable for delivering photographic images with minimal quality loss and a high compression rate. You can either choose the compression factor yourself or use Optipress - our Machine Learning algorithm, which will choose the best way to reduce JPEG file size minimizing perceptual quality loss.
This format is a good choice for non-photographic images - flowcharts, graphs, screenshots, logos, etc. PNG also supports transparency.
While the PNG format offers lossy compression only, Cloudimage can optimize the image before compression by reducing the number of colors or adding slight dithering (while preserving edges). This method usually leads to smaller file sizes for images visually indistinguishable from the original ones.
You can activate this feature in the Admin Console (Image Settings/Compression):
WebP is an image format maintained by Google and supported in certain browsers (mainly Chrome, Opera, and Chrome Android) which provides more aggressive compression techniques as JPG without noticeable quality degradation.
You can use the following parameters to control WebP compression quality:
By default, Cloudimage delivers the images in the format which will lead to the fastest delivery, while being supported by the requesting browser, as for exemple a WebP.
But sometimes WebP will be heavier than the original image (eg. a low resolution .JPG might be lighter than the same image .WEBP), so cloudimage will ignore the transformation process and provide the original format (when the original format is supported by the browser of course).
If you would like to systematically activate this function and always keep the format of the original image, you can use force_format=original
Shopify integration - theme files
You need to adapt your individual theme files for the image URLs to be changed to Cloudimage URLs. Identify first which theme files are used by your shop and edit them one by one as detailled below.
Here are a couple of examples indicating the change that needs to be made in the theme files. You can follow similar steps to change all of your theme files. List of some files that need to be changed (files may vary between themes):


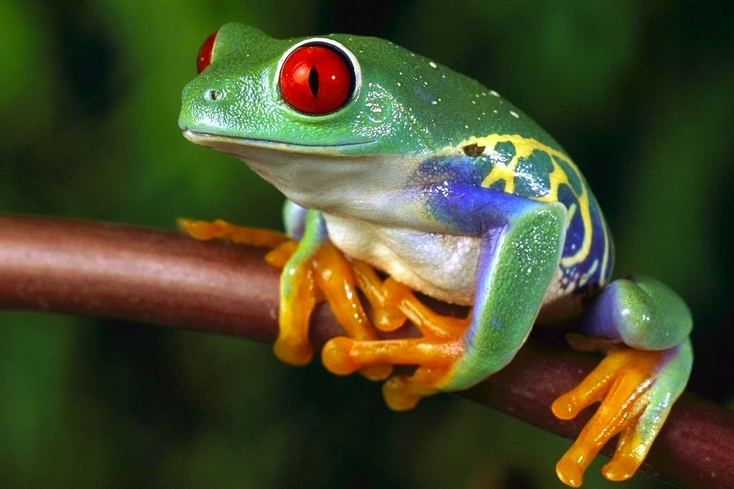


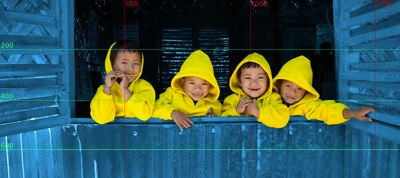
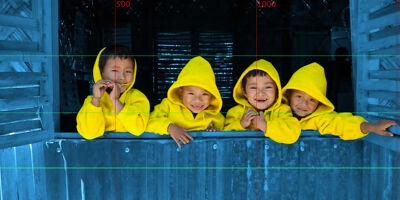
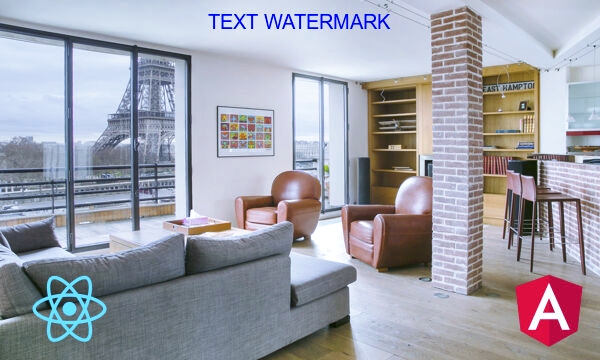
product-template.liquid
collection-grid-item.liquid
Product-grid-item.liquid
header.liquid
video.liquid
As general what you need to do is:
assign new variable inheriting the original theme image url
replace the old image invocation with inclusion of cloudimage
You can make the changes inside product-template.liquid.
If there is a tag inside image URL and you cannot simply assign it, use capture
You can also take a look at the FAQ section.
<img id="{{ img_id }}"
class="product-single__photo lazyload{% unless featured_image == image %} lazypreload{% endunless %}{% if section.settings.product_image_zoom_type == 'lightbox' %} lightbox{% endif %}"
{% if section.settings.product_image_zoom_type == 'zoom-in' %} data-zoom="{{ image | img_url: '1024x1024' }}"{% endif %}
src="{{ image | img_url: '200x200' }}"
data-src="{{ img_url }}"
data-widths="[180, 360, 470, 600, 750, 940, 1080, 1296, 1512, 1728, 2048]"
data-aspectratio="{{ image.aspect_ratio }}"
data-sizes="auto"
alt="{{ image.alt | escape }}">Explained changes:
We assign new variables for every URL usage from the original theme file (visible above)
using
{% assign meaningfull_name = the_entire_value_used_in_the_original_request %}
For example: src="{{ image | img_url: '200x200' }}"
we create new variable that equals the old src "image | img_url: '200x200'"
{% assign old_img_src = image | img_url: '200x200' %}
Now we replace the src="{{ image | img_url: '200x200' }}" with src="{% include 'cloudimage' src:old_img_src %}"
Where wi replace the old value with {% include 'cloudimage' src:the_meaningful_name_we_assign_before_that %}-
This way we get the chance to switch between the original image path and the optimised one by using the implemented Cloudimage enable/disable option
Now we need to perform this change in all files that deliver image URLs being src, data-src, background-image, zoom-image{% assign old_img_src = image | img_url: '200x200' %}
{% assign old_img_data_src = img_url %}
{% assign old_img_data_zoom = image | img_url: '1024x1024' %}
<img id="{{ img_id }}"
class="product-single__photo lazyload{% unless featured_image == image %} lazypreload{% endunless %}{% if section.settings.product_image_zoom_type == 'lightbox' %} lightbox{% endif %}"
{% if section.settings.product_image_zoom_type == 'zoom-in' %} data-zoom="{% include 'cloudimage' src:old_img_data_zoom %}"{% endif %}
src="{% include 'cloudimage' src:old_img_src %}"
data-src="{% include 'cloudimage' src:old_img_data_src %}"
data-widths="[180, 360, 470, 600, 750, 940, 1080, 1296, 1512, 1728, 2048]"
data-aspectratio="{{ image.aspect_ratio }}"
data-sizes="auto"
alt="{{ image.alt | escape }}"><noscript>
<img src="{{ featured_image | img_url: 'grande' }}" alt="{{ featured_image.alt | escape }}">
</noscript><noscript>
{% assign old_img_url = featured_image | img_url: 'grande' %}
<img src="{% include 'cloudimage' src:old_img_url %}" alt="{{ featured_image.alt | escape }}">
</noscript><li class="grid__item {{ thumbnail_width }}">
<a href="{{ image.src | img_url: 'grande' }}" class="product-single__thumbnail" data-image-id="{{ image.id }}">
<img src="{{ image.src | img_url: 'compact' }}" alt="{{ image.alt | escape }}">
</a>
</li><li class="grid__item {{ thumbnail_width }}">
{% assign old_img_grande = image.src | img_url: 'grande' %}
{% assign old_img_compact = image.src | img_url: 'compact' %}
<a href="{% include 'cloudimage' src:old_img_grande %}" class="product-single__thumbnail" data-image-id="{{ image.id }}">
<img src="{% include 'cloudimage' src:old_img_compact %}" alt="{{ image.alt | escape }}">
</a>
</li>{% if section.settings.product_image_zoom_type == 'lightbox' %}
<ul class="gallery hidden">
{% for image in product.images %}
<li data-image-id="{{ image.id }}" class="gallery__item" data-mfp-src="{{ image | img_url: '2048x2048' }}"></li>
{% endfor %}
</ul>{% if section.settings.product_image_zoom_type == 'lightbox' %}
<ul class="gallery hidden">
{% for image in product.images %}
{% assign old_data-mfp-src = image | img_url: '2048x2048' %}
<li data-image-id="{{ image.id }}" class="gallery__item" data-mfp-src="{% include 'cloudimage' src:old_data-mfp-src %}"></li>
{% endfor %}
</ul><img width="{{ image.width }}" height="{{ image.height }}" src="{{ image | img_url: '50x50' }}" class="lazyload attachment-shop_single size-shop_single sp-post-image" alt="{{image.alt}}" title="{{product.title}}"
data-src="{{ img_url }}"
data-large_image="{%-include 'gl_image_format',cache:true, src: image.src, size: product_image_photowipe -%}" data-large_image_width="{{ image.width }}" data-large_image_height="{{ image.height }}"
data-widths="[180, 360, 540, 720, 900, 1080, 1296, 1512, 1728, 2048]" data-aspectratio="{{ image.aspect_ratio }}" data-sizes="auto">{% assign old_img_src = image | img_url: '50x50' %}
{% assign old_img_data_src = img_url %}
{% capture old_img_data_large_image %}
{%-include 'gl_image_format',cache:true, src: image.src, size: product_image_photowipe -%}
{% endcapture %}
<img width="{{ image.width }}" height="{{ image.height }}" src="{% include 'cloudimage' src:old_img_src %}" class="lazyload attachment-shop_single size-shop_single sp-post-image" alt="{{image.alt}}" title="{{product.title}}"
data-src="{% include 'cloudimage' src:old_img_data_src %}"
data-large_image="{% include 'cloudimage' src:old_img_data_large_image %}" data-large_image_width="{{ image.width }}" data-large_image_height="{{ image.height }}"
data-widths="[180, 360, 540, 720, 900, 1080, 1296, 1512, 1728, 2048]" data-aspectratio="{{ image.aspect_ratio }}" data-sizes="auto">{{ section.settings.video
| video_tag:
image_size: "1100x",
autoplay: true,
loop: section.settings.enable_video_looping,
controls: true,
muted: false
}}{% assign old_video_url = section.settings.video.sources.first.url %}
{% render 'cloudimage-video-tag', image_size: "1100x", autoplay: true, loop: loop, controls: true, url: old_video_url, muted: false %}bg_blur=X
applies Gaussian blur to the background image
bg_opacity=X
X=0..1
specifies background image opacity
bg_colorize=X | bg_colourise=X
defines a color to tint the background image
bg_gravity=X
X=[north|south][east|west]
defines the positioning of the background image within its container
image upscaling
fit_enlarge=1
allows upscaling smaller images to the desired dimensions (will result in inferior image resolution)
Align Background image to left (west gravity):
No upscaling of smaller images (default):
Upscaling allowed:
gravity
gravity=X
X=[north|south][east|west]
sets the position of the image in the fit box
margin
margin=X
defines a minimum margin when fitting the image in the new canvas
solid background
bg_color=X | bg_colour=X
X={hex color}|auto
defines a background color with a hex code, color name or automatically, based on the image palette
blurred background
bg_img_fit=1
northwest
north
northeast
west
center | centre (default)
east
southwest
south
southeast
trim - more info
Solid background: /samples.scaleflex.com/hotel.jpg?w=400&h=245&func=fit&bg_color=000
Automatic solid background: /samples.scaleflex.com/frog.png?func=fit&w=400&h=220&bg_colour=auto
Blurred background, tinted: /samples.scaleflex.com/boat.jpg?func=fit&w=400&h=330&bg_img_fit=1&bg_opacity=0.5&bg_colorize=red
Align Background image to right (east gravity): /samples.scaleflex.com/classroom.jpg?func=fit&width=600&height=600&q=70&bg_img_fit=1&bg_blur=15&bg_gravity=east&bg_colorize=lc000000&bg_opacity=0.5
sets blurred image background
To use the plugin, you need to have a Cloudimage account. You can create one on the Cloudimage registration page.
Open a command console on your Sylius hosting server, enter your project directory and execute the following command to download the latest stable version of this bundle:
Then, enable the plugin by adding it to the list of registered plugins/bundles in config/bundles.php file of your project
Update Channel Model Your Entity Channel has to implement \Scaleflex\SyliusCloudimagePlugin\Model\ExtendedChannelInterface
You can use Trait \Scaleflex\SyliusCloudimagePlugin\Model\ExtendedChannelTrait
Update Database Schema
Include
in your templates/bundles/SyliusAdminBundle\Channel_form.html.twig form.
Then you can start to personalize the configuration (token, options) in Admin / Channel -> Choose one Channel
To process your image through Cloudimage you have two ways to implement
Option 1: Use the ci_src(path) Twig Function
Option 2: Define your own
Update the image src to ci-src="{path}?q={sylius.channel.cloudimageImageQuality}"
Add the script
Here are the available configuration options:
Activation
Enable/Disable the plugin
Token
Token from Cloudimage (found in your admin panel)
Use origin URL
If enabled, the module will only add query parameters to the image source URL without prefixing it with {token}.cloudimg.io : might be useful to avoid double CDNization, for exemple if you have aliases configured
Ignore Image Size Node
Useful for improving compatibility with some themes.
Ignore Image Size Style
Useful for improving compatibility with some themes.
When Javascript Mode is active, make sure that no other module is overwriting the plugin's delivery with "ci-src" image source.
Set format
force_format=jpg
forces using the JPEG image compression
Quality
q=X
X=0..100
the smaller the value of q, the more your image will be compressed. Be careful - the quality of the image will decrease as well.
Optipress
optipress=X
X=1..3
chooses the best compression approach maintaining visual quality via the Optipress algorithm
q=85, filesize 204 kB: /samples.scaleflex.com/woman_dress.jpg?force_format=jpeg&q=85 q=75, filesize 129 kB: /samples.scaleflex.com/woman_dress.jpg?force_format=jpeg&q=75 q=65, filesize 102 kB: /samples.scaleflex.com/woman_dress.jpg?force_format=jpeg&q=65
Set format
force_format=png
forces using the PNG image compression
Set format
force_format=webp
forces using the WebP image compression
Quality
q=X
X=0..100
the smaller the value of q, the more your image will be compressed. Be careful - the quality of the image will decrease as well.
Lossless
lossless=1
use lossless webp compression
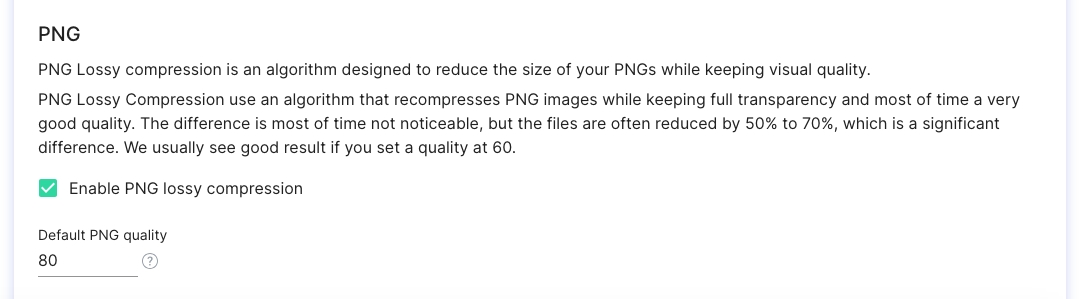
Commercetools implementation
The react-cloudimage-responsive library is a React component that allows you to easily add responsive images to your web application using the Cloudimage service. With this package, you can load and display optimized images that are automatically resized based on the device screen size and pixel density.
It is a simple and easy-to-use package that can help you improve the performance and user experience of your web application by optimizing it.
You can create an account on the .
You can install using npm or yarn:
or
To use , you need to provide it with a Cloudimage URL and some additional parameters. Here's an example:
In this example, we're passing three props to the "CloudimageResponsive" component:
alt: The alternate text to display for the image. This is required for accessibility reasons.
image: The URL of the original image to be optimized and resized by Cloudimage.
cloudimageConfig: An object that contains the Cloudimage configuration parameters. This includes your Cloudimage API token, the base URL of your Cloudimage service, and the resizing, quality, and format parameters for the image.
Here are the configuration parameters you can use in the "cloudimageConfig" object:
token
Type: String | Default: "demo" | required
Your Cloudimage customer token. for a Cloudimage account to get one. The subscription takes less than a minute and is totally free.
customDomain
Type: String | Default: "cloudimage.io" | optional
If you use a custom CNAME for your cloudimage integration, you can set it here.
baseURL
Type: String | Default: "/" | optional
Your image folder on server, this alows to shorten your origin image URLs.
apiVersion
Type: String |Default: 'v7' | optional
Allow to use a specific version of API.
set a specific version of API
disable API version
Note: this will disregard your token above as this should be built into the CNAME entry.
doNotReplaceURL
Type: bool | Default: false
If set to true the plugin will only add query params to the given source of image.
lazyLoading
Type: Bool | Default: true | optional
Only images close to the client's viewport will be loaded, hence accelerating the page loading time. The plugin uses library to achieve it.
lazyLoadOffset
Type: Number/Array(Number) | Default: 100
Say if you want to preload a component even if it's 100px below the viewport (user have to scroll 100px more to see this component), you can set offset props to 100. On the other hand, if you want to delay loading a component even if it's top edge has already appeared at viewport, set offset to negative number.
Library supports horizontal lazy load out of the box. So when you provide this prop with number like 100 it will automatically set left edge offset to 100 and top edge to 100;
If you provide this prop with array like [100, 200], it will set left edge offset to 100 and top offset to 200.
params
Type: String | Default: 'org_if_sml=1' | optional
Applies default Cloudimage operations/ filters to your image, e.g. brightness, contrast, rotation... Multiple params can be applied, separated by "&" e.g. wat_scale=35&wat_gravity=northeast&wat_pad=10&grey=1
alternative syntax: type: Object
placeholderBackground
Type: String | Default: '#f4f4f4' | optional
Placeholder coloured background while the image is loading or use it to set your custom placeholder image or gif
For example:
lowQualityPreview
Type: Object
lowQualityPreview.minImgWidth number (default: 400) - minimum width of an image to load a low-quality preview image
presets
Type: Object
Default:
Breakpoints shortcuts to use in image size property, can be overridden.
limitFactor
Type: Number | Default: 100 | optional
Rounds up the size of an image to the nearest limitFactor value.
For example:
For an image with width 358px and limitFactor equal to 100, the plugin will round up to 400px.
For an image with width 358px and limitFactor equal to 5, the plugin will round up to 360px.
devicePixelRatioList
Type: [Number,...] | Default: [1, 1.5, 2] | optional
List of supported device pixel ratios. If there is no need to support retina devices, you should set an empty array devicePixelRatioList: [].
delay
Type: Number | optional
Delay for processing an image after rendering component.
NOTE: Normally, the parameter is not needed but in some cases with integrating third-party libraries, it can fix wrong calculation of image container.
ImageSizeAttributes
Type: String | possible values: 'use', 'ignore', 'take-ratio' | Default: 'use'
If width and height attributes are set:
use - width & height attributes values will be used to calculate image size (according to user's DPR) and ratio.
take-ratio - width & height attributes values will be used only to calculate ratio.
ignore - width & height attributes will be ignored.
If width and height attributes are NOT set, image container size will be detected to calculate result image size (according to user's DPR)
Note: If only width or height attributes is set, ratio is going to be taken from ci-ratio image attribute
Here are the properties you can use with the "CloudimageResponsive" component:
alt: The alternate text to display for the image. This is required for accessibility reasons.
image: The URL of the original image to be optimized and resized by Cloudimage.
cloudimageConfig: An object that contains the Cloudimage configuration parameters.
className: An optional class name to apply to the image container.
All-in-One Digital Asset Management and Cloudimage Media Optimization Plugin for WordPress
Scaleflex VXP is a powerful WordPress plugin designed to help businesses efficiently manage and optimize their digital assets. Integrating two key features - Scaleflex Digital Asset Management (DAM) and Cloudimage Digital Media Optimization (DMO) - Scaleflex VXP enables you to store, organize, deliver, and optimize images, videos, and other digital resources directly within WordPress.
DAM (Digital Asset Management): Seamlessly organize, search, and control all your digital assets, ensuring brand consistency and boosting team collaboration.
Cloudimage (Digital Media Optimization): Automatically optimize images and videos for size and loading speed, enhancing user experience and improving website performance.
With the Scaleflex VXP plugin for WordPress, you don’t just store, you take full control of your assets. Experience a streamlined, modern, and scalable digital content management workflow today!
Install the plugin from your WordPress admin or from the .
Create an account if you have not registered already. You can create an account on the .
Log in to your WordPress admin panel.
On the Admin sidebar, navigate to Plugins > Add New.
Enter "Scaleflex VXP" in the search field and then install the plugin.
Once installed, click Activate.
Fill in the plugin settings page with the required authentication details
You need to enter your Cloudimage account token, which you have received upon account creation.
With Cloudimage, we will have two modes when using:
JavaScript Mode: Replace image URLs with JavaScript
Standard Mode: Replace image URLs not using any JavaScript
Remove V7
Some tokens are associated with a v7 URL, while others are not.
But not to worry, this plugin automatically checks and sets it for you, all within a few seconds.
Eg: If you enter a v7 token into the text input field, then a few seconds later, the v7 dial will automatically turn itself on.
Prevent Image Upsize: If you set Maximum "Pixel ratio" equal to 2, but some of your assets do not have min retina size (at least 2560x960), please enable this to prevent image resized. By default, yes.
Image Quality: The smaller the value, the more your image will be compressed. Careful - the quality of the image will decrease as well. By default, 90.
Ignore SVG Image: Ignore converting the SVG file to a CDN URL.
Your image URL will be like this:
Notice that the URLs have been appended https://token.cloudimg.io/ to ensure CDN delivery and optimization of images.
Cloudimage will:
The ci-src() attribute will be added to theimgelement, which will
generate data-srcset
set resize
Cloudimage will change the attribute "src" in the img tag without JavaScript
Please note that Scaleflex VXP - Cloudimage will not take effect on localhost
URL Signature: To prevent URL tampering and protect your token, every Cloudimage URL can be secured with an SHA-1 HMAC signature. Read more .
Enable srcset adding: Adding srcset for the img tag. By default, this mode will remove the srcset
Srcset widths (px): The widths in pixels that would be generated for the srcset tag if the srcset adding option is enabled. Separated by a comma (,)
Local JavaScript libraries:
ON: Use Cloudimage JS files from CDN
OFF: Use Cloudimage JS files from the plugin locally
Use Origin URL: If enabled, the plugin will only add query parameters to the image source URL, avoiding double CDN in some cases, like if you have aliases configured.
Shopify integration
Cloudimage will accelerate your Shopify shop by compressing images and delivering them over CDN.
After finding out your Shopify URL as shown below (i.e. https://cdn.shopify.com, https://cdn2.shopify.com or https://cdn.shopifycloud.com), you can create a HTTP-Storage in Cloudimage.
composer require scaleflex/sylius-cloudimage-plugin<?php
# config/bundles.php
return [
// ...
Scaleflex\SyliusCloudimagePlugin\ScaleflexSyliusCloudimagePlugin::class => ['all' => true],
];nonebin/console doctrine:migration:diff
bin/console doctrine:migration:migrate{{ include('@ScaleflexSyliusCloudimagePlugin/Admin/Channel/extendedChannelForm.html.twig') }} # config/packages/sylius_ui.yaml
sylius_ui:
events:
sylius.shop.layout.head:
blocks:
cloudimage_script: '@ScaleflexSyliusCloudimagePlugin\Shop\cloudimageScript.html.twig'
sylius.shop.layout.after_body:
blocks:
cloudimage_process: '@ScaleflexSyliusCloudimagePlugin\Shop\cloudimageProcess.html.twig'#templates/bundles/SyliusShopBundle/Product/_mainImage.html.twig
{% if product.imagesByType('thumbnail') is not empty %}
{% set path = product.imagesByType('thumbnail').first.path|imagine_filter(filter|default('sylius_shop_product_thumbnail')) %}
{% elseif product.images.first %}
{% set path = product.images.first.path|imagine_filter(filter|default('sylius_shop_product_thumbnail')) %}
{% else %}
{% set path = '//placehold.it/200x200' %}
{% endif %}
<img {{ ci_src(path) }} {{ sylius_test_html_attribute('main-image') }} alt="{{ product.name }}" class="ui bordered image" />{% if sylius.channel.cloudimageStatus and sylius.channel.cloudimageToken %}
<script>
window.ciResponsive.process();
</script>
{% endif %}

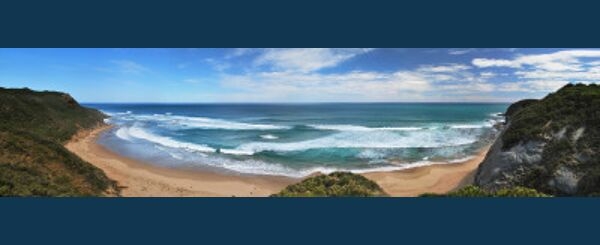

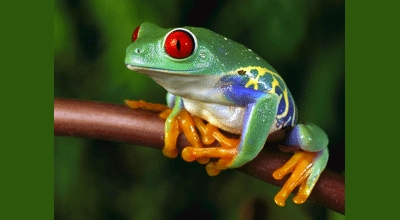
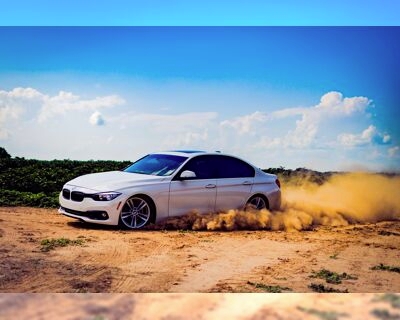


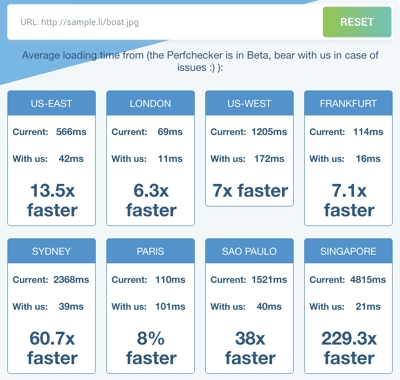
Lazy Loading
If enabled, images will be lazy-loaded for better initial loading times and user experience. ⚠️ lazy loading can have variable results on some websites as for the first rows of images loaded, therefore it is recommended to make use of an integrated new class provided: “lazy-off”. You can specify the "lazy-off" class either in the page builder through the back-office, or in the templates directly (eg. category page and product page).
Custom js function
🚨 Any js function to customize the behavior of the Cloudimage library. Attention, adding js should only be done by advanced administrators as it can break the js or have unintended effects if not thoroughly tested and validated.
Image Quality
Customizes image quality, therefore compression -influences the size of image-.applied by default. Warning, a setting under 80 might have a potentially visible impact.
Ignore SVG images
If enabled, all SVG images will be skipped from acceleration as anyway vector images will not be compressed.
Maximum "Pixel ratio"
List of supported device pixel ratios, default is 2, eg: 2 for Retina devices
Custom Library Options
🚨 Those optional parameters will be added to the request for each URL going through the Cloudimage acceleration infrastructure. It can allow you to force image formats, apply automatic transformations or watermarking, and might be used for troubleshooting purposes. For advanced users only, please refer to the Cloudimage documentation here for the list of possible parameters.

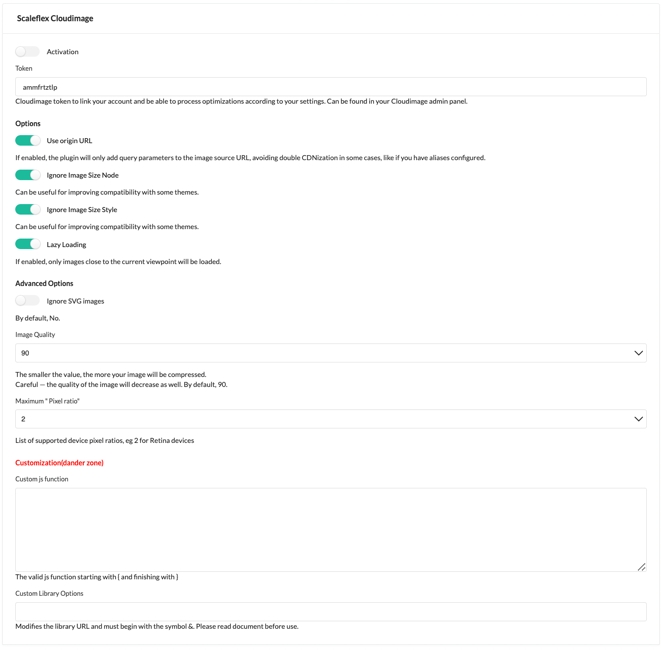
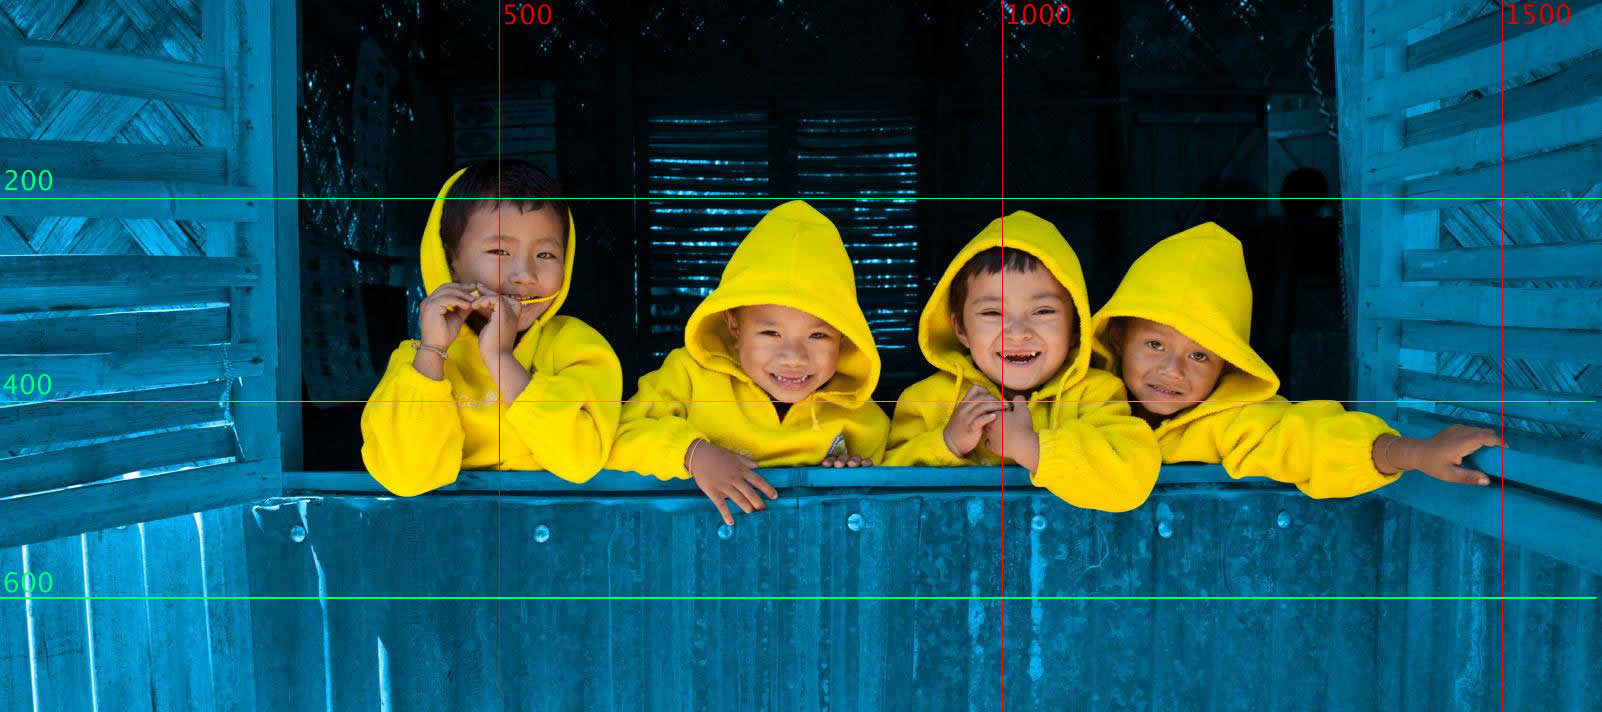
style: An optional object that contains CSS styles to apply to the image container.
Navigate to the settings page.
Select "Cloudimage - Digital Media Optimization (DMO)".
Please be patient and wait for the “The v7 checking process …” message to disappear before pressing the “SAVE ALL CHANGES“ button.
Skip files: Files with these extensions would be skipped. Separated by a comma (,)
Lazy Loading: If enabled, only images close to the current viewpoint will be loaded.
Maximum "Pixel Ratio": List of supported device pixel ratios, eg 2 for Retina devices.
Image Size Attributes: Used to calculate the width and height of images.
Custom JavaScript function: A valid JavaScript function starting with { and finishing with }.
Custom library options: Automatically adds Cloudimage parameters for all images, e.g. watermark=1 to put a watermark on all images. The list of all available parameters can be found on docs.cloudimage.io
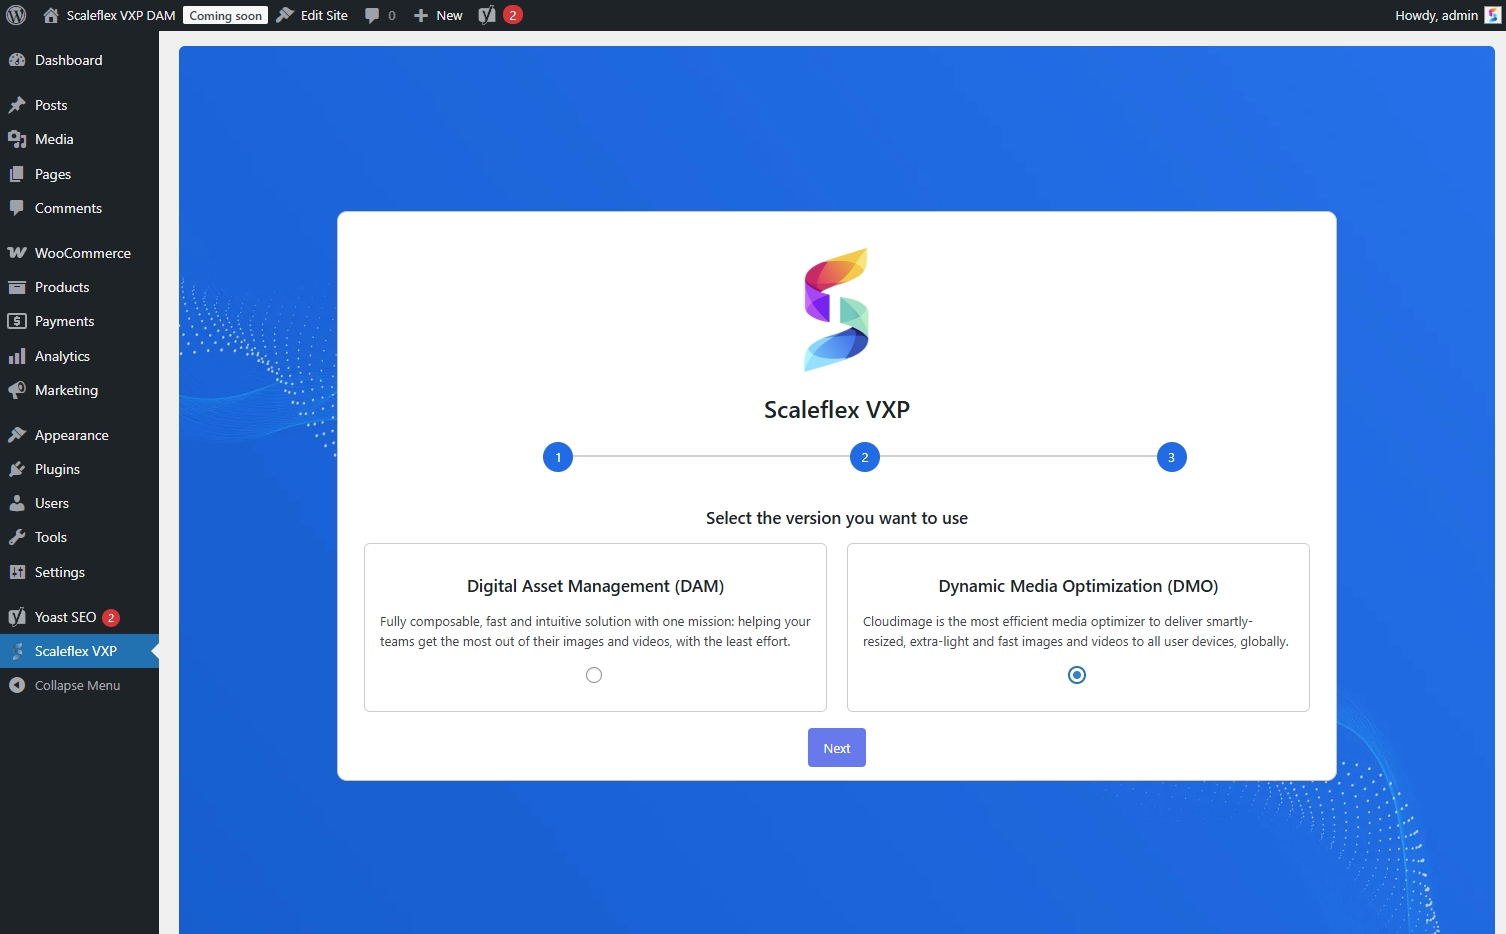
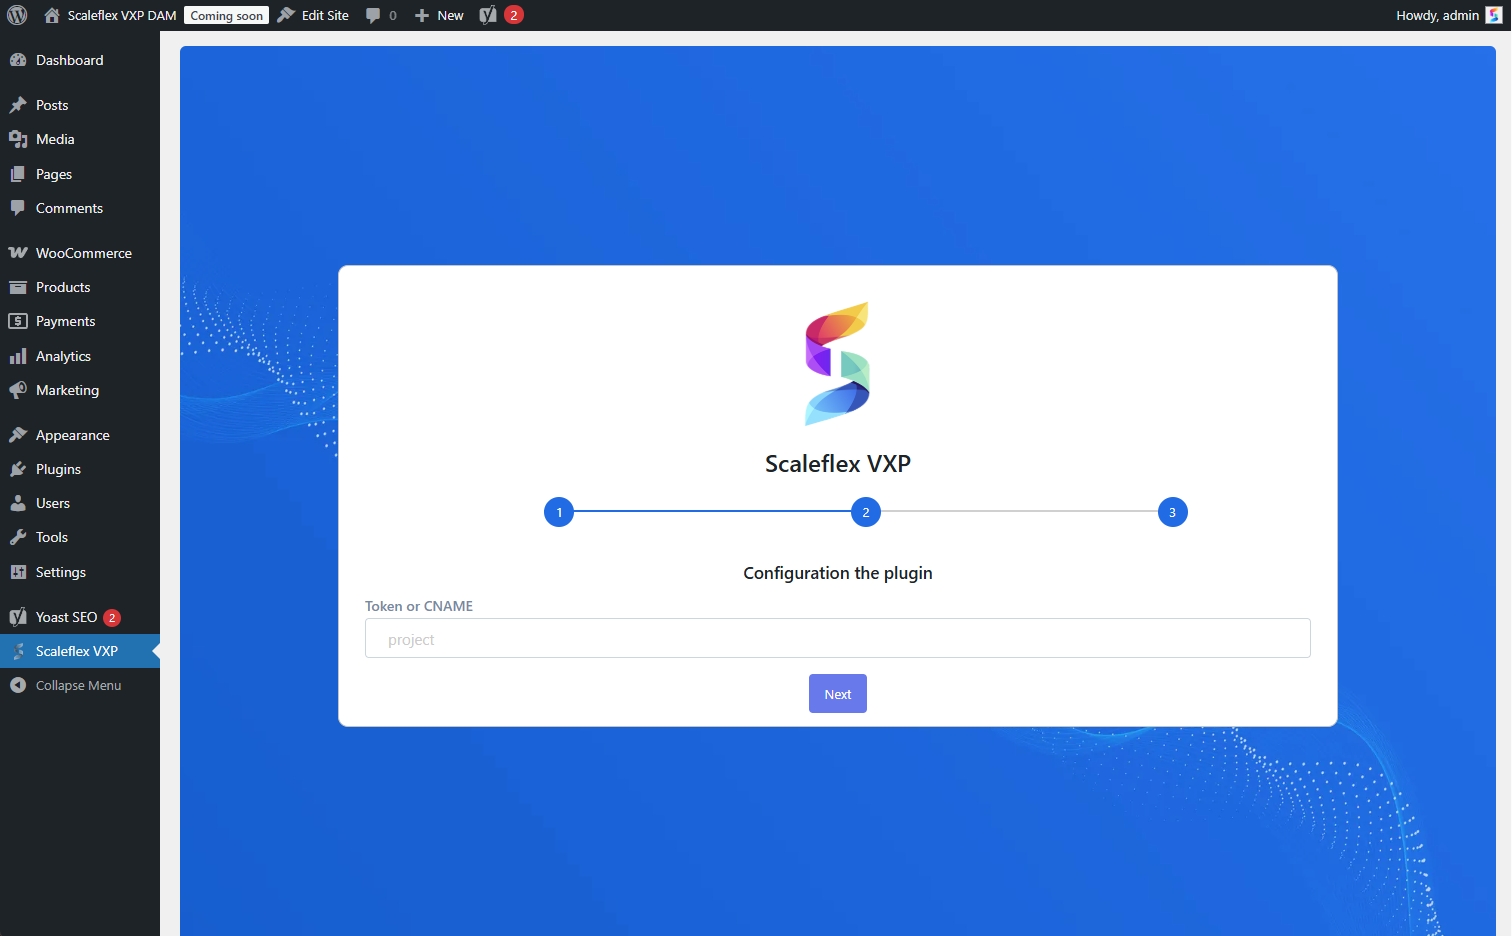

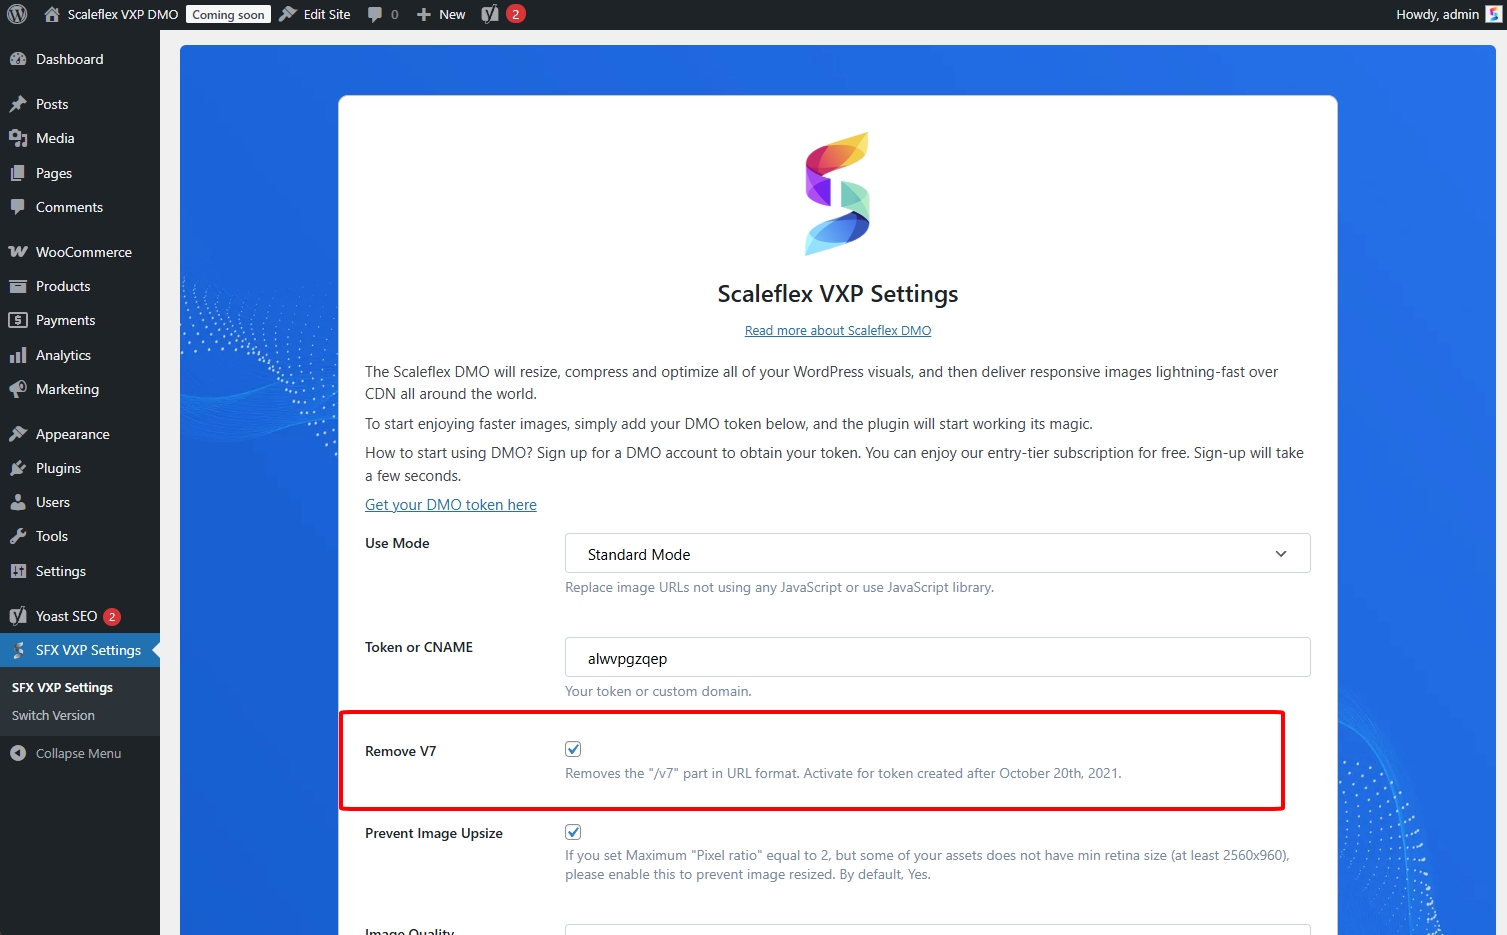
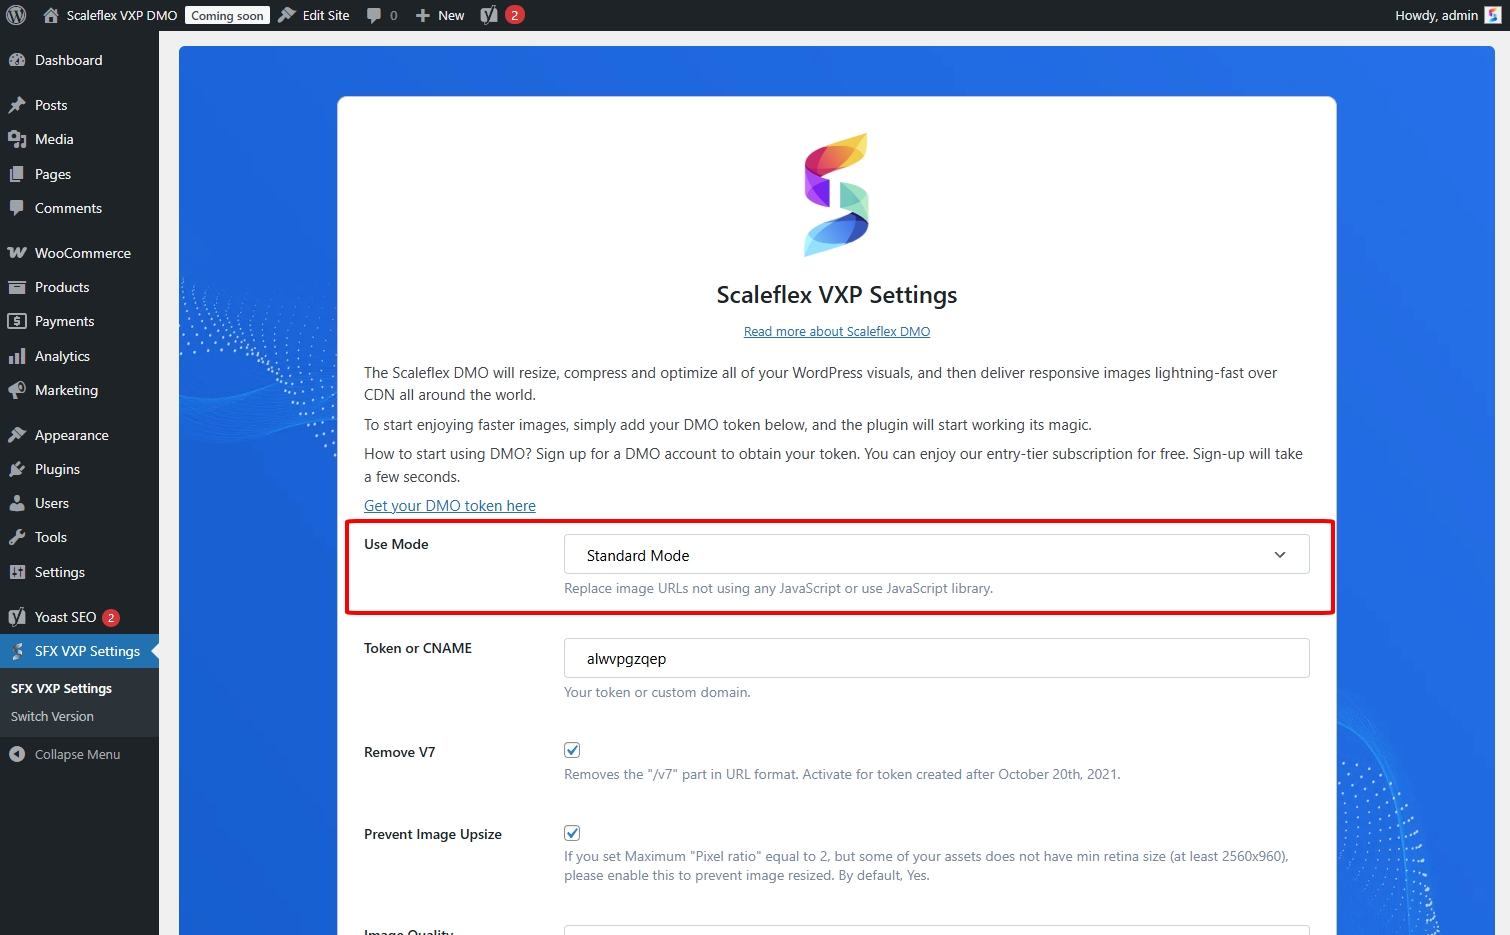
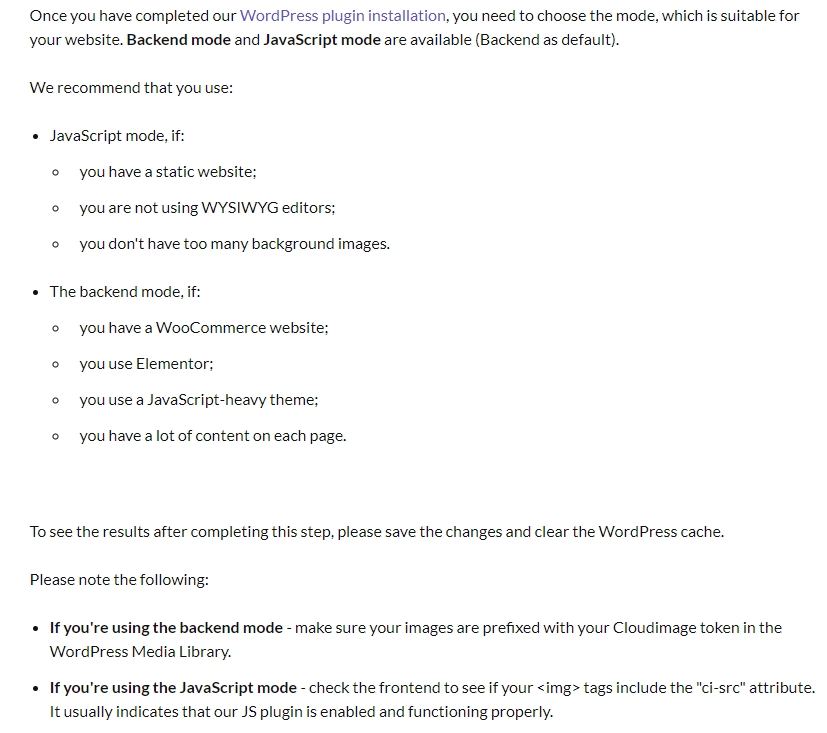
npm install react-cloudimage-responsiveyarn add react-cloudimage-responsiveimport React from 'react';
import CloudimageResponsive from 'react-cloudimage-responsive';
const MyComponent = () => {
const cloudimageConfig = {
token: 'your-token',
baseURL: 'https://your-subdomain.cloudimg.io/v7/',
params: {
resize: {
width: 500,
height: 500,
type: 'fit',
},
quality: 90,
format: 'webp',
},
};
return (
<CloudimageResponsive
alt="My Image"
image="https://example.com/my-image.jpg"
cloudimageConfig={cloudimageConfig}
/>
);
};const cloudimageConfig = {
token: 'demo',
baseURL: 'https://cdn.scaleflex.it/demo/',
apiVersion: 'v7' // optional
};const cloudimageConfig = {
token: 'demo',
baseURL: 'https://cdn.scaleflex.it/demo/',
apiVersion: null // optional
};params: 'org_if_sml=1'params: {
org_if_sml: 1,
grey: 1,
...
}placeholderBackground: "url('https:/
https://cdn.scaleflex.it/filerobot/red-loader.gif
') 50% 50% no-repeat"lowQualityPreview: {
minImgWidth = 400
}const cloudimageConfig = {
token: 'demo',
baseUrl: 'https://cdn.scaleflex.it/demo/',
...
presets: {
xs: '(max-width: 575px)', // up to 575 PHONE
sm: '(min-width: 576px)', // 576 - 767 PHABLET
md: '(min-width: 768px)', // 768 - 991 TABLET
lg: '(min-width: 992px)', // 992 - 1199 SMALL_LAPTOP_SCREEN
xl: '(min-width: 1200px)' // from 1200 USUALSCREEN
}
};<img
class="alignnone size-medium wp-image-437"
src="http://wp.sandbox.sfxconnector.com/wp-content/uploads/catswillbecats-201x300.jpeg"
alt=""
width="201"
height="300"
srcset="https://wp.sandbox.sfxconnector.com/wp-content/uploads/catswillbecats-201x300.jpeg 201w,
https://wp.sandbox.sfxconnector.com/wp-content/uploads/catswillbecats-600x894.jpeg 600w,
https://wp.sandbox.sfxconnector.com/wp-content/uploads/catswillbecats.jpeg 644w"
sizes="(max-width: 201px) 100vw, 201px"
><img
class="alignnone size-medium wp-image-440"
src="https://token.cloudimg.io/wp.sandbox.sfxconnector.com/wp-content/uploads/catswillbecats.jpeg?func=bound&w=300&h=300"
alt=""
width="300"
height="300"
srcset="https://token.cloudimg.io/wp.sandbox.sfxconnector.com/wp-content/uploads/catswillbecats.jpeg?w=150 150w,
https://token.cloudimg.io/wp.sandbox.sfxconnector.com/wp-content/uploads/catswillbecats.jpeg?w=450 450w,
https://token.cloudimg.io/wp.sandbox.sfxconnector.com/wp-content/uploads/catswillbecats.jpeg?w=100 100w
sizes="(max-width: 300px) 100vw, 300px"
><img
class="alignnone size-medium wp-image-440 ci-image ci-image-loaded lazyloaded"
ci-src="https://token.cloudimg.io/wp.sandbox.sfxconnector.com/wp-content/uploads/catswillbecats.jpeg?func=bound&w=300&h=300"
alt=""
data-srcset="https://token.cloudimg.io/https://token.cloudimg.io/wp.sandbox.sfxconnector.com/wp-content/uploads/catswillbecats.jpeg?w=300&org_if_sml=1&func=bound 1x,
https://token.cloudimg.io/https://token.cloudimg.io/wp.sandbox.sfxconnector.com/wp-content/uploads/catswillbecats.jpeg?w=450&org_if_sml=1&func=bound 1.5x,
https://token.cloudimg.io/https://token.cloudimg.io/wp.sandbox.sfxconnector.com/wp-content/uploads/catswillbecats.jpeg?w=600&org_if_sml=1&func=bound 2x"
data-src="https://token.cloudimg.io/https://token.cloudimg.io/wp.sandbox.sfxconnector.com/wp-content/uploads/catswillbecats.jpeg?w=300&org_if_sml=1&func=bound"
srcset="https://token.cloudimg.io/https://token.cloudimg.io/wp.sandbox.sfxconnector.com/wp-content/uploads/catswillbecats.jpeg?w=300&org_if_sml=1&func=bound 1x,
https://token.cloudimg.io/https://token.cloudimg.io/wp.sandbox.sfxconnector.com/wp-content/uploads/catswillbecats.jpeg?w=450&org_if_sml=1&func=bound 1.5x,
https://token.cloudimg.io/https://token.cloudimg.io/wp.sandbox.sfxconnector.com/wp-content/uploads/catswillbecats.jpeg?w=600&org_if_sml=1&func=bound 2x"
src="https://token.cloudimg.io/https://token.cloudimg.io/wp.sandbox.sfxconnector.com/wp-content/uploads/catswillbecats.jpeg?w=300&org_if_sml=1&func=bound"
>Create the Storage record in the Cloudimage admin as follows:
Adding an HTTP-based Storage will make you create a Cloudimage Alias. After saving the storage in Step 1 above, verify that images are delivered correctly over your Cloudimage URL with the Alias:
Origin image URL on Shopify:
Cloudimage URL with Alias:
https://{token}.cloudimg.io/_myshopify_/shopifycloud/brochure/assets/home/hero-stock-small-72c1242fc5bbf6cfe135968110e9c52435af1e389c0fd4fe68208d21427e21e0.jpg
Replace {token} with your Cloudimage token.
Unable to delivery images over your Cloudimage URL? Contact [email protected] if you are not able to fetch the image as explained above. In such a situation, do not move to step 3 as this could break your website images.
Proceed with making the changes in our Shopify settings and theme files to switch the image delivery to Cloudimage.
From your Shopify admin, click Online Store > Themes. Find the theme you want to edit, click the Actions button and then Edit code.
Under Config, click settings_schema.json and append the code below after the last section of this file:
Create new files cloudimage.liquid and cloudimage-video-tag.liquid under the Snippets directory. Copy the code below into that file, and save it:
cloudimage.liquid
cloudimage-video-tag.liquid
Navigate to Online store > Themes > Customize theme. In the sidebar, under Theme Settings open Cloudimage and enable it. Fill out the below two fields:
Cloudimage Token - It should be your Cloudimage Token
Default URL endpoint - It should be //{token}.cloudimg.io/myshopify (where token is your Cloudimage token)
Shopify CDN domain - Its value should be //cdn2.shopify.com, //cdn.shopify.com
Hit the "Save" button.
The final step of this tutorial is to adapt your theme files to start delivering your images over Cloudimage.
For more information, please see the Theme files and FAQ sections.
Basic image resizing operations
Resizing operations enable the dynamic generation of image transformations to meet various web delivery use cases. Operations focus on the image size while Image filters allow to modify the image itself.
Most of the on-the-fly image transformations can be configured using the Asset Variation Builder, an in-line URL builder to preview each image transformation instantly.
When you resize an image by specify both width and height, the original image proportions can be either ignored or maintained. You may also choose to add padding to the image to fill the blank space (extending the canvas).
Cloudimage supports the following resize functions (defined with the func parameter):
Keeps image proportions, cutting the image to fit the defined width and height; see
This resizing function removes parts of the image and is the default behavior when both width and height are defined. Read further for other resizing functions.
Resizes the image, keeping proportions and extending the canvas (by adding padding) to satisfy the desired dimensions; see
Performs either or based on the image dimensions, aspect ratio and transformation parameters; see
This resizing function may remove (crop out) parts of the image.
Fits image in a box of defined size without adding padding; see
Resizes the image to the given width and height, ignoring original image proportions, thus distorting the image; see
{
"name": "Cloudimage",
"settings": [
{
"type": "paragraph",
"content": "Check out Cloudimage's [Cloudimage and Shopify integration](https://docs.cloudimage.io/go/cloudimage-documentation-v7/en/dev-implementation/shopify-tutorial) to learn more about this."
},
{
"type": "checkbox",
"id": "enableCloudimage",
"label": "Enable Cloudimage"
},
{
"type": "text",
"id": "cloudImageToken",
"label": "Cloudimage Token",
"info": "The token of Cloudimage"
},
{
"type": "text",
"id": "cloudImageUrl",
"label": "Cloudimage url endpoint",
"info": "The url endpoint you set within Cloudimage. Example: //token.cloudimg.io/v7/_myshopify_"
},
{
"type": "text",
"id": "cloudimageShopifyCdnUrl",
"label": "Shopify CDN domain",
"default": "//cdn.shopify.com",
"info": "Do not change this unless you have a proxy in place. Not sure? Leave it as is."
}
]
}{% capture CLOUDIMAGE %}
{% if settings.enableCloudimage%}
{% for i in (1..1) %}
{% unless src or settings.cloudImageUrl != blank %}
{{ src }}
{% break %}
{% endunless %}
{% assign cdnUrls = settings.cloudimageShopifyCdnUrl | split: ',' %}
{% if cdnUrls.size == 0 %}
{{ src }}
{% break %}
{% endif %}
{% assign cdnUrl = cdnUrls[0] %}
{% for temp in cdnUrls %}
{% if src contains temp %}
{% assign cdnUrl = temp %}
{% break %}
{% endif %}
{% endfor %}
{% assign cdnUrl = cdnUrl | strip %}
{% unless src contains cdnUrl %}
{{ src }}
{% break %}
{% endunless %}
{% assign cloudImageUrl = settings.cloudImageUrl | strip %}
{% assign tempCloudImageUrl = cloudImageUrl %}
{% assign lastChar = cloudImageUrl | slice:-1 %}
{% assign cloudImageUrlLength = cloudImageUrl | size %}
{% assign newCloudImageUrl = cloudImageUrlLength | minus:1 %}
{% if lastChar == "/" %}
{% assign tempCloudImageUrl = cloudImageUrl | slice:0,newCloudImageUrl %}
{% endif %}
{% assign newSrc = src | strip | replace:cdnUrl,tempCloudImageUrl %}
{{ newSrc | default:src }}
{% endfor %}
{% else %}
{{ src }}
{% endif %}
{% endcapture %}{{ CLOUDIMAGE | strip | replace:' ' | strip_newlines }}{% comment %}
Renders video tag
Accepts:
- image_size: {String} Size of media
- autoplay: {Boolean} Video autoplay
- loop: {String} Video loop
- controls: {Boolean} Video controls
- url: {String} Video url
- muted: {Boolean} Video muted
Usage:
{% render 'cloudimage-video-tag',
image_size: image_size,
autoplay: autoplay,
loop: loop,
controls: controls,
url: url,
muted: muted
%}
{% endcomment %}
{% if settings.enableCloudimage%}
{% for i in (1..1) %}
{% unless url or settings.cloudImageUrl != blank %}
{% assign newSrc = url %}
{% break %}
{% endunless %}
{% assign cdnUrls = settings.cloudimageShopifyCdnUrl | split: ',' %}
{% if cdnUrls.size == 0 %}
{% assign newSrc = url %}
{% break %}
{% endif %}
{% assign cdnUrl = cdnUrls[0] %}
{% for temp in cdnUrls %}
{% if url contains temp %}
{% assign cdnUrl = temp %}
{% break %}
{% endif %}
{% endfor %}
{% assign cdnUrl = cdnUrl | strip %}
{% unless url contains cdnUrl %}
{% assign newSrc = url %}
{% break %}
{% endunless %}
{% assign cloudImageUrl = settings.cloudImageUrl | strip %}
{% assign tempCloudImageUrl = cloudImageUrl %}
{% assign lastChar = cloudImageUrl | slice:-1 %}
{% assign cloudImageUrlLength = cloudImageUrl | size %}
{% assign newCloudImageUrl = cloudImageUrlLength | minus:1 %}
{% if lastChar == "/" %}
{% assign tempCloudImageUrl = cloudImageUrl | slice:0,newCloudImageUrl %}
{% endif %}
{% assign newSrc = url | strip | replace:cdnUrl,tempCloudImageUrl | append: '&func=proxy' %}
{% endfor %}
{% else %}
{% assign newSrc = url %}
{% endif %}
{%- if controls -%}
{% assign videoControls = 'controls="controls"' %}
{%- else -%}
{% assign videoControls = "" %}
{%- endif -%}
{%- if autoplay -%}
{% assign videoAutoplay = 'autoplay="autoplay"' %}
{%- else -%}
{% assign videoAutoplay = "" %}
{%- endif -%}
{%- if muted -%}
{% assign videoMuted = 'muted="muted"' %}
{%- else -%}
{% assign videoMuted = "" %}
{%- endif -%}
<video playsinline="playsinline" {{ videoControls }} {{ videoAutoplay }} {{ videoMuted }}>
<source src="{{ newSrc }}" type="video/mp4">
</video>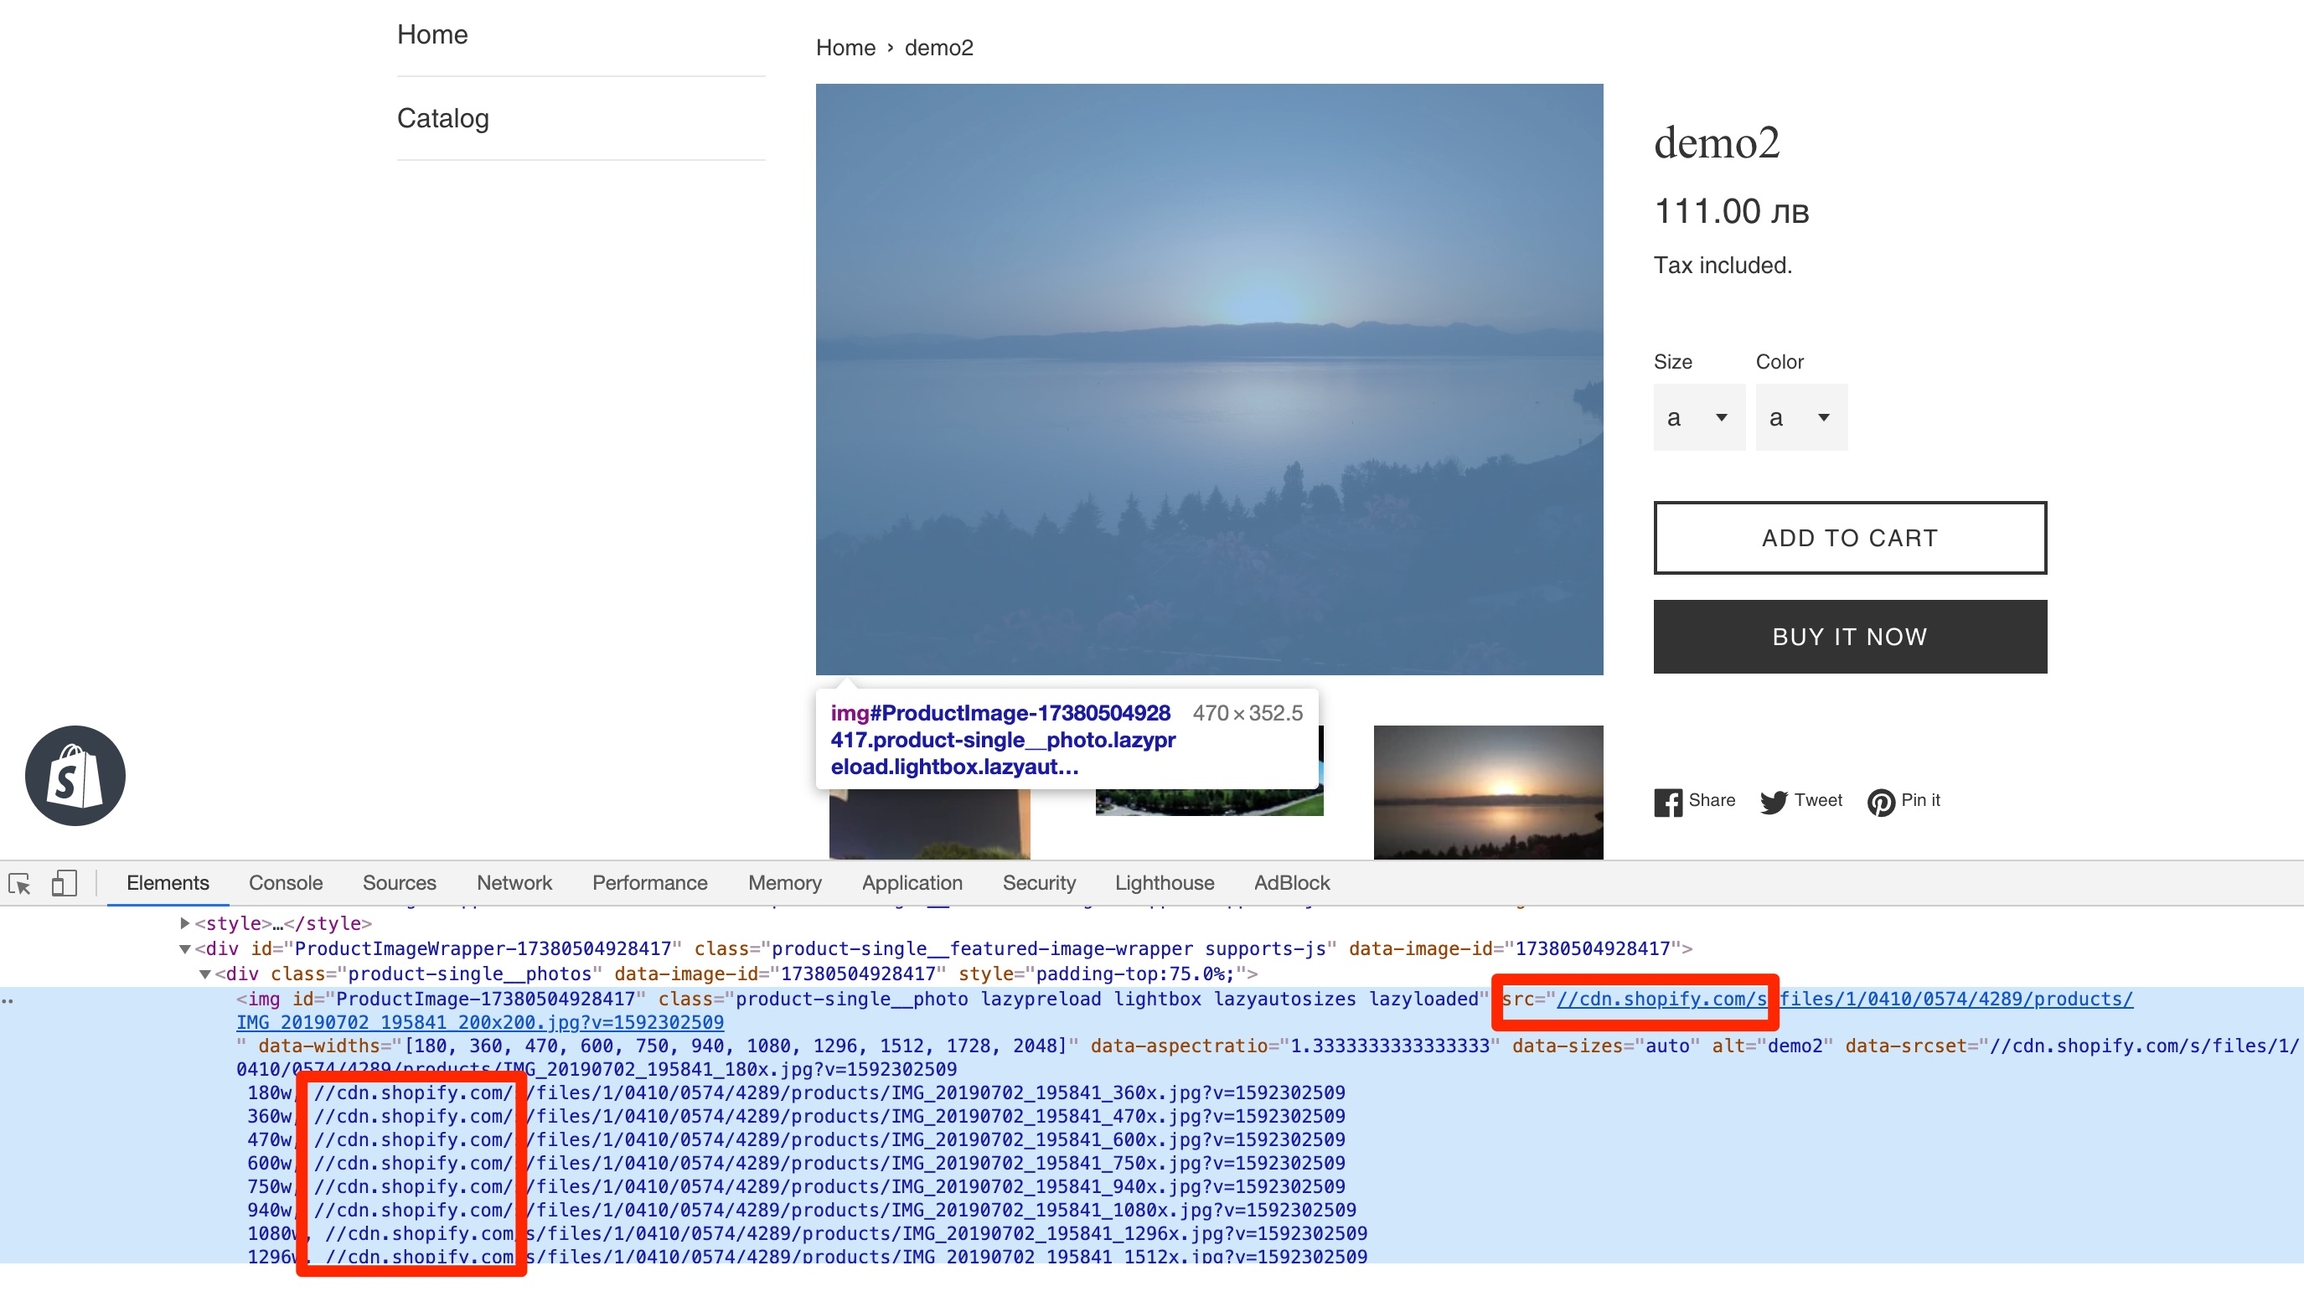
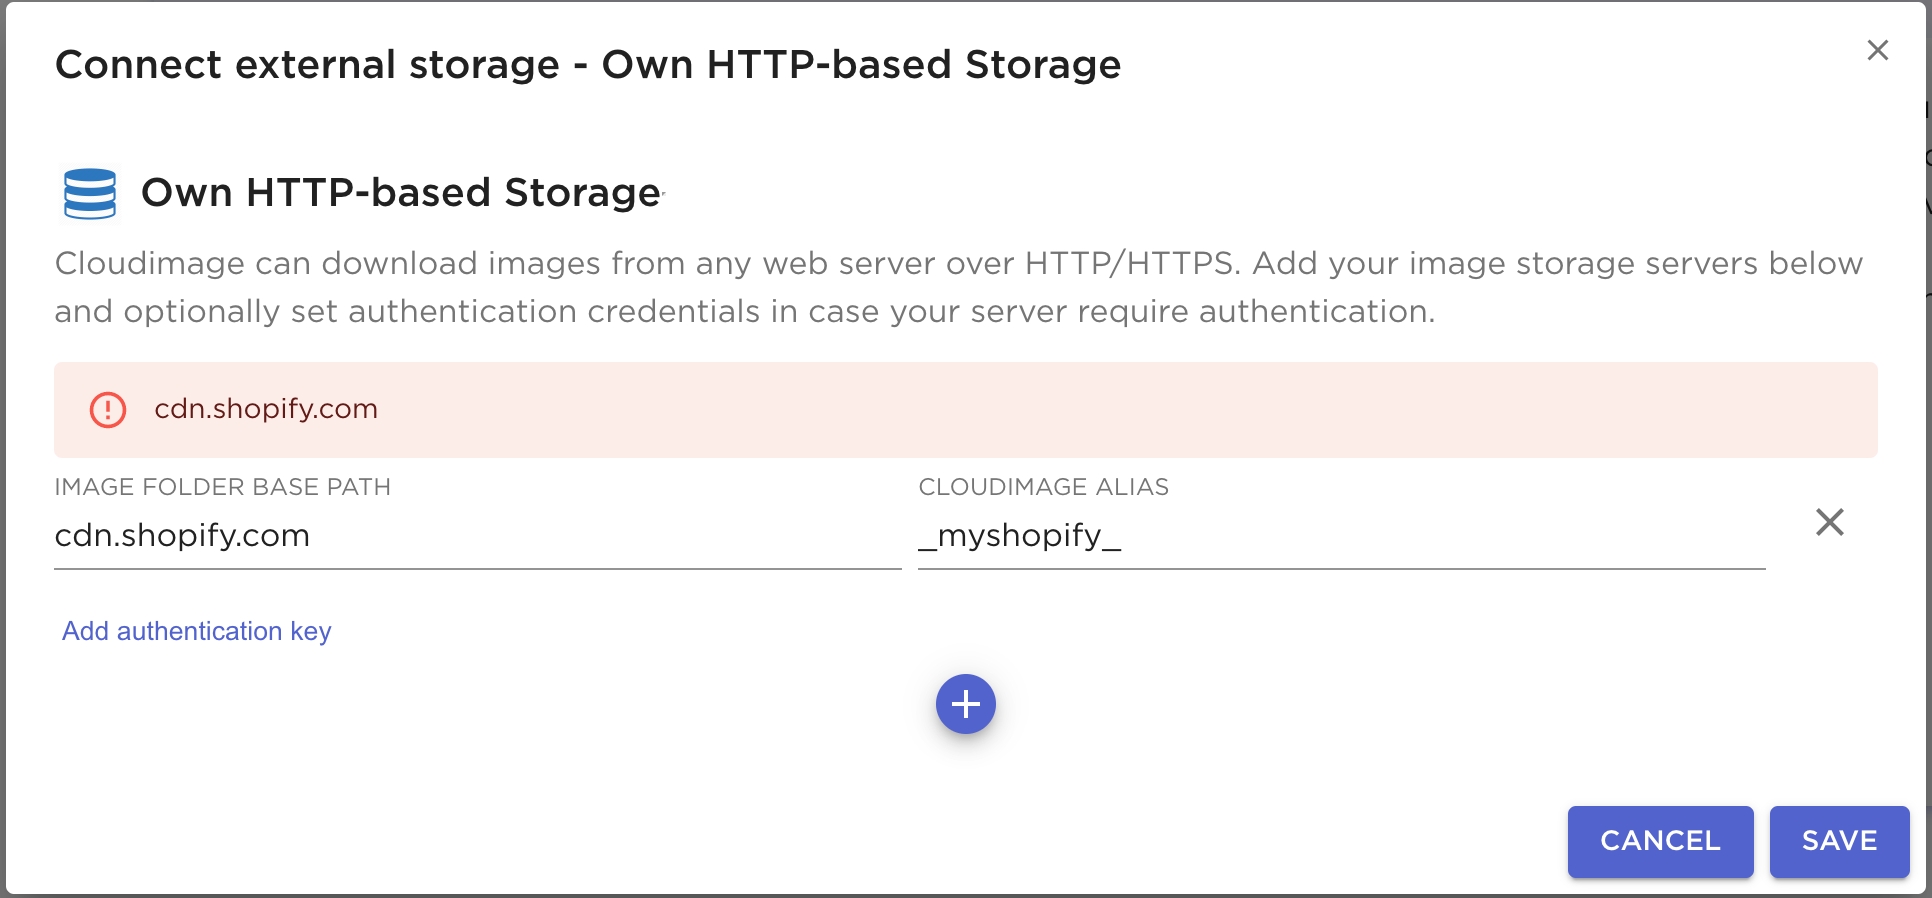
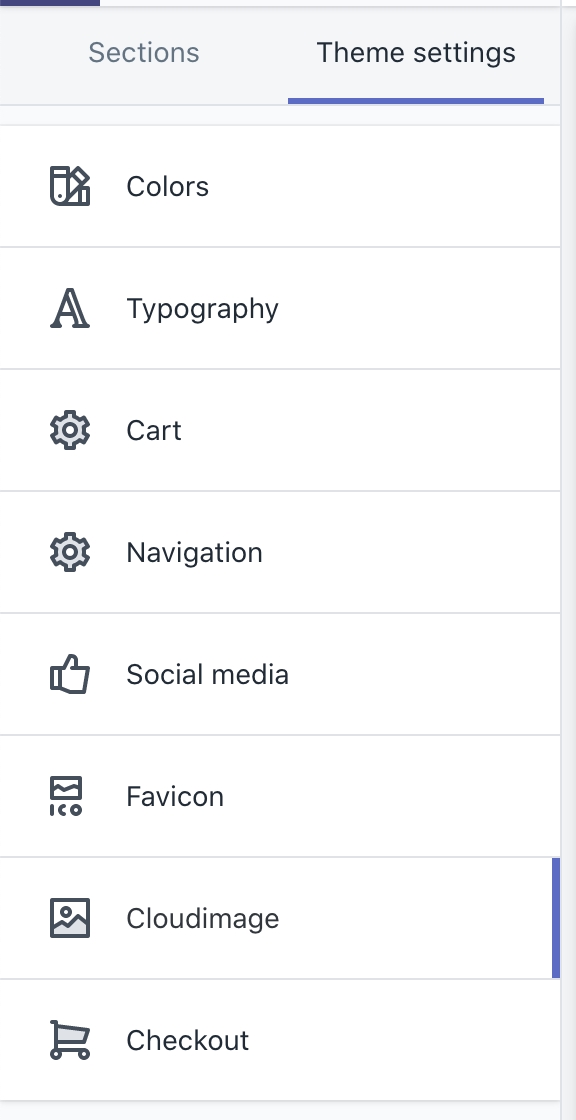

tl_px=X,Y
defines the coordinates of the top left corner of the cropping rectangle when performing positionable crop
br_px=X,Y
sets coordinates of the bottom right corner of the cropping rectangle when performing positionable crop
func=face
crops the image automatically focusing on the most prominent face in the image (if a face is detected)
func=fit
resizes the image to the desired dimensions without distorting it by increasing the image canvas if necessary, to achieve the desired aspect ratio
margin=X
sets the minimum margin when using the fit resize mode
func=cropfit
resizes the image while automatically choosing between the crop and fit resize modes depending on the origin image dimensions, the desired dimensions, and the other parameters in the transformation URL
func=bound
resizes the image to dimensions no larger than the ones specified in the transformation URL. The resulting image might not match both width and height depending on the desired aspect ratio
func=boundmin
resizes the image to dimensions no larger than the larger one specified in the transformation URL. The resulting image might not match both width and height depending on the desired aspect ratio
func=cover
resizes the image to the set width and hight while ignoring the origin aspect ratio (image might be distorted)
flip=[h][v]
mirrors the image horizontally and/or vertically
r=X
rotates the image to an arbitrary angle of X degrees (counterclockwise)
trim=X
trims any solid-color border (if present); X is the aggressiveness of the operation
radius=X
rounds the corners of the image while optionally fills the empty background with a chosen color
bg_remove=1
removes the background of the image using AI
width=X
resizes the image width to X pixels while keeping original aspect ratio
height=X
resizes the image height to X pixels while keeping original aspect ratio
org_if_sml=1
prevents upscaling if any of the target dimensions is larger than the origin image
func=crop
resizes the image to the desired dimensions without distorting it while cropping out portions of the image if necessary, to achieve the desired aspect ratio. You need to also provide both width and height
gravity=X
650x500 origin image, resolves to "crop": /samples.scaleflex.com/classroom.jpg?func=cropfit&w=500&h=350&bg_colour=auto
Same parameters, 400x250 origin image, resolves to "fit": /samples.scaleflex.com/ny_doc.jpg?func=cropfit&w=500&h=350&bg_colour=auto
defines the desired "focal point" of the image. Used with func=crop, this will set the part of the image which will be retained. With the func=fit resize mode, it will set the placement of the image within the new canvas X = [north | south][east | west] | auto | smart | trim | X,Y
Fonts available to use for text watermarks
Andale-Mono
LMMonoProp10-Oblique
LMSans9-Regular
Arial
LMMonoProp10-Regular
LMSansDemiCond10-Oblique
Arial-Black
LMMonoPropLt10-Bold
LMSansDemiCond10-Regular
Arial-Bold
LMMonoPropLt10-BoldOblique
LMSansQuot8-Bold
Arial-Bold-Italic
LMMonoPropLt10-Oblique
LMSansQuot8-BoldOblique
Arial-Italic
LMMonoPropLt10-Regular
LMSansQuot8-Oblique
Century-Schoolbook-L-Bold
LMMonoSlant10-Regular
LMSansQuot8-Regular
Century-Schoolbook-L-Bold-Italic
LMRoman10-Bold
Liberation-Mono
Century-Schoolbook-L-Italic
LMRoman10-BoldItalic
Liberation-Mono-Bold
Century-Schoolbook-L-Roman
LMRoman10-Italic
Liberation-Mono-Bold-Italic
Comic-Sans-MS
LMRoman10-Regular
Liberation-Mono-Italic
Comic-Sans-MS-Bold
LMRoman12-Bold
Liberation-Sans
Courier-New
LMRoman12-Italic
Liberation-Sans-Bold
Courier-New-Bold
LMRoman12-Regular
Liberation-Sans-Bold-Italic
Courier-New-Bold-Italic
LMRoman17-Regular
Liberation-Sans-Italic
Courier-New-Italic
LMRoman5-Bold
Liberation-Sans-Narrow
DejaVu-Sans
LMRoman5-Regular
Liberation-Sans-Narrow-Bold
DejaVu-Sans-Bold
LMRoman6-Bold
Liberation-Sans-Narrow-Bold-Italic
DejaVu-Sans-Mono
LMRoman6-Regular
Liberation-Sans-Narrow-Italic
DejaVu-Sans-Mono-Bold
LMRoman7-Bold
Liberation-Serif
DejaVu-Serif
LMRoman7-Italic
Liberation-Serif-Bold
DejaVu-Serif-Bold
LMRoman7-Regular
Liberation-Serif-Bold-Italic
FreeMono
LMRoman8-Bold
Liberation-Serif-Italic
FreeMono-Bold
LMRoman8-Italic
Nimbus-Mono-L
FreeMono-Bold-Oblique
LMRoman8-Regular
Nimbus-Mono-L-Bold
FreeMono-Oblique
LMRoman9-Bold
Nimbus-Mono-L-Bold-Oblique
FreeSans
LMRoman9-Italic
Nimbus-Mono-L-Regular-Oblique
FreeSans-Bold
LMRoman9-Regular
Nimbus-Roman-No9-L
FreeSans-Bold-Oblique
LMRomanCaps10-Oblique
Nimbus-Roman-No9-L-Medium
FreeSans-Oblique
LMRomanCaps10-Regular
Nimbus-Roman-No9-L-Medium-Italic
FreeSerif
LMRomanDemi10-Oblique
Nimbus-Roman-No9-L-Regular-Italic
FreeSerif-Bold
LMRomanDemi10-Regular
Nimbus-Sans-L
FreeSerif-Bold-Italic
LMRomanDunh10-Oblique
Nimbus-Sans-L-Bold
FreeSerif-Italic
LMRomanDunh10-Regular
Nimbus-Sans-L-Bold-Condensed
Georgia
LMRomanSlant10-Bold
Nimbus-Sans-L-Bold-Condensed-Italic
Georgia-Bold
LMRomanSlant10-Regular
Nimbus-Sans-L-Bold-Italic
Georgia-Bold-Italic
LMRomanSlant12-Regular
Nimbus-Sans-L-Regular-Condensed
Georgia-Italic
LMRomanSlant17-Regular
Nimbus-Sans-L-Regular-Condensed-Italic
Impact
LMRomanSlant8-Regular
Nimbus-Sans-L-Regular-Italic
LMMono10-Italic
LMRomanSlant9-Regular
Noto-Mono
LMMono10-Regular
LMRomanUnsl10-Regular
Times-New-Roman
LMMono12-Regular
LMSans10-Bold
Times-New-Roman-Bold
LMMono8-Regular
LMSans10-BoldOblique
Times-New-Roman-Bold-Italic
LMMono9-Regular
LMSans10-Oblique
Times-New-Roman-Italic
LMMonoCaps10-Oblique
LMSans10-Regular
Trebuchet-MS
LMMonoCaps10-Regular
LMSans12-Oblique
Trebuchet-MS-Bold
LMMonoLt10-Bold
LMSans12-Regular
Trebuchet-MS-Bold-Italic
LMMonoLt10-BoldOblique
LMSans17-Oblique
Trebuchet-MS-Italic
LMMonoLt10-Oblique
LMSans17-Regular
URW-Bookman-L-Demi-Bold
LMMonoLt10-Regular
LMSans8-Oblique
URW-Bookman-L-Demi-Bold-Italic
LMMonoLtCond10-Oblique
LMSans8-Regular
URW-Bookman-L-Light
LMMonoLtCond10-Regular
LMSans9-Oblique
URW-Bookman-L-Light-Italic


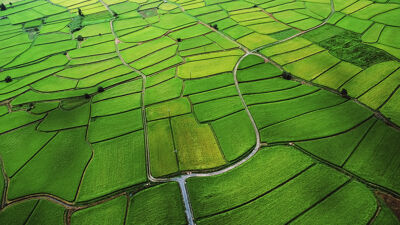
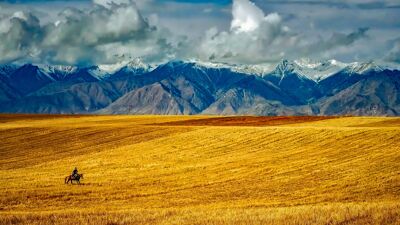
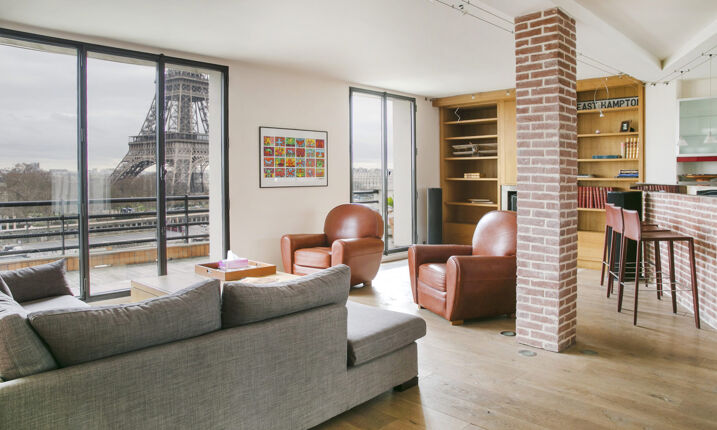
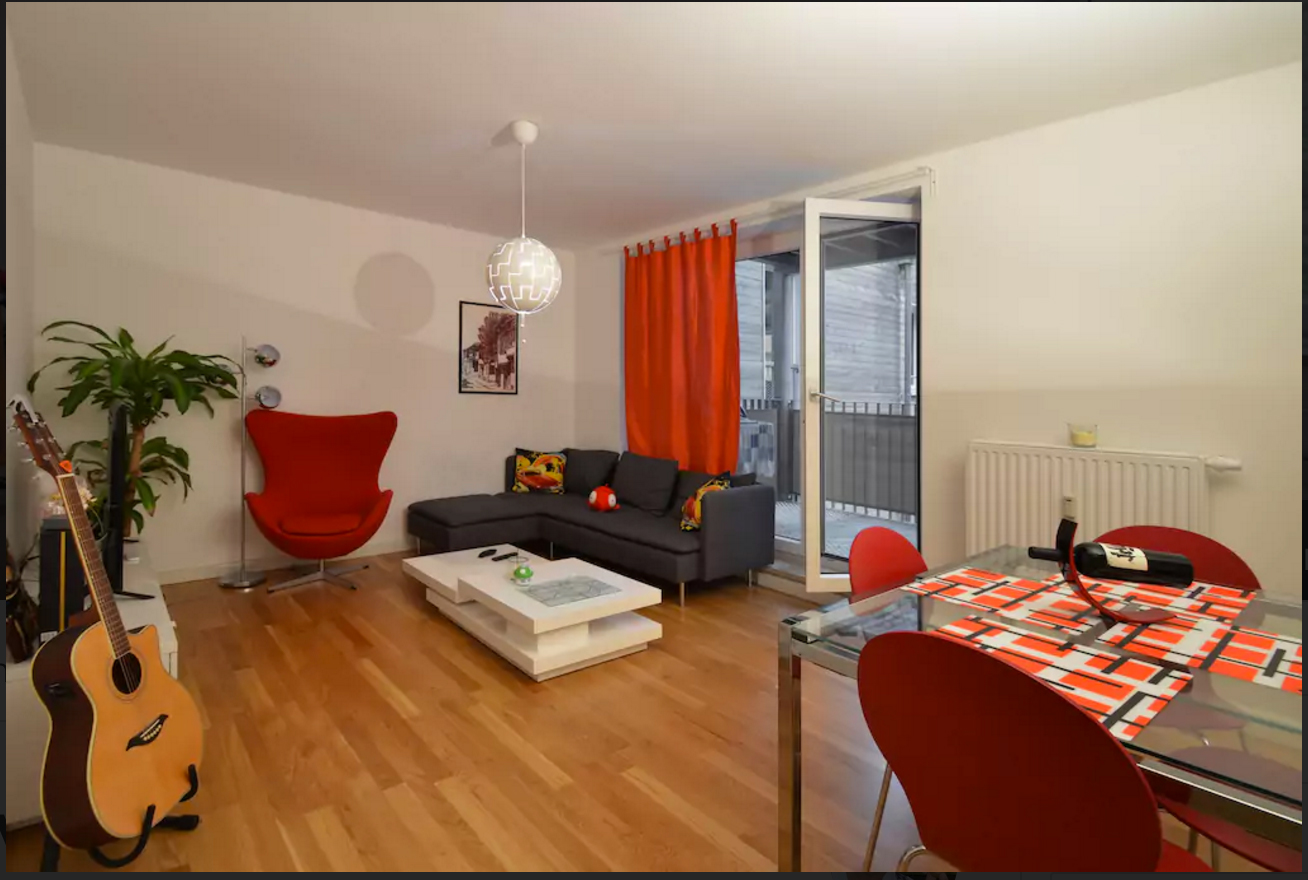
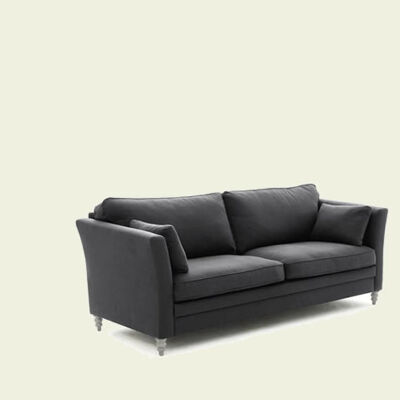
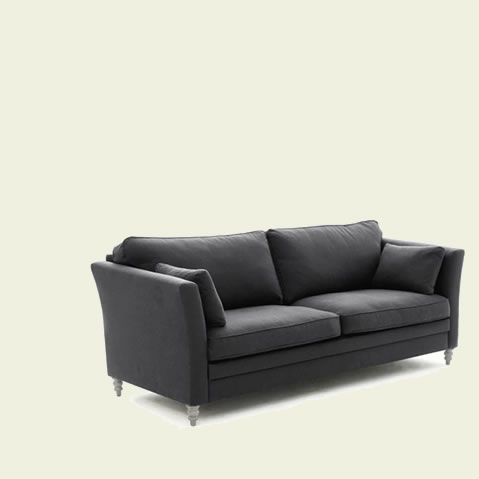
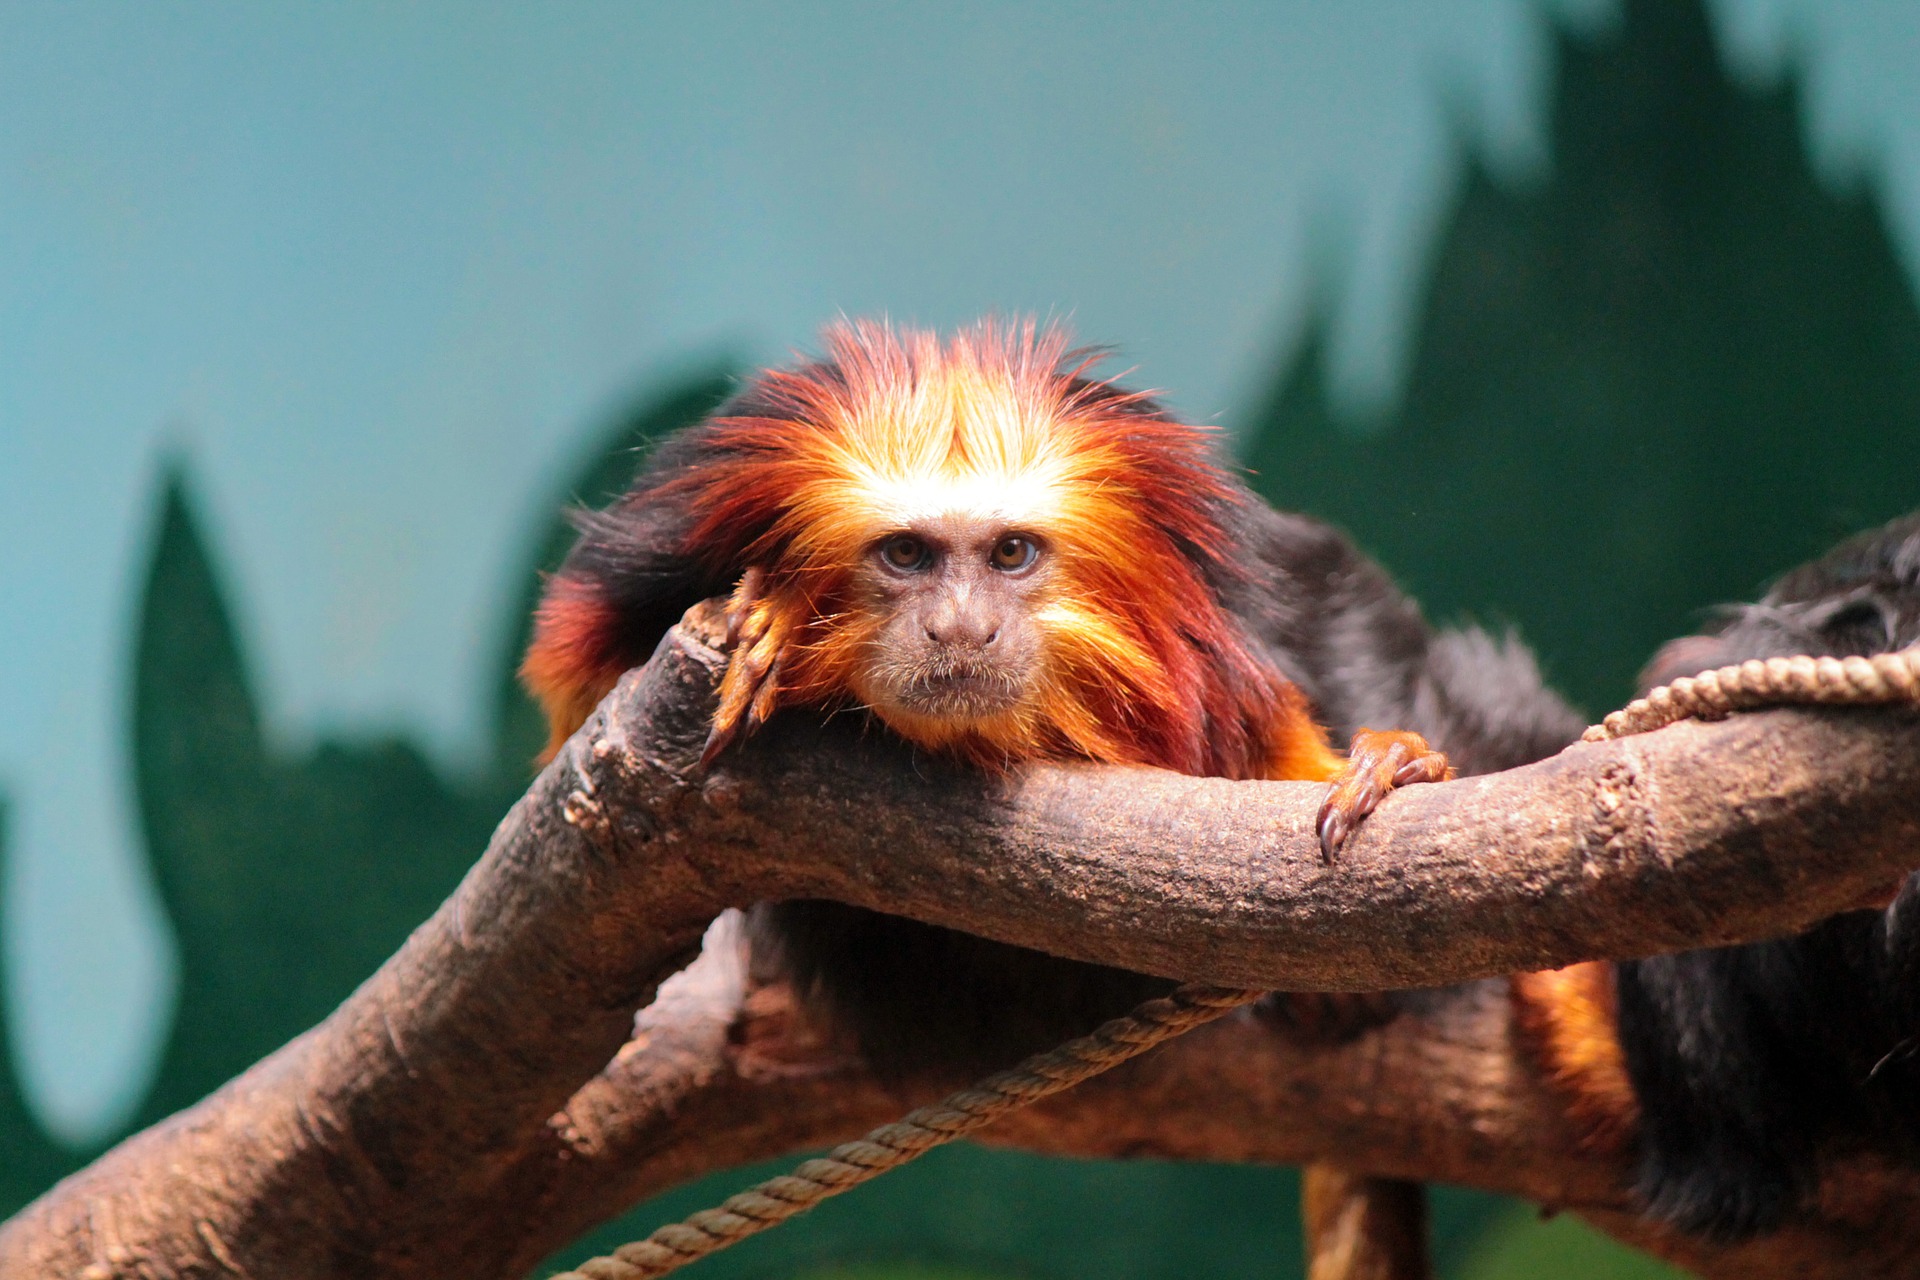
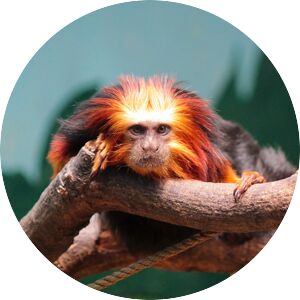
![/samples.scaleflex.com/paris-salon2.jpg?w=600&wat[1]=1&wat[2]=1&wat[3]=1&wat_pad=6&wat_url[1]=http://sample.li/Angular.png&wat_url[2]=http://sample.li/React.png](https://doc.cloudimg.io/https://samples.scaleflex.com/paris-salon2.jpg?w=600&wat[1]=1&wat[2]=1&wat[3]=1&wat_pad=6&wat_url[1]=http://sample.li/Angular.png&wat_url[2]=http://sample.li/React.png&wat_gravity[1]=southeast&wat_gravity[2]=southwest&wat_scale=25&wat_text[3]=TEXT%20WATERMARK&wat_fontsize[3]=20&wat_gravity[3]=north&wat_color[3]=blue)
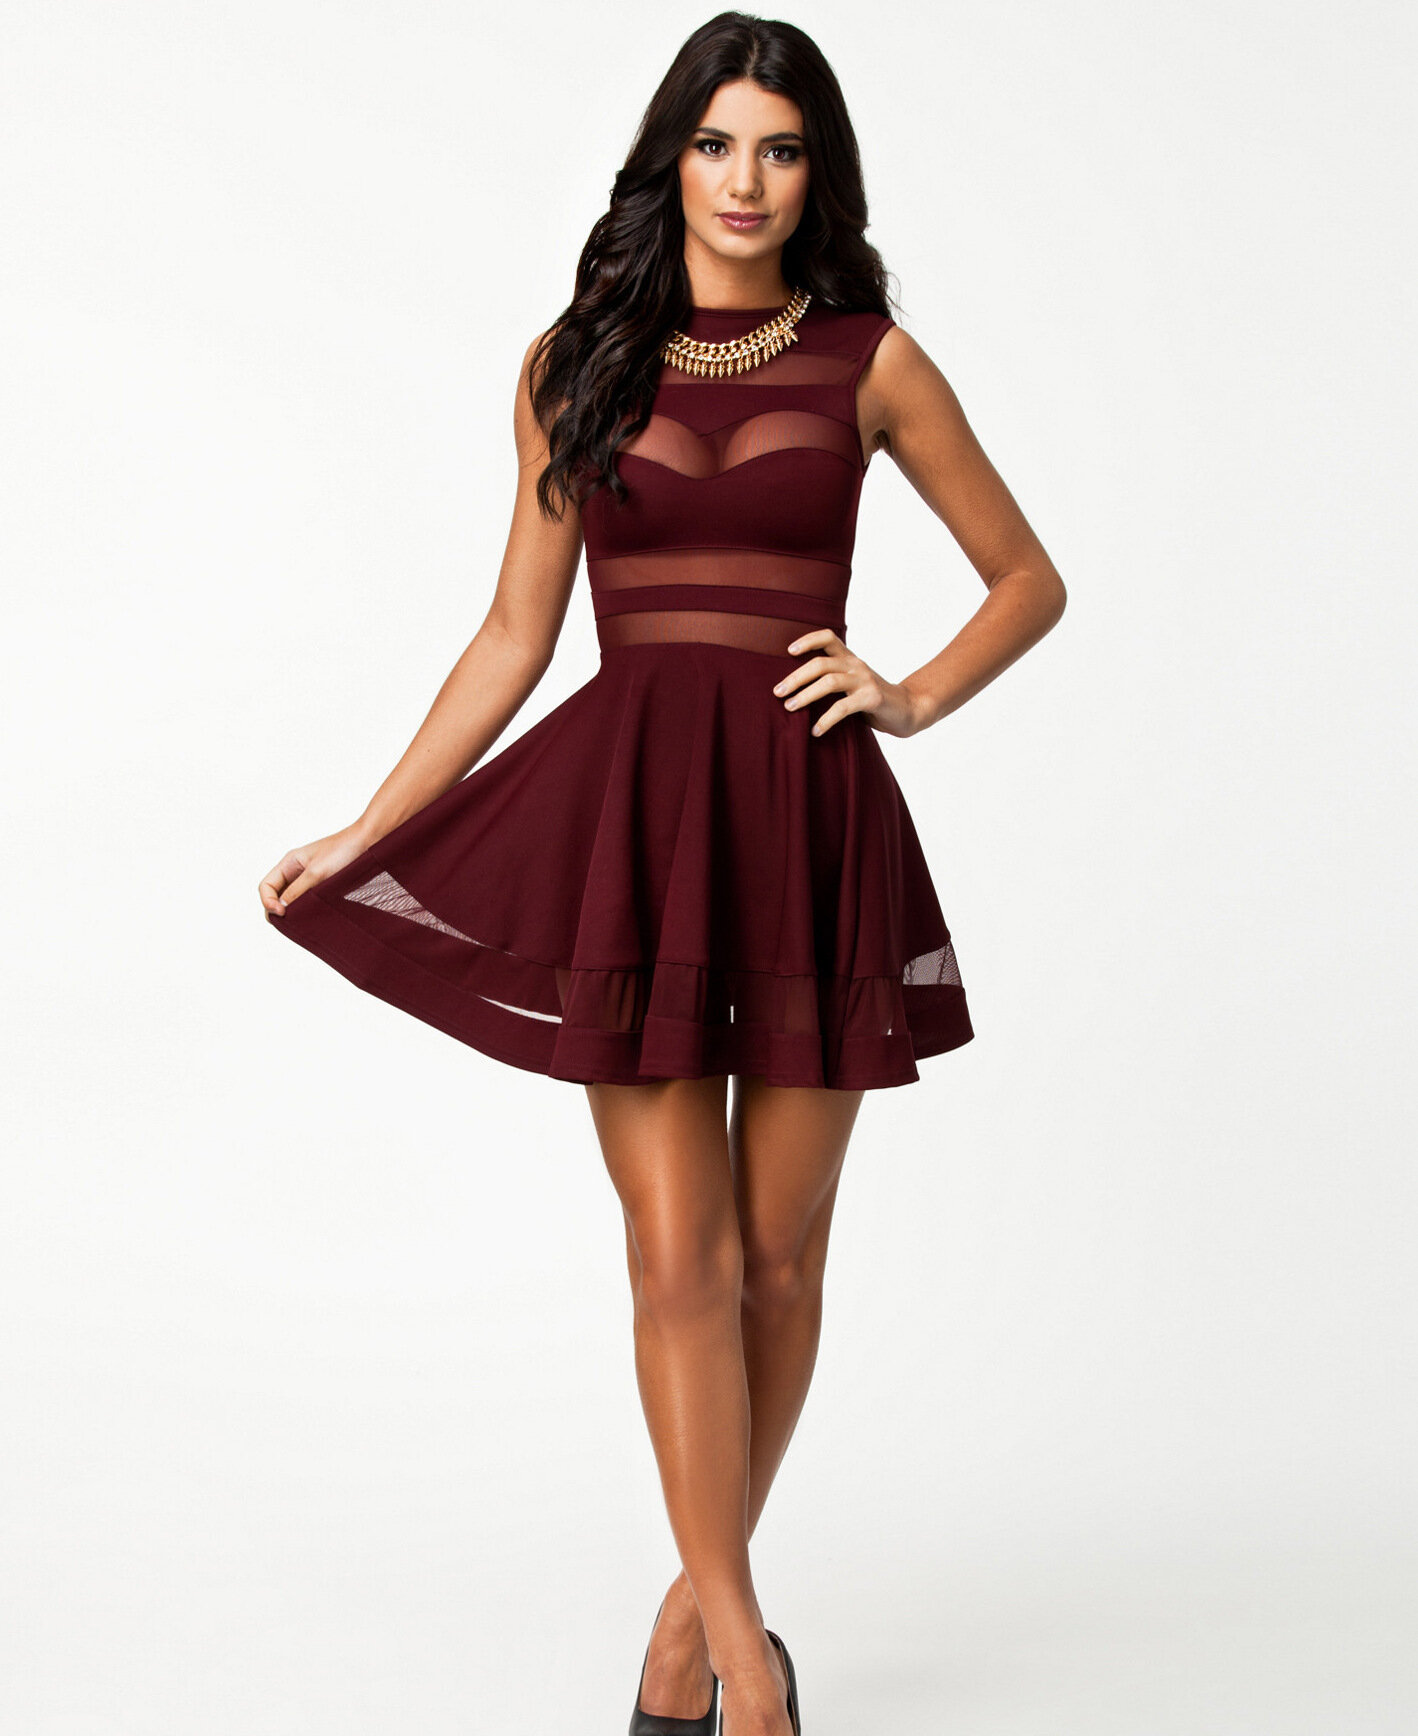
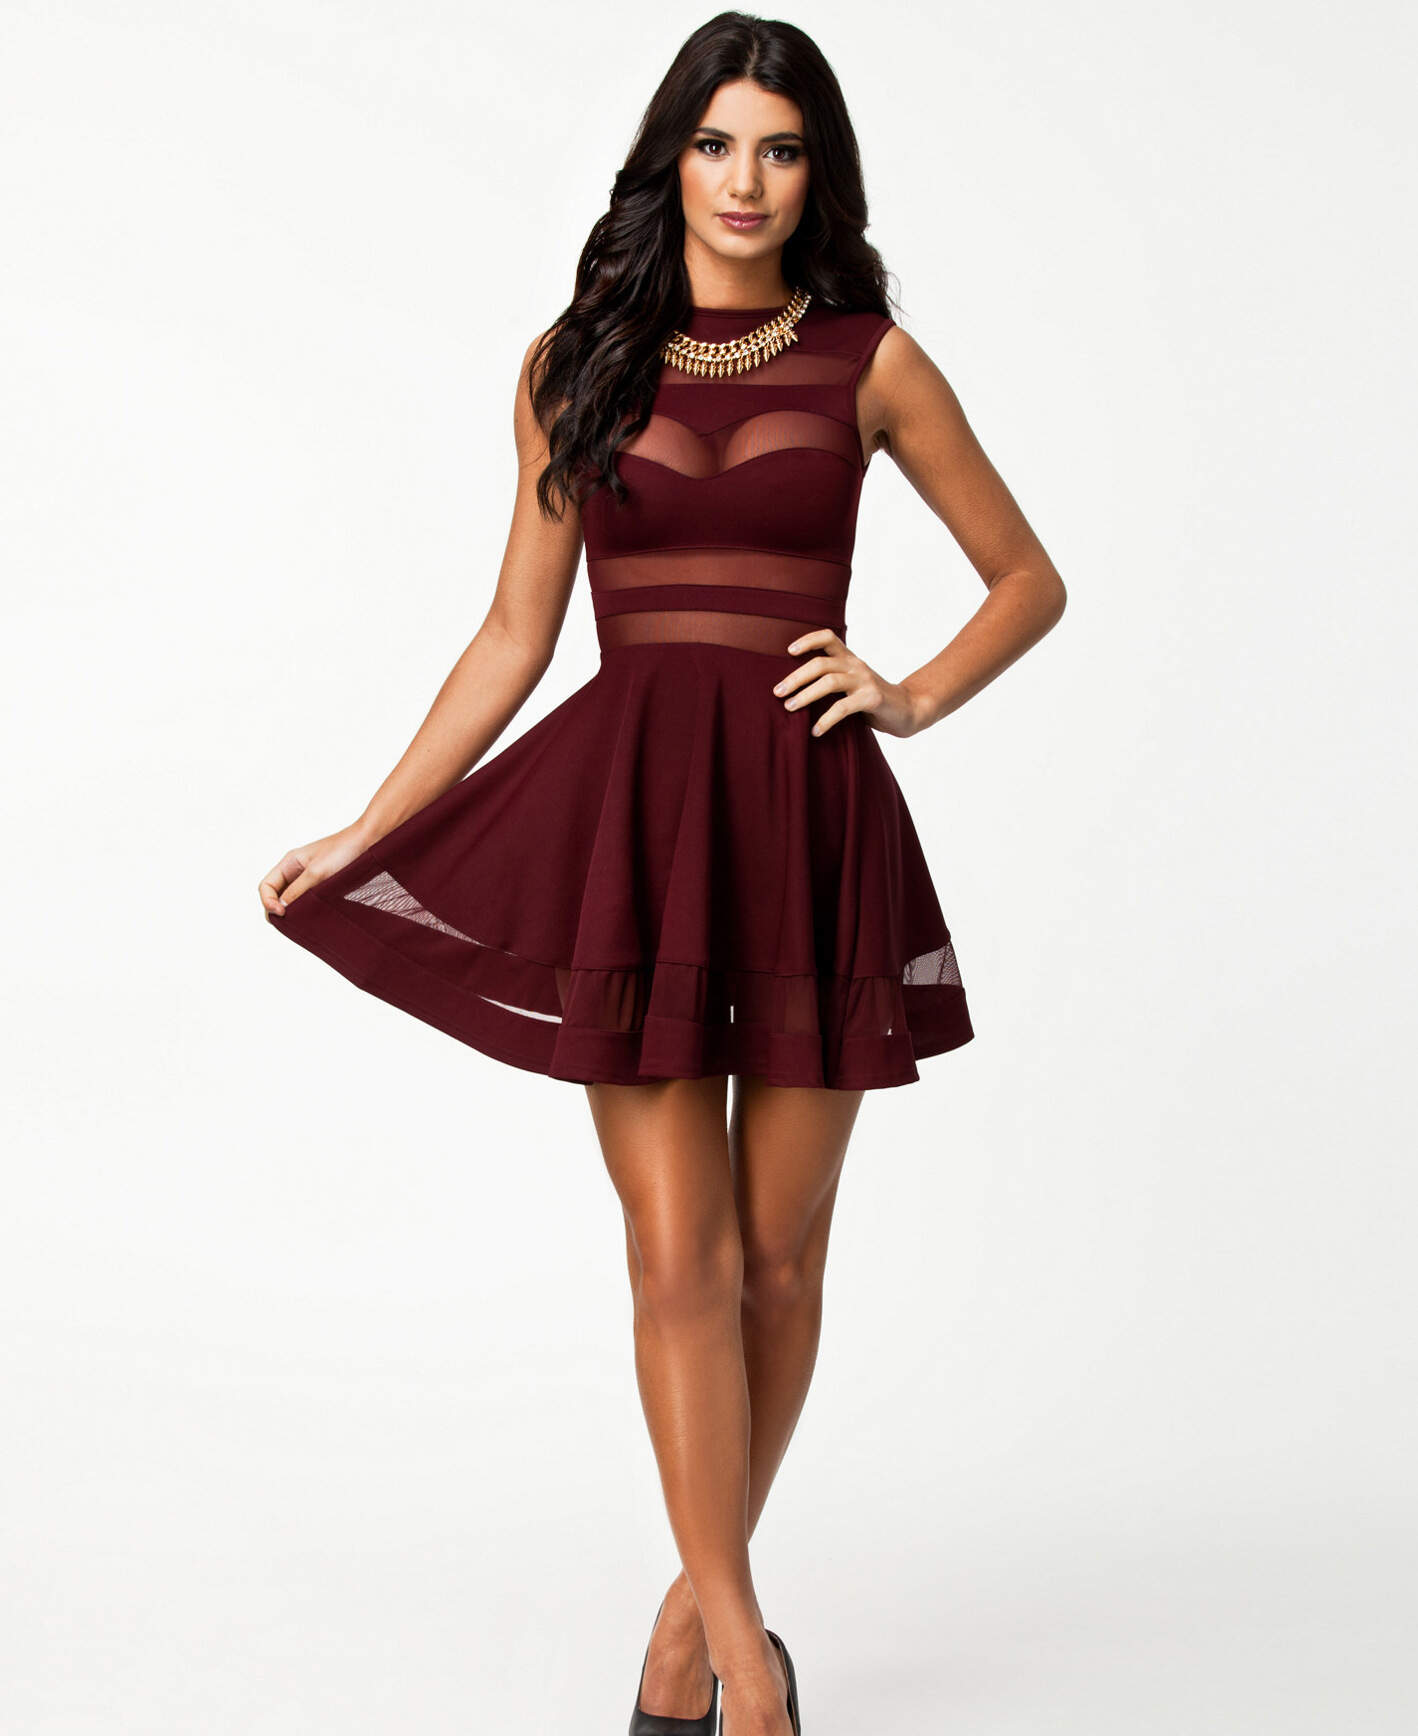